
Sebring Sedan V6-2.7L VIN R (2004)
6. Remove the forward lateral link from the vehicle.
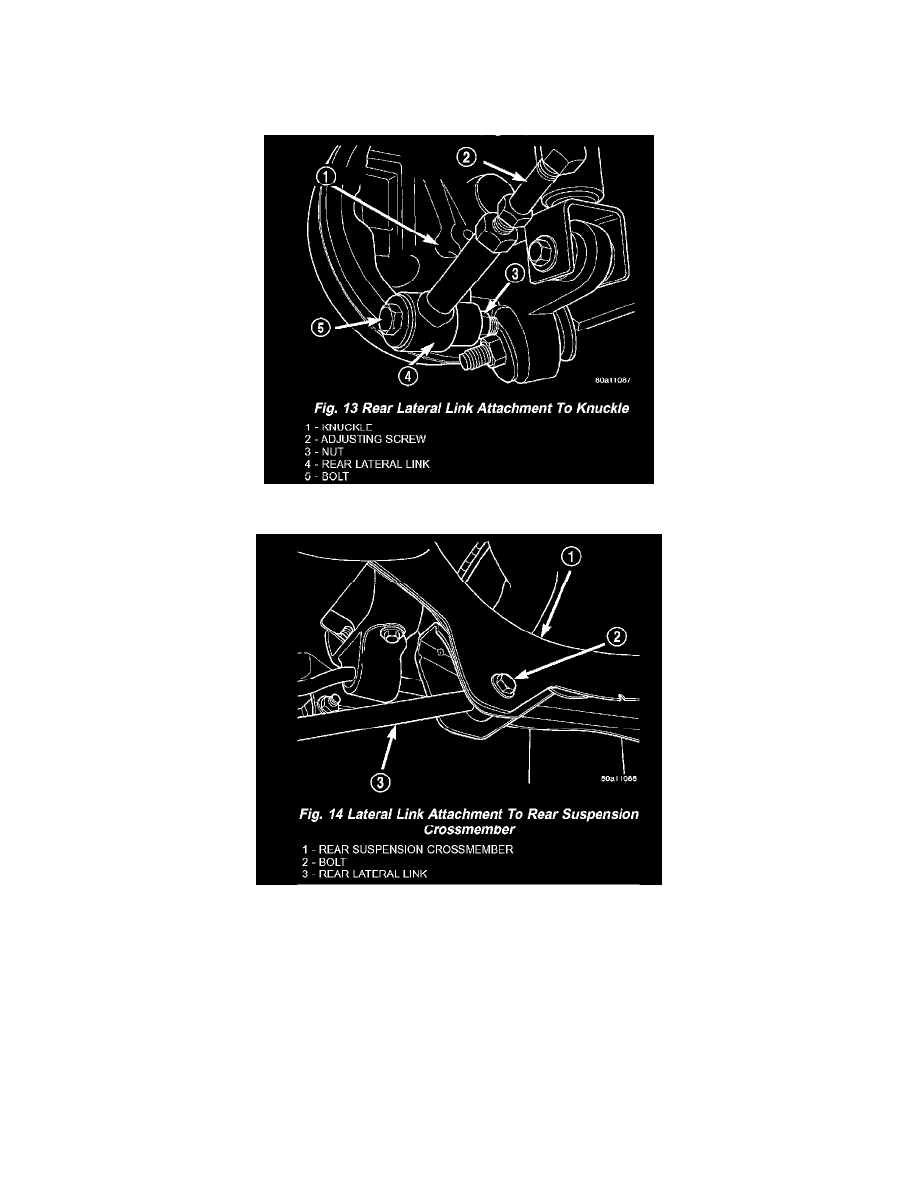
REAR LATERAL LINK
1. Raise vehicle.
2. Remove the rear wheel and tire assembly.
3. Remove the nut, bolt and washer attaching the lateral link to the knuckle (Fig. 13).
4. Remove the bolt (Fig. 14) and nut attaching the lateral link to the rear suspension crossmember.
5. Remove rear lateral link from vehicle.
INSTALLATION
CAUTION: Do not attempt to straighten or repair a lateral link. Do not apply heat to the lateral link adjusting screws or to the jam nuts, when
loosening or adjusting the lateral links.
FORWARD LATERAL LINK
1. Install the lateral link and the attaching nut and bolt at rear suspension crossmember (Fig. 12). The forward lateral link is to be installed with the
cup in cast portion facing down and toward rear knuckle (Fig. 11).
2. Install the lateral link and attaching nut, bolt and washer at rear knuckle (Fig. 11).
3. Torque both lateral link attaching bolts to 108 Nm (80 ft. lbs.).
4. Install the rear stabilizer bar attaching link, isolator bushings and attaching nut on the forward lateral link (Fig. 11). Tighten the attaching nut to a