
Sebring Sedan V6-2.7L VIN T FFV (2003)
5. Using a soft face hammer, tap front suspension crossmember into position until it is aligned with the previously scribed positioning marks on body
of vehicle.
6. Once front suspension crossmember is correctly positioned, tighten the 2 rear crossmember mounting bolts to 163 Nm (120 ft. lbs.) torque. Then
tighten the 2 front crossmember to frame rail attaching bolts to 163 Nm (120 ft. lbs.) torque.
7. Lower the transmission jack.
8. Connect fuel tube bundle routing support above crossmember.
9. Install brake tube routing bracket onto left lower control arm rear mounting bolt threads.
10. Install screws fastening power steering pressure hose routing clamps to crossmember. Tighten screws to 45 Nm (33 ft. lbs.) torque.
11. Install steering gear heat shield on crossmember.
12. Install 3 bolts attaching engine torque mount to crossmember. Tighten bolts to 65 Nm (48 ft. lbs.) torque.
13. Loosely install the 2 shock absorber clevis-to-lower control arm thru-bolts and nuts. Do not tighten bolts at this time.
14. Install tie rod seal boot heat shield on tie rod end.
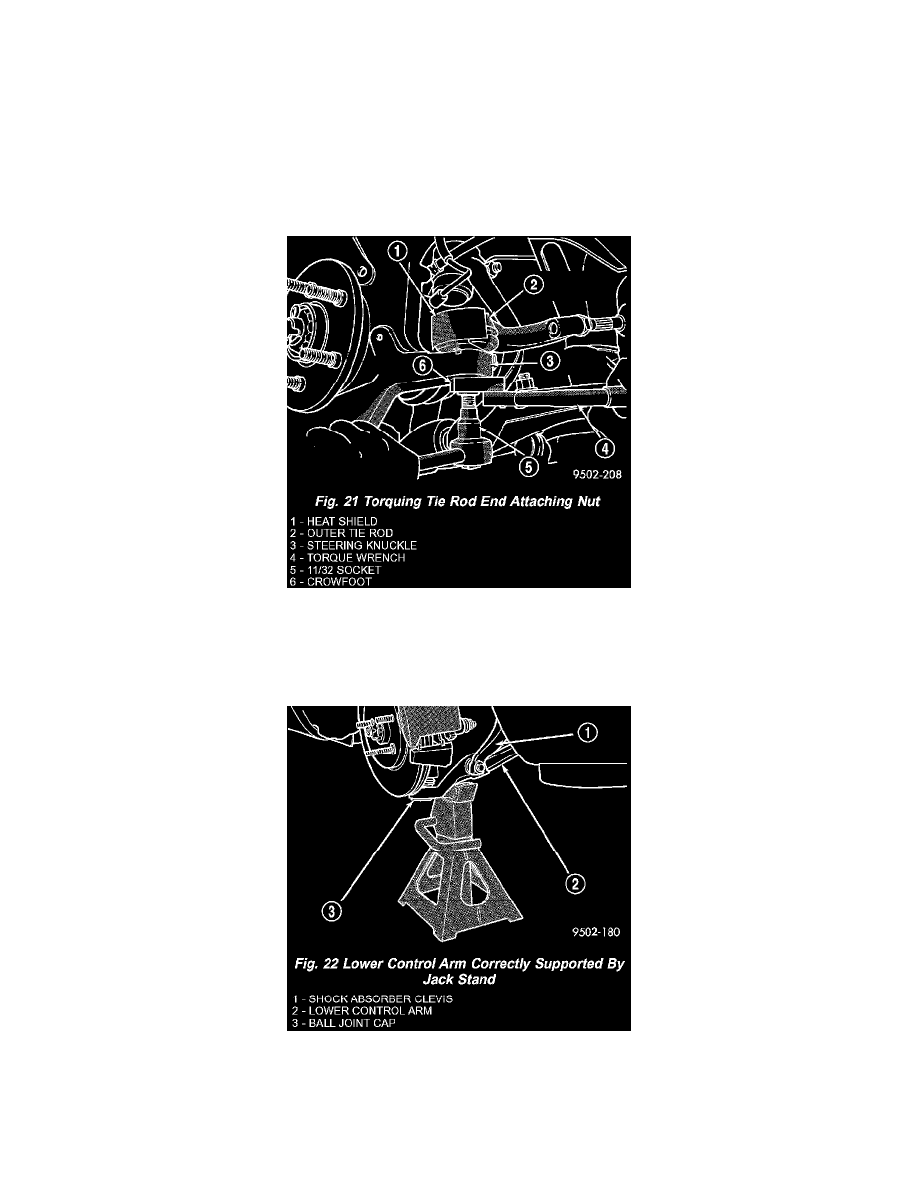
15. Install tie rod end into steering knuckle. Start tie rod end-to-steering knuckle attaching nut onto tie rod stud. While holding stud stationary, tighten
nut. To properly torque the nut, use a crowfoot and socket as shown and tighten the nut to 55 Nm (40 ft. lbs.) torque.
16. Install and tighten the 2 stabilizer bar bushing clamp-to-body attaching bolts to 61 Nm (45 ft. lbs.) torque.
17. Install fasteners attaching drive-belt splash shield to crossmember.
CAUTION: When supporting lower control arm with jack stand, do not position jack stand under the ball joint cap on the lower control arm.
Position in area of lower control arm shown in.
18. Lower vehicle and support front end of vehicle by positioning jack stands as shown at each lower control arm as the vehicle is lowered. Continue
to lower vehicle until the total front end weight is supported by the jack stands.
19. Tighten the shock absorber clevis-to-lower control arm bushing thru-bolts to a torque of 92 Nm (68 ft. lbs.).