
Sebring Sedan V6-3.5L (2009)
Front Door Latch: Service and Repair
Front Door Latch - Removal
REMOVAL
1. Place the window in the full up position.
2. Remove the mirror flag bezel. See: Mirrors/Service and Repair/Front Door Mirror Flag - Removal.
3. Remove door trim panel. See: Front Door Panel/Service and Repair/Front Door Trim Panel - Removal.
4. Disconnect the door latch cable from the interior door handle.
5. Remove the rubber door latch access cover from the door module.
NOTE: If not present, a small two inch relief must be cut into the door module latch access opening to allow the removal of the door latch.
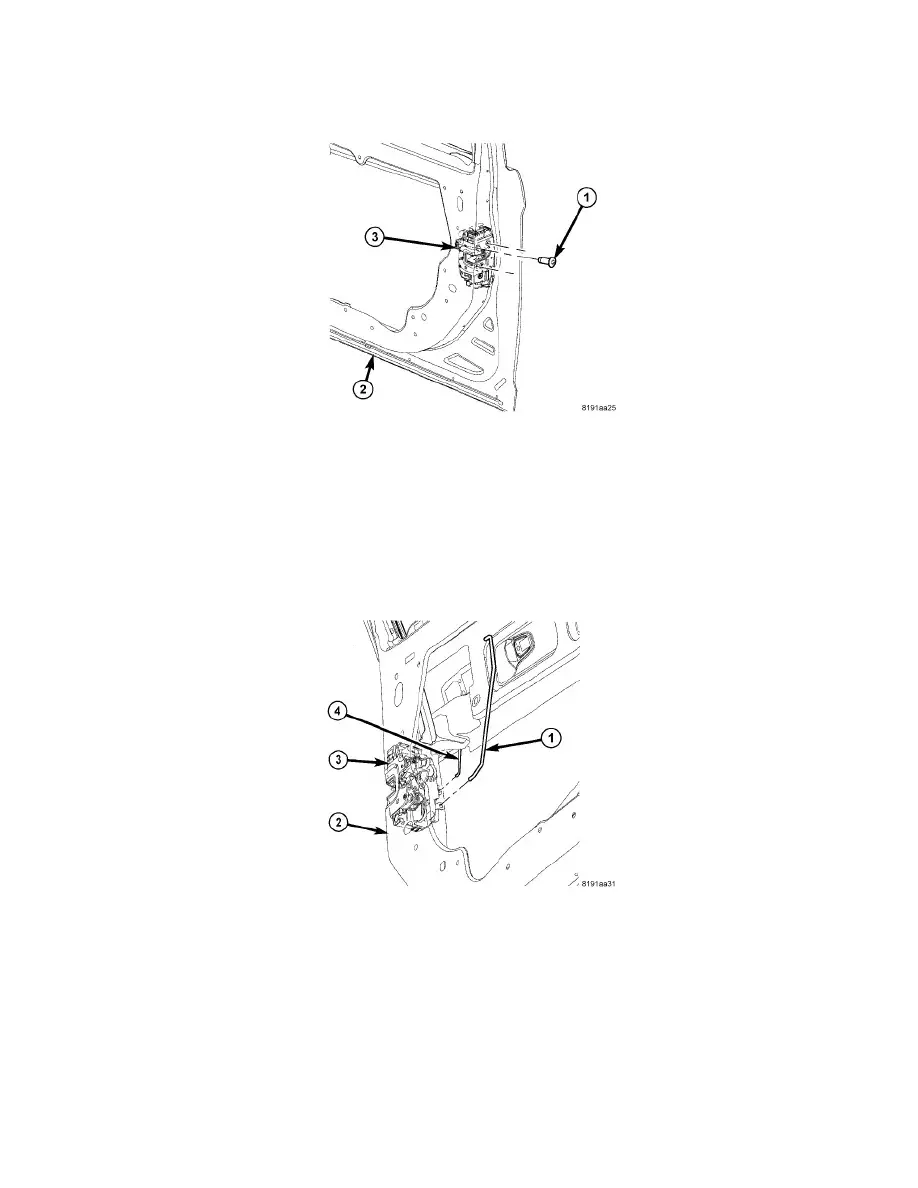
6. Remove the latch retaining screws.
7. Disconnect the exterior door handle linkage from the latch.
8. Disconnect the lock cylinder linkage at the latch (Driver door only).
9. If equipped, remove the latch locator bracket by pushing upward releasing the bracket from the door module.
10. Remove the interior door handle release cable from the door latch.
11. Disconnect the electrical connector to the door latch.
NOTE: The latch locator bracket is used for assembly only. Once removed the latch locator bracket can be discarded.
12. If equipped, remove the latch locator bracket from the door latch by pressing the top of the locator bracket away from the latch and unsnap the
bottom from the latch assembly.
13. Disconnect the door lock rod from the door latch.
14. Remove the latch from the vehicle.