
Sebring Sedan V6-3.5L (2009)
CENTER DUCT
1. Remove the instrument panel and place it on a workbench See: Body and Frame/Interior Moulding / Trim/Dashboard / Instrument Panel/Service
and Repair/Instrument Panel - Removal.
2. Remove the left and right instrument panel air outletsSee: Air Register/Service and Repair/Air Outlet - Removal.
3. Remove the outer instrument panel ducts (refer to OUTER DUCTS.
4. Remove the instrument panel top pad See: Body and Frame/Interior Moulding / Trim/Dashboard / Instrument Panel/Service and Repair/Instrument
Panel Pad - Removal.
5. Remove the demister ducts See: Instrument Panel Demister Duct - Removal.
6. Remove the defroster duct See: Defroster Duct - Removal.
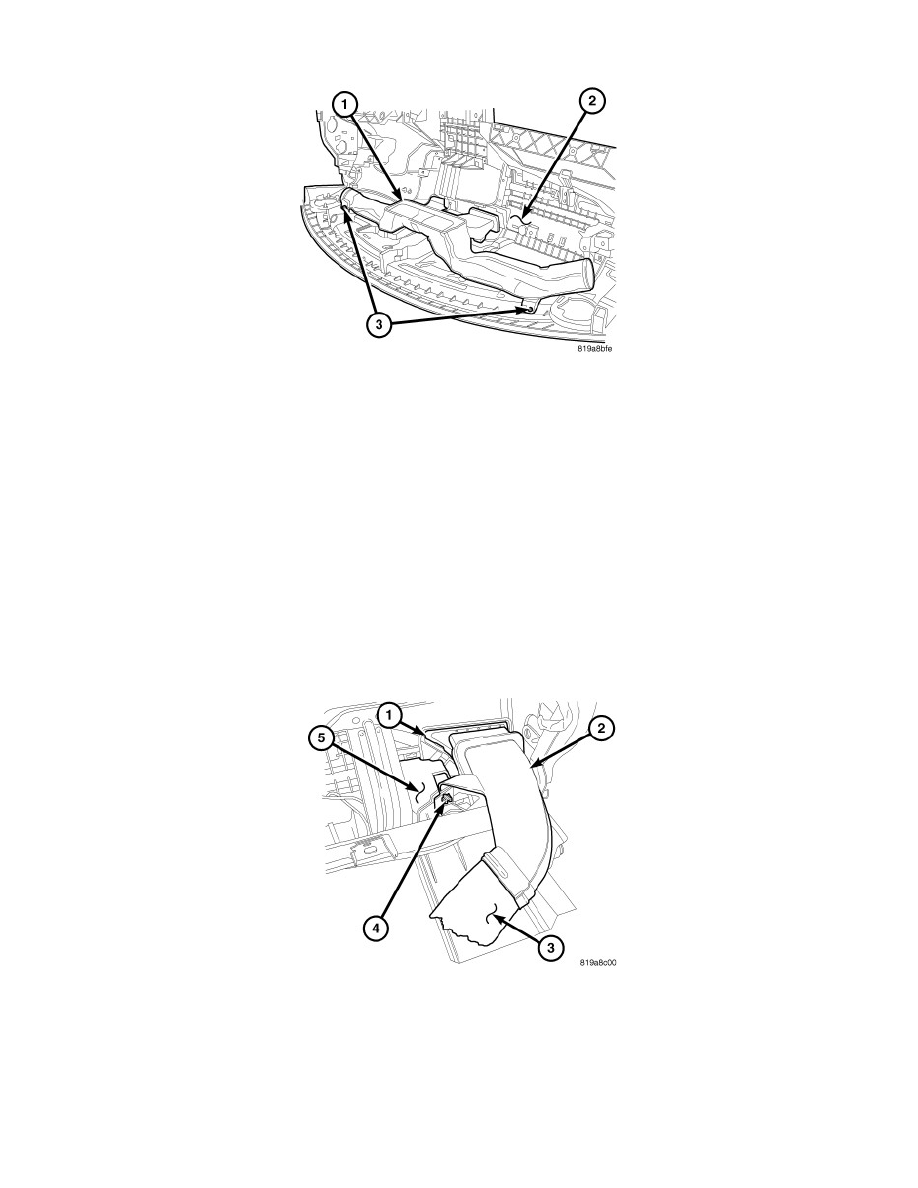
7. Remove the screws (3) that secure the center instrument panel duct (1) to the instrument panel top cover (2).
8. Disengage the center instrument panel duct from the instrument panel top cover and remove the duct.
Instrument Panel Duct - Installation
INSTALLATION
NOTE: LHD Chrysler model shown in illustrations. Dodge and RHD models similar.
OUTER DUCTS
NOTE: Passenger side shown. Driver side similar.
1. Connect each outer instrument panel duct (2) to the center instrument panel duct (3). Make sure the ducts are fully engaged to each other.
2. Position each outer instrument panel duct to the instrument panel top cover (5).
3. Install the screw (4) that secures each outer instrument panel duct to the instrument panel top cover. Tighten the screws to 2.2 Nm (20 in. lbs.).
4. Install the left and right instrument panel air outlets (1) See: Air Register/Service and Repair/Air Outlet - Installation.
5. Install the instrument panel See: Body and Frame/Interior Moulding / Trim/Dashboard / Instrument Panel/Service and Repair/Instrument Panel -
Installation.