
Sebring Sedan V6-3.5L (2009)
Condenser HVAC: Service and Repair
A/C Condenser - Installation
INSTALLATION
CAUTION: Be certain to adjust the refrigerant oil level when servicing the A/C refrigerant system See: Service and Repair/Refrigerant Oil Level
. Failure to properly adjust the refrigerant oil level will prevent the A/C system from operating as designed and can cause serious
A/C compressor damage.
NOTE: When replacing multiple A/C system components, see the Refrigerant Oil Capacities chart to determine how much oil should be added
to the refrigerant system See: Service and Repair/Refrigerant Oil Level .
NOTE: If only the A/C condenser is being replaced, add 20 milliliters (0.7 fluid ounce) of refrigerant oil to the refrigerant system. Use only
refrigerant oil of the type recommended for the A/C compressor in the vehicle.
NOTE: Replacement of the refrigerant line O-ring seals and gaskets is required anytime a refrigerant line is disconnected. Failure to replace
the rubber O-ring seals and metal gaskets could result in a refrigerant system leak.
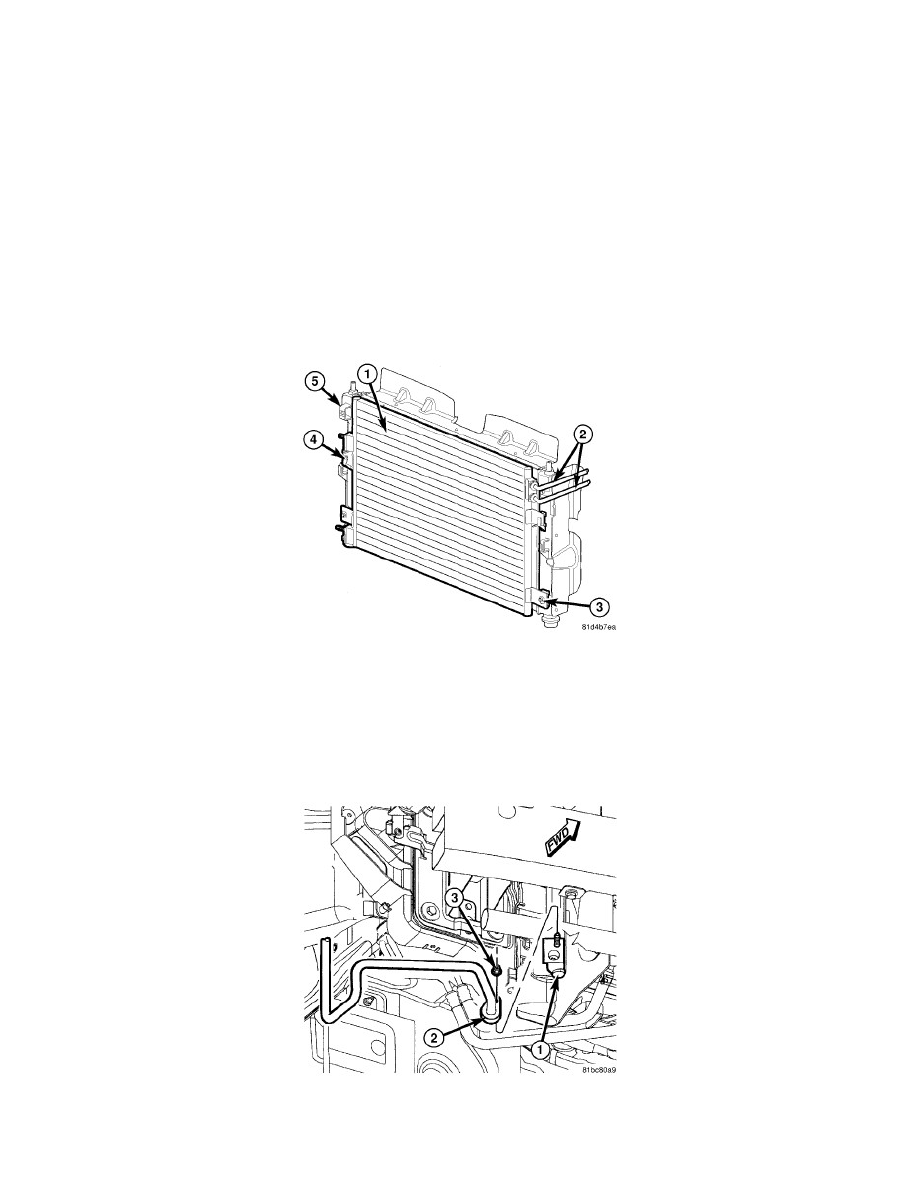
NOTE: Illustration shown with front fascia removed for clarity.
1. Carefully lower the A/C condenser (1) straight down in front of the radiator (5) and engage the upper condenser brackets (4) to the radiator.
2. If equipped, connect the automatic transmission cooler lines (2) to the left side of the A/C condenser See: Engine, Cooling and Exhaust/Cooling
System/Service and Repair.
3. Raise and support the vehicle.
4. Install the two bolts (3) that secure the lower condenser brackets to the radiator. Tighten the bolts to 4.5 Nm (40 in. lbs.).
NOTE: Illustration shown with front fascia removed for clarity.