Sebring Sedan V6-3.5L (2009)

shield. Rotate and tilt the heat shield as required.
NOTE: It is only necessary to position the power steering fluid reservoir and engine coolant reservoir out of the way. Draining of the power
steering fluid and engine coolant is not required.
11. Remove the power steering fluid reservoir and the engine coolant reservoir and position them out of the way.
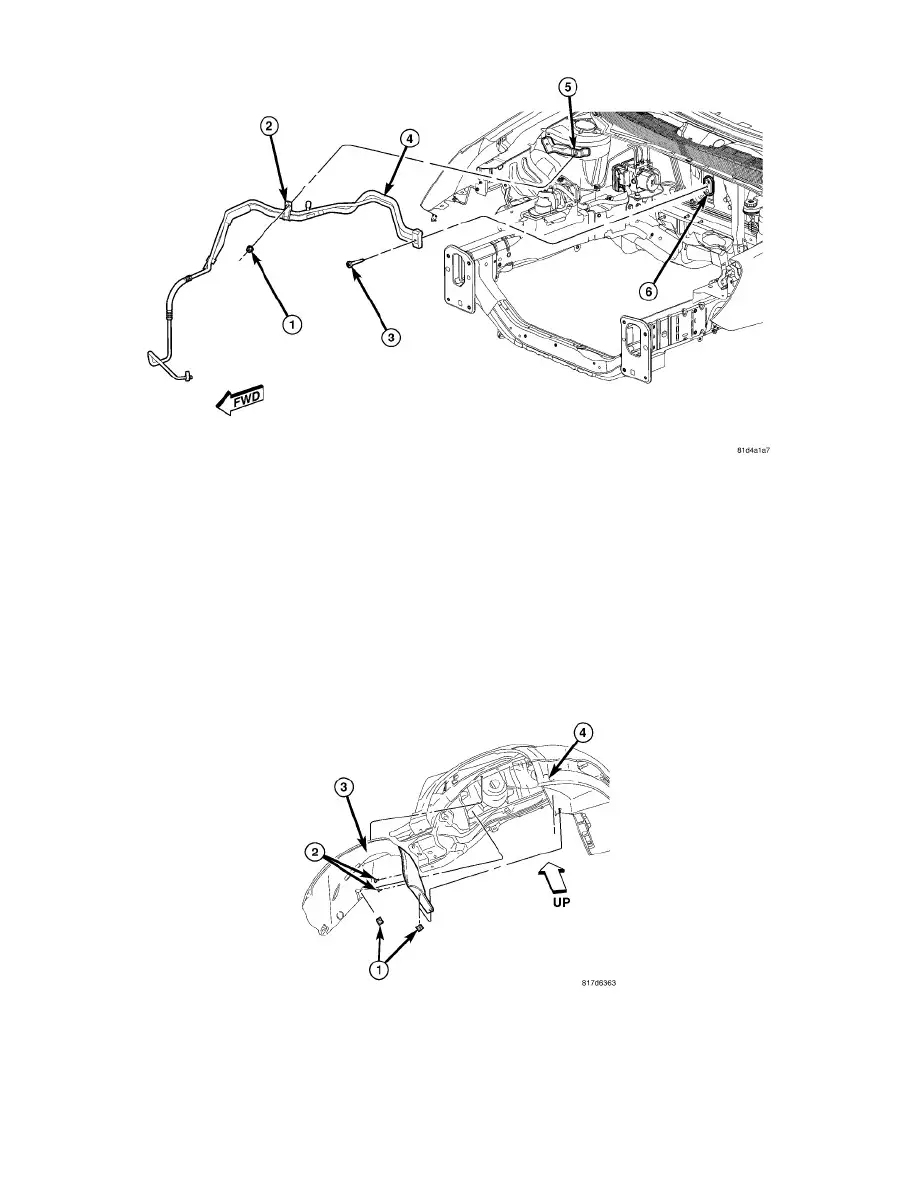
12. Remove the nut (1) that secures the refrigerant line retaining bracket (2) to the right front strut tower (5).
13. On RHD models, disengage the retainers that secure the power brake booster vacuum supply hose to the dash panel and position the vacuum line
out of the way.
14. Remove the bolt (3) that secures the A/C liquid and suction line assembly (4) to the A/C evaporator (6).
15. Disconnect the A/C liquid and suction line assembly from the A/C evaporator and remove and discard the dual-plane seals.
16. Install plugs in, or tape over the opened refrigerant line fittings and the evaporator ports.
17. Remove the A/C liquid and suction line assembly from the engine compartment.
Lower A/C Suction Line
1. Disconnect and isolate the negative battery cable.
2. Recover the refrigerant from the refrigerant systemSee: Service and Repair/Refrigerant System Recovery.
3. Raise and support the vehicle.
4. Remove the right front wheel See: Maintenance/Wheels and Tires/Service and Repair/Removal and Replacement/Tires and Wheels - Removal.
5. Remove the three push-pin retainers (1) and three screws (2) that secure the front portion of the right front wheelhouse splash shield (3) to body
(4) and position the front of the wheelhouse splash shield out of the way to gain access to the A/C accumulator.
