
Sebring Sedan V6-3.5L (2009)
Shield - Installation.
14. Lower the vehicle.
15. Reconnect the negative battery cable.
CAUTION: Do NOT run the engine with a vacuum pump in operation or with a vacuum present within the A/C system. Failure to follow this
caution will result in serious A/C compressor damage.
16. Evacuate the refrigerant system See: Service and Repair/Refrigerant System Evacuate.
17. Adjust the refrigerant oil level See: Service and Repair/Refrigerant Oil Level.
18. Charge the refrigerant system See: Service and Repair/Refrigerant System Charge.
A/C Liquid Line - Removal
REMOVAL
WARNING: Review safety precautions and warnings before performing this procedure See: Service Precautions/Warning and See: Service
Precautions/Caution . Failure to follow these instructions may result in possible serious or fatal injury.
NOTE: The A/C liquid line is only serviced as an assembly with the upper A/C suction line.
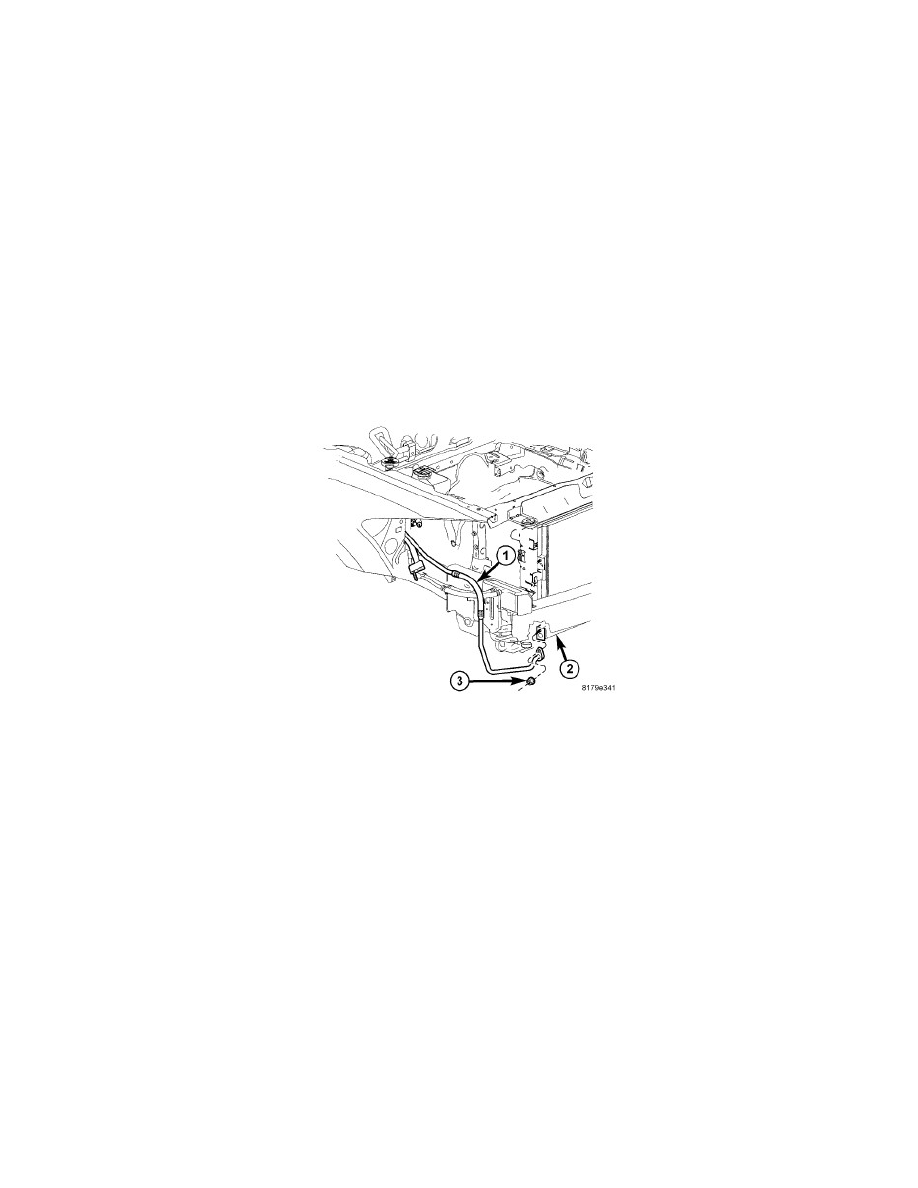
NOTE: LHD model shown in illustrations. RHD model similar.
NOTE: Illustration shown with front fascia removed for clarity.
1. Disconnect and isolate the negative battery cable.
2. Recover the refrigerant from the refrigerant system See: Service and Repair/Refrigerant System Recovery.
3. Raise and support the vehicle.
4. Remove the A/C accumulator See: Accumulator HVAC/Service and Repair/Accumulator - Removal.
5. Reach up through the opening in the bottom of the front fascia located in the right front corner of the vehicle and remove the nut (3) that secures
the A/C liquid line (1) to the A/C condenser (2).
6. Disconnect the A/C liquid line from the A/C condenser and remove and discard the O-ring seal and gasket.
7. Install plugs in, or tape over the opened refrigerant line fittings and the condenser and accumulator ports.