
Sebring Sedan V6-3.5L (2009)
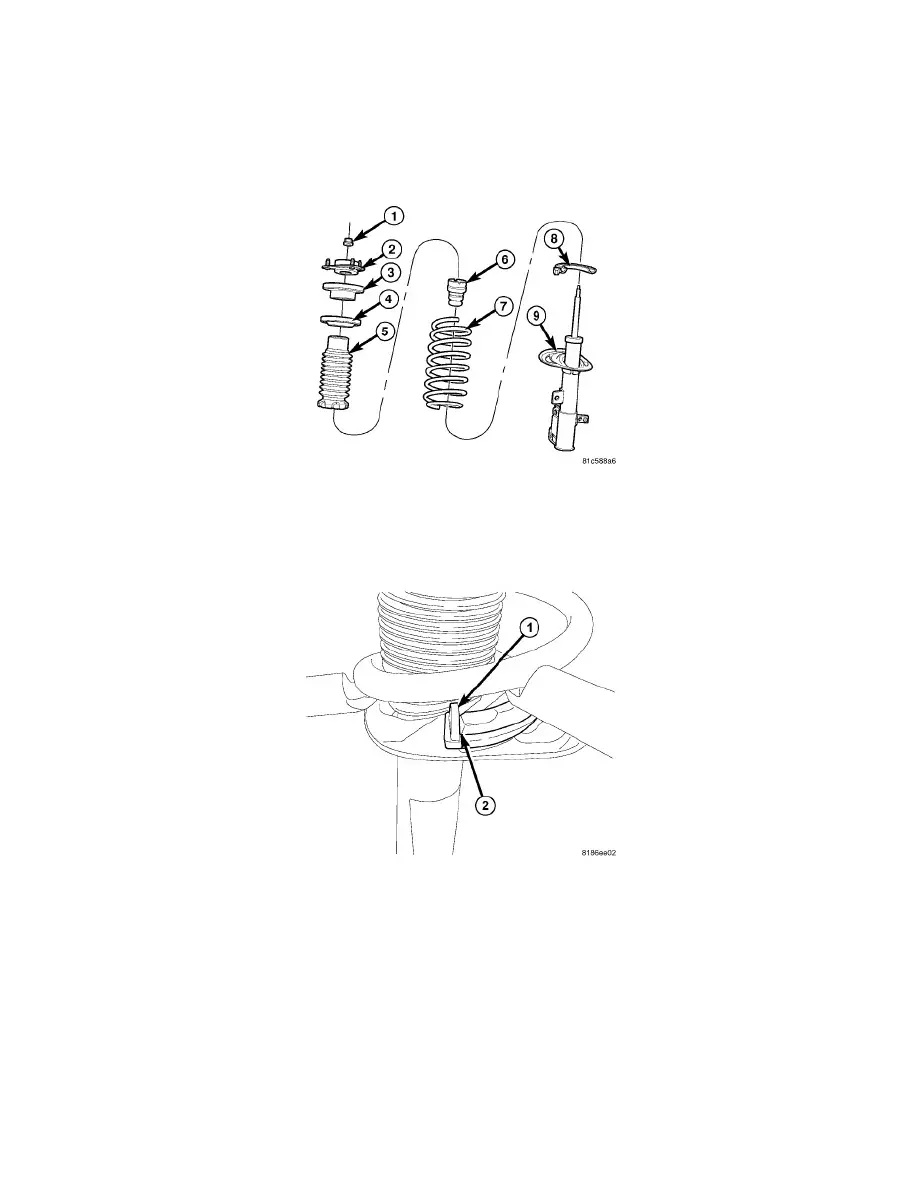
the coil spring stands on end, the end on the flat surface is the flat coil end. If the coil spring falls over, the end on the flat surface is not the flat
coil end. Stand the coil spring on the opposite end to verify.
1. Place the coil spring flat coil end upward (see above note) in the spring compressor following the manufacturer's instructions. Before compressing
the spring, rotate the spring so the end of the bottom coil is at approximately the 9 o'clock position as viewed above (or to where the spring was
when removed from the compressor). This action will allow the strut (damper) clevis bracket to be positioned outward, away from the compressor
once installed.
2. Slowly compress the coil spring until enough room is available for strut assembly reassembly.
3. Install the bearing and upper spring seat (3), and isolator (4) on top of the coil spring (7).
4. Install the upper mount (2) on top of the bearing and upper spring seat (3).
5. Install the lower spring isolator (8) on the spring seat on the strut (damper) (9).
6. Slide the jounce bumper (6) and dust shield (5) onto the strut rod.
7. Install the strut up through the bottom of the coil spring and upper spring seat, mount, and bearing until the lower spring seat contacts the lower
end of the coil spring. Rotate the strut as necessary until the end of the bottom coil (2) comes in contact with the stop (1) built into the lower spring
isolator.