
TC BY Maserati V6-181 2972cc 3.0L SOHC VIN S FI (1991)
Console: Service and Repair
REAR CONSOLE REMOVAL
1. Remove low instrument panel bezel.
2. Remove both seats to disconnect wiring connectors.
3. Remove gearshift knob mounting screw and pull knob from selector lever.
4. Lift console lid.
5. Remove two front and rear screws attaching console to floor mounting bracket.
6. Remove regulator mounting screw of gearshift indicator and disconnect relevant cable.
Console Assembly
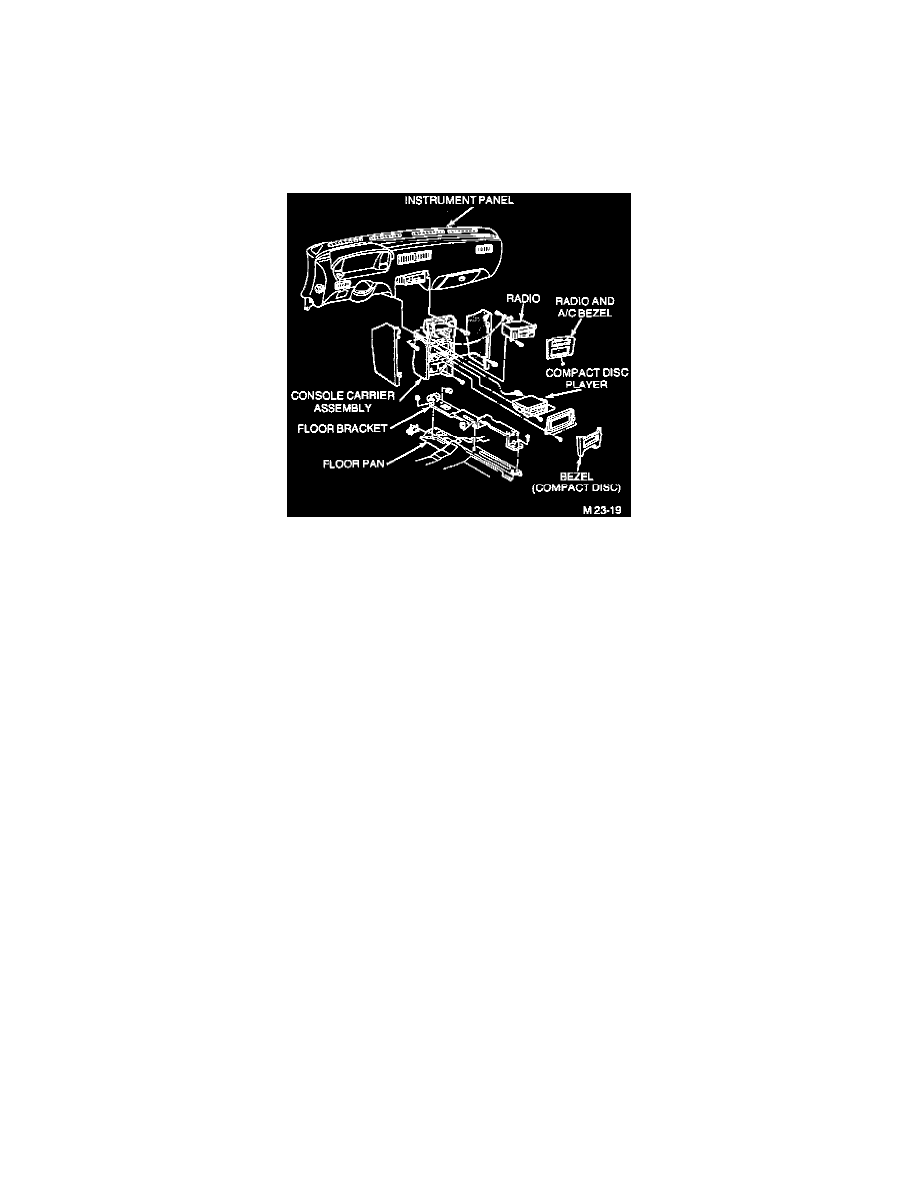
FORWARD CONSOLE REMOVAL
1. Remove right and left side console panels.
2. Remove compact disc player bezel mounting screws (2)
3. Remove A/C control and radio bezel mounting screws (2).
4. Remove compact disc player and radio and disconnect wiring connectors.
5. Remove A/C control mounting screws (2) and pull A/C control rearward without disconnect control cables and wiring connector.
6. Remove console mounting screws (4) and lower nuts (2).
7. Pull forward console rearward or sideward to remove.
FORWARD CONSOLE INSTALLATION
1. Position forward console close enough to the instrument panel.
2. Secure console to base panel with four screws and bottom to mounting bracket with two nuts.
3. Install compact disc player and radio and connect wiring connectors.
4. Install A/C control with two mounting screws.
5. Install compact disc player and radio bezels.
REAR CONSOLE INSTALLATION
1. Position rear console on floor bracket.
2. Install gearshift regulator mounting screw and connect relevant cable.
3. Install two front and rear screws attaching rear console to floor mounting bracket.
4. Install gearshift knob mounting screw.
5. Install low instrument panel bezel.
6. Install right and left side console bezels.