
TC BY Maserati V6-181 2972cc 3.0L SOHC VIN S FI (1991)
Convertible Top: Adjustments
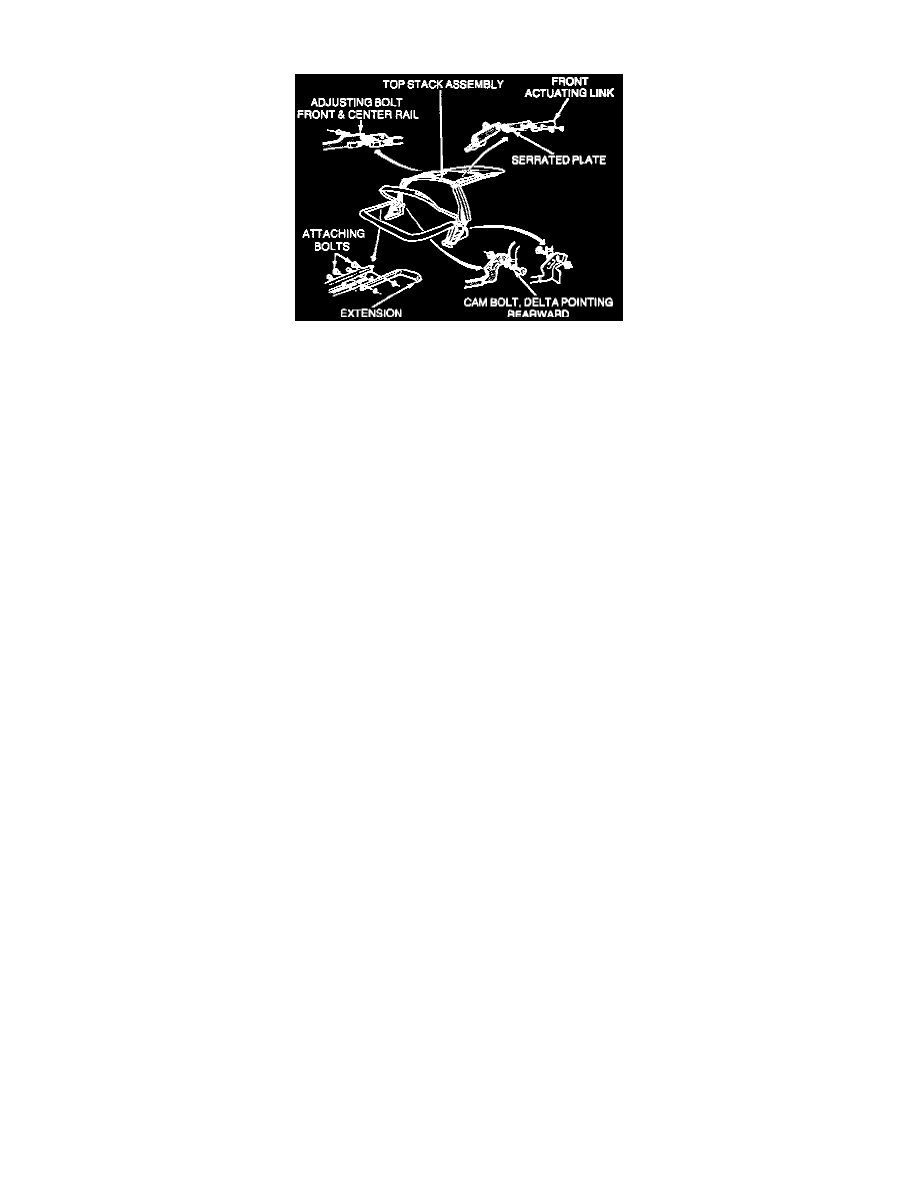
Convertible Top Adjustment Procedure
ADJUSTMENTS (MAJOR AND MINOR)
Minor adjustments are provided to assist in aligning the top header to the windshield header to prevent leakage into this area; to improve top
frontal appearance and assure each of raising and lowering operation.
They are also provided to assure correct alignment of the roof side rails with door and quarter glass to prevent leakage. Adjustments are provided
to eliminate wrinkles in the material.
Major adjustments are at the cam, control link bracket, and the outer mounting. These adjustments are necessary to improve roof side rail
alignment if minor hinge and header adjustment do not completely correct the condition.
The preferred sequence of adjustments is as follows:
1. Dowel pin adjustment.
2. Latch hook adjustment.
3. Cam adjustment.
4. Control link adjustment.
These adjustments should be used, as necessary, to reduce effort and stay within specifications while maintaining sealing.
ADJUSTMENT PROCEDURE
The side to side adjustment is made possible by using the elongated slots in the folding top header. The steps required to make this adjustment are
as follows:
1. Loosen pins.
2. Position pins in slots so the center line of both pins are aligned with both holes (in the windshield header mounted striker) at the same time.
3. Tighten pins.
LATCH HOOK ADJUSTMENT
Lengthening the latching hook reduces effort and is done as follows: Loosen the set screw, turn the hook counterclockwise, then tighten set screw.
The hook has an adjustment range of 1.00 inch minimum to 1.40 inch maximum. One turn of the hook counterclockwise extends the hood 0.04
inch (1 mm). If latching is difficult after the dowel pin adjustment, lengthen the hook 2 turns counterclockwise. If still difficult, repeat, as
necessary, until hook reaches its maximum length.
CONTROL LINK ADJUSTMENT
The control links incorporate serrated adjusting plates. With the top latched, to the header, loosen both bolts just enough to permit moving link up
or down. Push upward in the area of the front to center rail joint (be careful not to pinch hand between these rails). The rails should be pushed up
by hand as far as possible. With the control link adjusting bolts loosened, allow the control link to seek its proper position. Tighten bolts while rail
assembly is held in the position described above.
ROOF SIDE RAIL ALIGNMENT
The roof side rail structure consists of separate rails hinged together to enable the top to fold into the well. The rails must be in good alignment and
parallel to top edges of door and quarter glass to provide a good weatherseal.
The front to center door rail adjustment is made by turning a cam bolt until the rails are aligned to match the top edges of the door and quarter
glass.
DOOR END GLASS ALIGNMENT