Town & Country V6-3.3L VIN R (2003)

3.
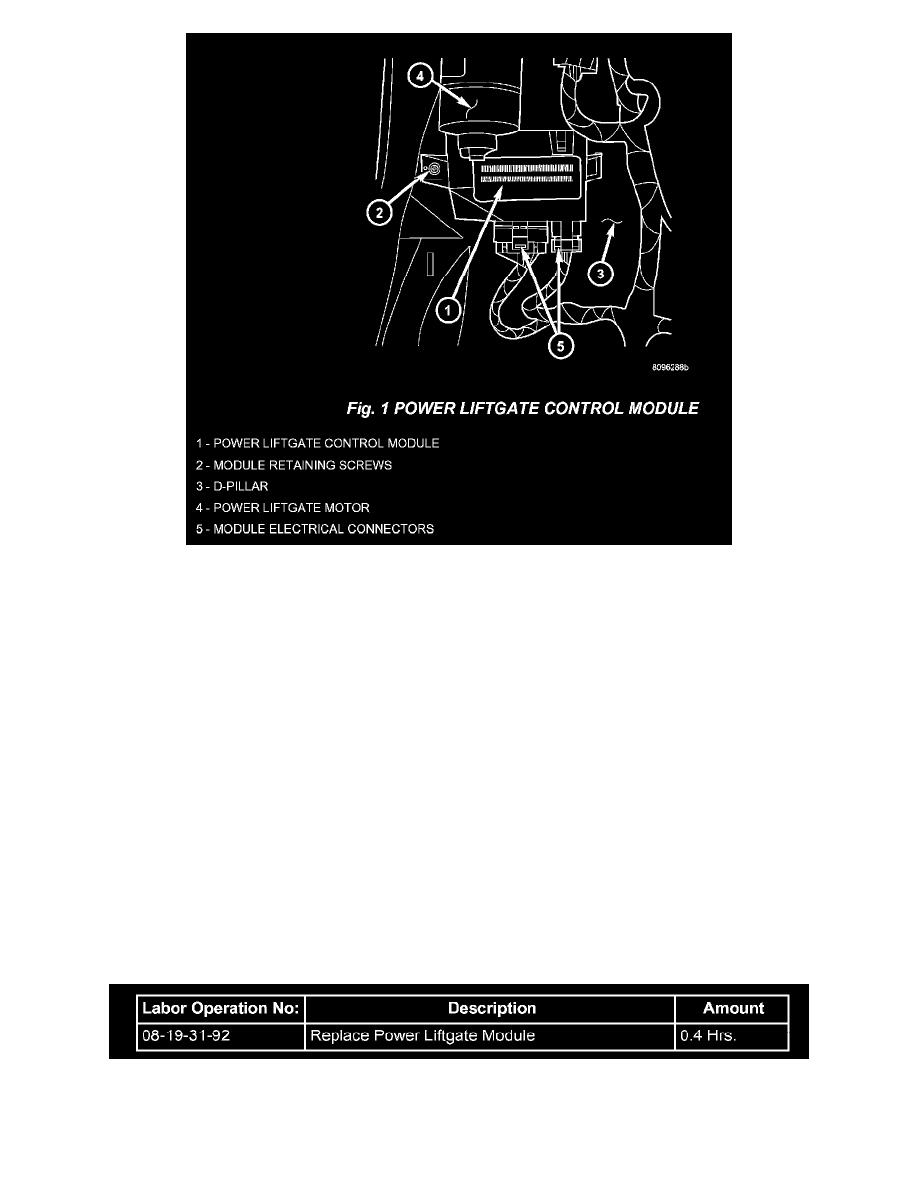
Disconnect the wire harness connections from the PLC motor assembly (Fig. 1).
4.
Remove the screw holding the PLC control module to the D-pillar (Fig. 1).
5.
Remove the PLC control module from the vehicle.
6.
Install the replacement PLC control module, p/n 04686687AP, on the D-pillar and install retaining screw. Torque the screw to 14.5 in. lbs (Fig. 1).
7.
Connect the wire harness connections on the PLC control module. Be certain to slide connector locks to the locked position (Fig. 1).
8.
Install the D-pillar trim panel on the vehicle. Refer to the service information available in TechCONNECT. Reference: Service Info, 23 -
Body/Interior/Left D-Pillar Trim Panel - Installation.
9.
Connect the negative battery cable.
10.
Set the clock to the correct time.
11.
Using the DRBIII(R), check and erase any PLC control module Diagnostic Trouble Codes (DTC's).
12.
Verify PLC system operation. Cycle the PLC through one complete open and close cycle, this will allow the PLC control module to relearn its
cycle with the new components.
POLICY:
Reimbursable within the provisions of the warranty.
TIME ALLOWANCE:
