
Town & Country V6-3.3L VIN R (2003)
8.
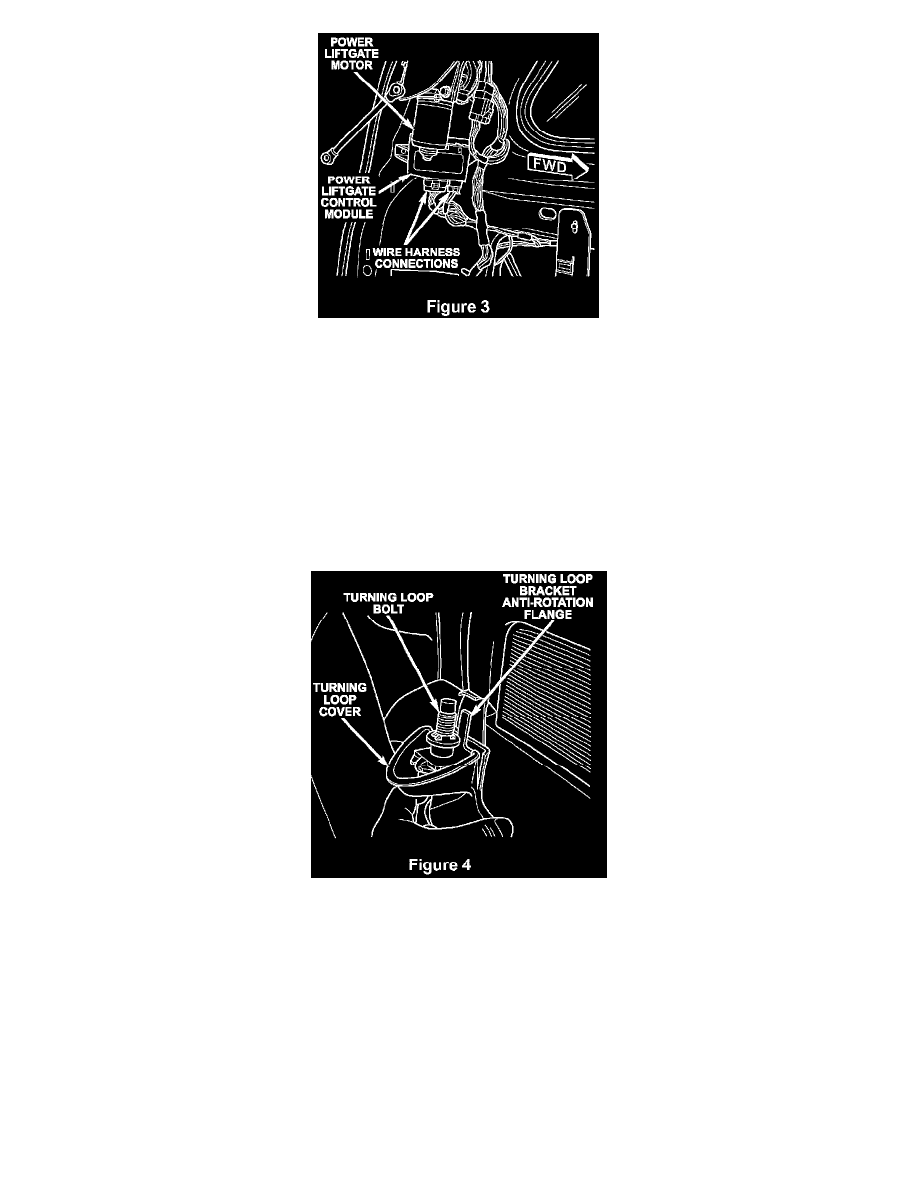
Disconnect the wire harness connections from the power liftgate control module (Figure 3).
9.
Remove the screw holding the power liftgate control module to the D-pillar.
10.
Remove and discard the power liftgate control module from the vehicle.
11.
Install the new power liftgate control module on the D-pillar and install the retaining screw. Tighten the screw to 14.5 in-lbs (1.6 Nm).
12.
Connect the wire harness connections to the power liftgate control module. Be certain to slide the connector locks to the locked position.
13.
Install the D-pillar trim panel to the vehicle and if equipped, connect the speaker wire.
14.
Attach the upper end of the power liftgate motor link to the liftgate. Tighten the bolt to 252 in-lbs (28 Nm).
15.
Align the turning loop mounting bracket anti-rotation flange with the slot in the D-pillar and install the third row seat belt turning loop to the
D-pillar. Tighten the bolt to 29 ft-lbs (39 Nm) (Figure 4).
CAUTION:
Verify that the seatbelt webbing is not twisted.
16.
Install the liftgate sill plate.
17.
Install the rear header trim cover.
18.
Connect the negative battery cable.
NOTE:
To enhance customer satisfaction, remember to reset the clock when you have completed the service procedure.