
Town & Country V6-3.3L VIN R (2003)
a. Using adjustable pliers, grip the edges of the retainer (Fig. 41).
b. Apply an upward force with a slight rocking motion until the retainer disengages from shaft (Fig. 41).
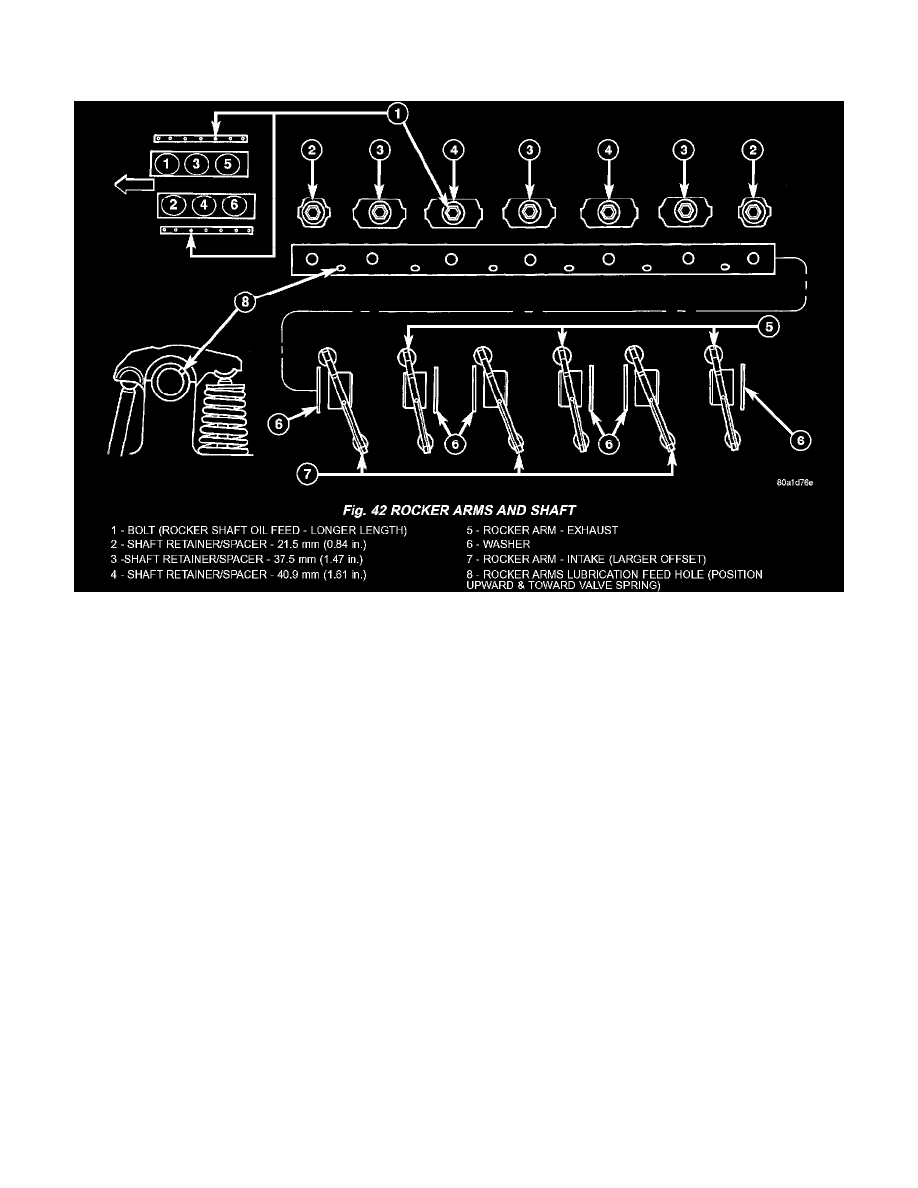
Fig.42
2. Remove rocker arms (Fig. 42). Identify the component locations for reassembly in original locations.
ASSEMBLY - ROCKER ARMS AND SHAFT
1. Install rocker arms on the shaft (Fig. 42). Install in the original positions if re-used. Ensure the rocker shaft, all the retainers and washers are
properly positioned and installed in the correct locations (Fig. 42).
2. Install rocker arms and shaft to the cylinder head.
INSTALLATION - ROCKER ARMS AND SHAFT
CAUTION: Ensure the longer shaft retaining bolt is installed in the proper location on the rocker shaft.
1. Position the rocker arm and shaft assemblies on the pedestal mounts.
CAUTION: Ensure all pushrods are properly located on the lifter and the rocker arm socket.
2. Align each rocker arm socket with each pushrod end.
CAUTION: The rocker arm shaft should be tightened down slowly, starting with the center bolts. Allow 20 minutes lifter bleed down time after
installation of the rocker shafts before engine operation.