
Town & Country V6-3.3L VIN R (2003)
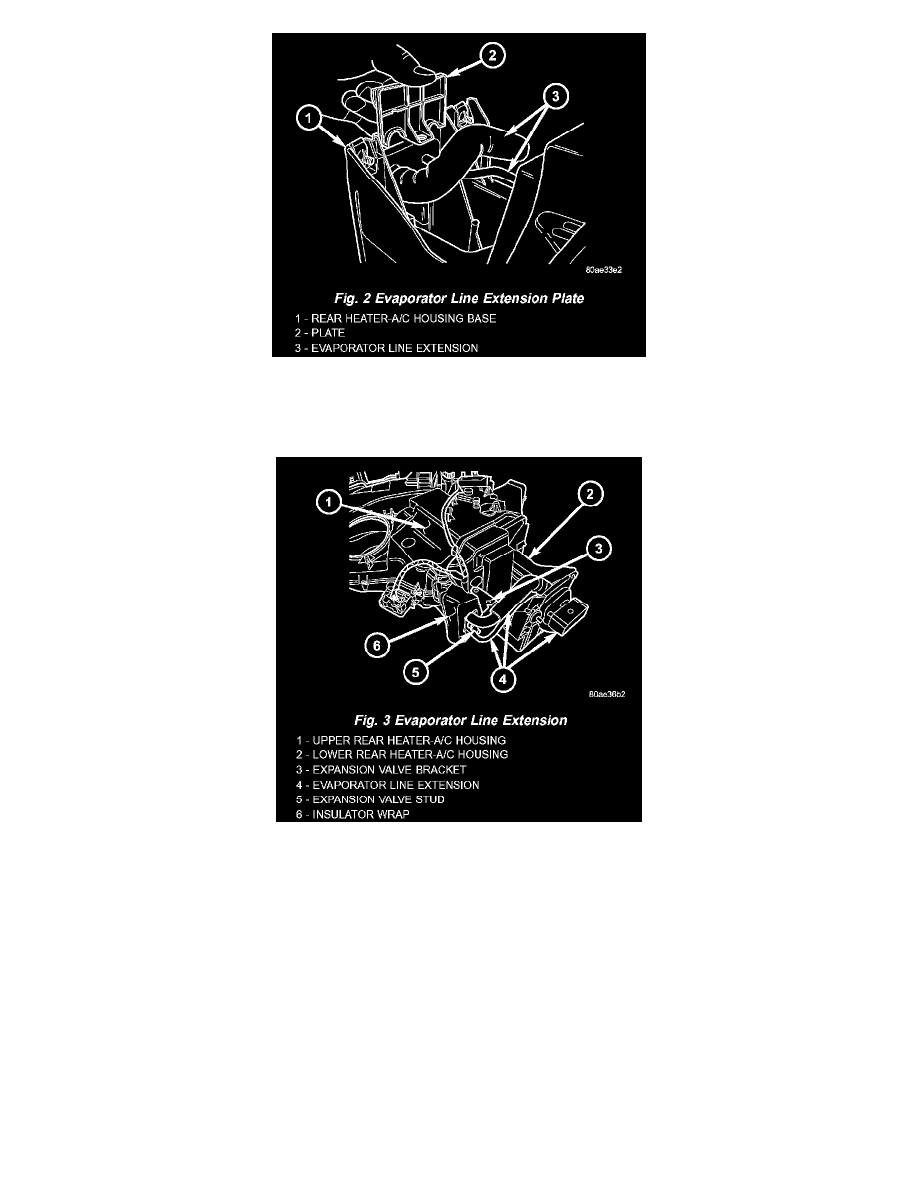
Fig.2 Evaporator Line Extension Plate
2. Remove the screw that secures the plate that captures and seals the evaporator line extension within the base of the rear heater-A/C unit housing.
3. Remove the capture plate from the rear heater A/C unit housing base.
Fig.3 Evaporator Line Extension
4. Carefully peel back the expansion valve foam insulator wrap far enough to access the evaporator line extension sealing plate on the bottom of the
expansion valve.
5. Remove the two screws that secure the expansion valve bracket to the lower rear heater-A/C unit housing.
6. Remove the nut that secures the expansion valve bracket to the expansion valve stud.
7. Remove the expansion valve bracket from the expansion valve stud.
8. Remove the nut that secures the evaporator line extension seal plate to the expansion valve stud.
9. Remove the evaporator line extension seal plate from the expansion valve stud.
10. Remove the evaporator line extension from the expansion valve and the rear heater-A/C housing base.
11. Remove the seals from the evaporator line extension fittings and discard.
12. Install plugs in, or tape over the opened evaporator line extension fittings and both expansion valve ports.
INSTALLATION
Rear Evaporator
NOTE: If the evaporator is being replaced, add 60 milliliters (2 fluid ounces) of refrigerant oil to the refrigerant system. Use only refrigerant oil of the
type recommended for the compressor in the vehicle.