Town & Country V6-3.3L VIN R (2003)

Trunk / Liftgate Switch: Service and Repair
Full Open Switch Replacement
REMOVAL
1. Disconnect and isolate the negative battery cable.
2. Remove the lift gear and link rod assembly from the vehicle (Refer to ELECTRICAL/POWER DOORS/CONTROL ROD - REMOVAL).
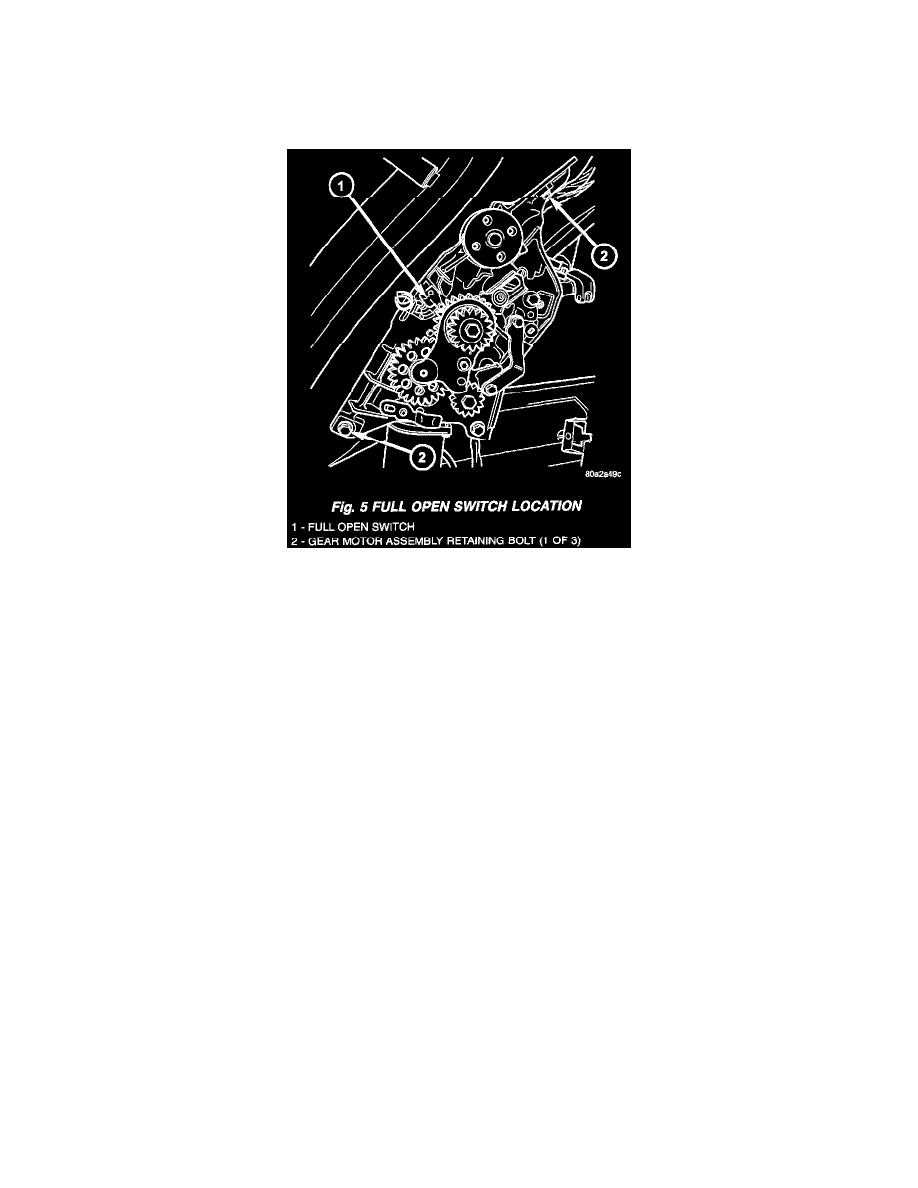
Fig.5 Full Open Switch Location
3. Cut the two wires leading to the full open switch or back the wires out of the electrical connector. Refer to the Wiring section of the service
manual for detailed instructions.
4. Remove the full open switch retaining screw and remove the full open switch from the gear motor housing assembly
INSTALLATION
1. Perform a wiring repair on the full open switch wires following the approved procedure in the Wiring section of the service manual. Or install new
terminals on the wire ends and reinstall in the main lift- gate motor electrical connector.
2. Position and install the full open switch retaining screw.
3. Install the power liftgate lift gear and link rod assembly (Refer to ELECTRICAL/POWER DOORS/CONTROL ROD - INSTALLATION).
4. Connect the negative battery cable.
5. Using an appropriate scan tool, check any erase any power liftgate control module diagnostic trouble codes.
6. Verify power liftgate system and full open switch operation. Cycle the power liftgate through one complete open and close cycle, this will allow
the power liftgate control module to relearn its cycle with the new components.
