Town & Country V6-3.8L (2009)

7. If equipped, remove the subwoofer, See: Accessories and Optional Equipment/Radio, Stereo, and Compact Disc/Speaker/Service and
Repair/Speaker - Removal.
8. Remove the link rod assembly from the liftgate attachment point, See: Power Liftgate Link Rod - Removal.
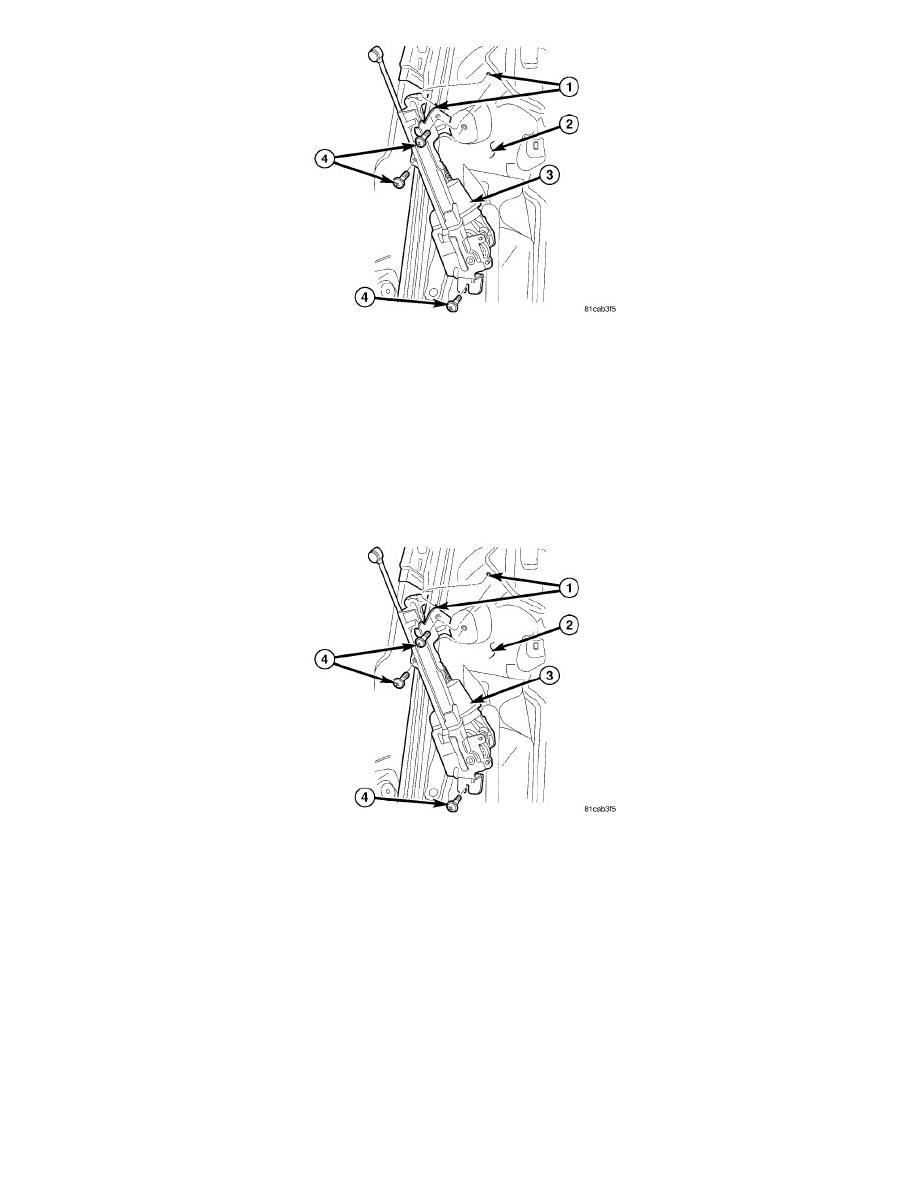
9. Remove the drive unit assembly retaining bolts (4).
10. Disconnect the wire harness connector from the power liftgate drive unit assembly (3).
11. Unhook the drive unit assembly (1) from the D-pillar (2) and remove the unit from the vehicle.
Power Liftgate Drive Unit - Installation
INSTALLATION
1. Install the power liftgate drive unit assembly (3) onto the D-pillar (2).
2. Insure that the drive unit bracket mounting tab is properly seated into the hole on the D-Pillar (1).
3. Install the drive unit retaining bolts (4). Tighten the bolts to 26 Nm (19 ft. lbs.).
4. Connect the wire harness connector to the drive unit assembly.
5. If equipped, install the subwoofer, See: Accessories and Optional Equipment/Radio, Stereo, and Compact Disc/Speaker/Service and
Repair/Speaker - Removal.
