
Town & Country V6-3.8L (2009)
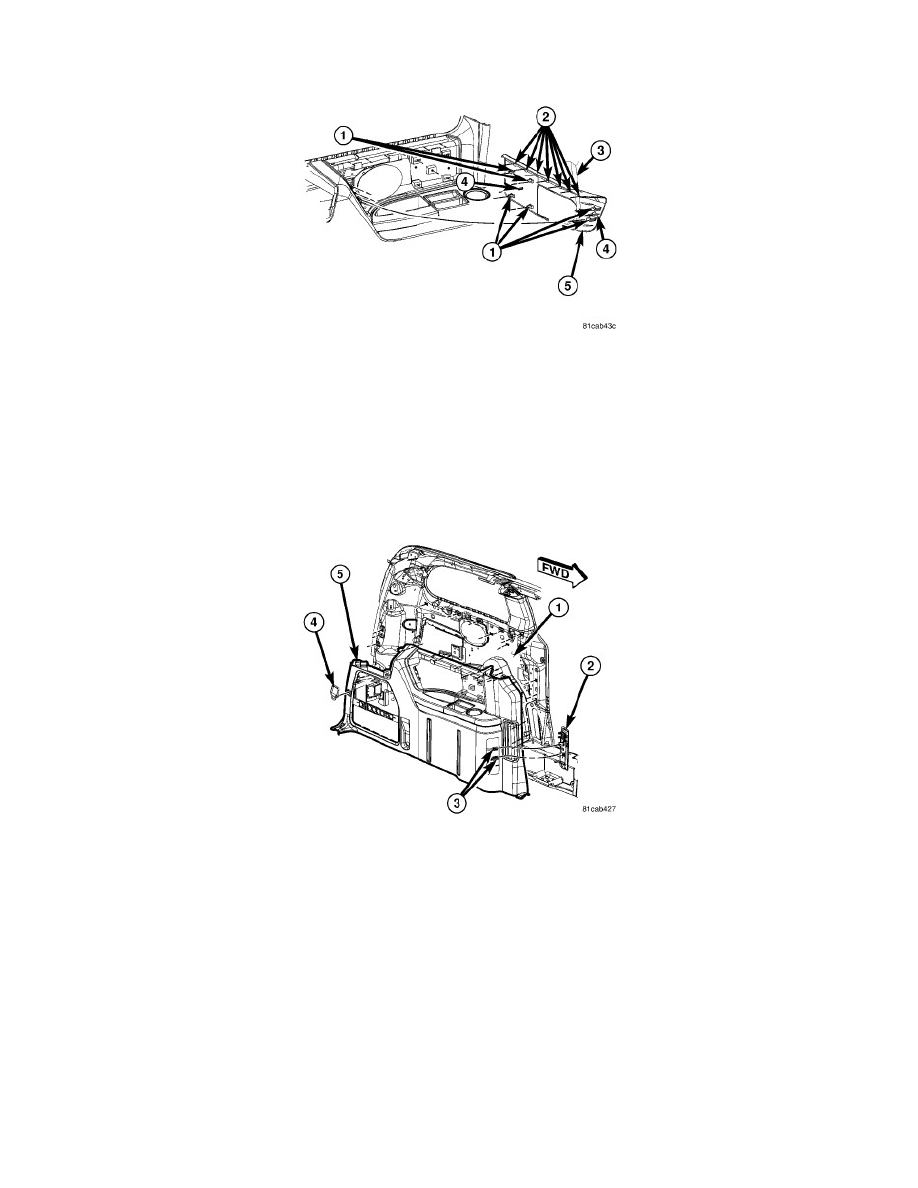
1. Using a trim stick or equivalent, disengage the front and rear quarter trim bolster retaining clips (1).
2. Carefully disengage the quarter trim bolster upper retaining tabs (2) by lifting the bottom edge of the bolster.
3. Continue pulling the quarter trim bolster away from the quarter trim panel to disengage the quarter trim bolster locating tabs (4).
4. Slide the rear seat belt (3) out of the slot in the quarter trim bolster.
5. Remove the quarter trim bolster (5).
Quarter Trim Panel
INSTALLATION
1. Position the left quarter trim panel (5) into the vehicle.
2. Left quarter trim only - Connect the auxiliary power outlet and power inverter (2) wire harness connectors (3) (if equipped).
3. Align the trim panel over the retaining slots on the inner quarter panel (1) and firmly snap into place.
4. Install the six quarter trim retaining screws.
5. Right quarter trim only - install the second row seat belt webbing anchor bolt.
6. Install the third row upper turning loop anchor bolt.
7. Install the third row lower seat belt webbing anchor (4).
8. Install the quarter trim bolster.
9. Install the upper D-pillar trim. See: Pillar Trim/D-Pillar Trim/Installation.
10. Install the liftgate scuff plate. See: Scuff Plate/Service and Repair/Scuff Plate - Installation.
11. Close liftgate.
Quarter Trim Panel Bolster
INSTALLATION