
Town & Country V6-3.8L (2009)
1. Disconnect and isolate the negative battery cable.
2. Recover the refrigerant from the refrigerant system See: Heating and Air Conditioning/Service and Repair/Refrigerant System Recovery.
3. Drain the engine cooling system See: Engine, Cooling and Exhaust/Cooling System/Service and Repair.
4. Raise and support the vehicle.
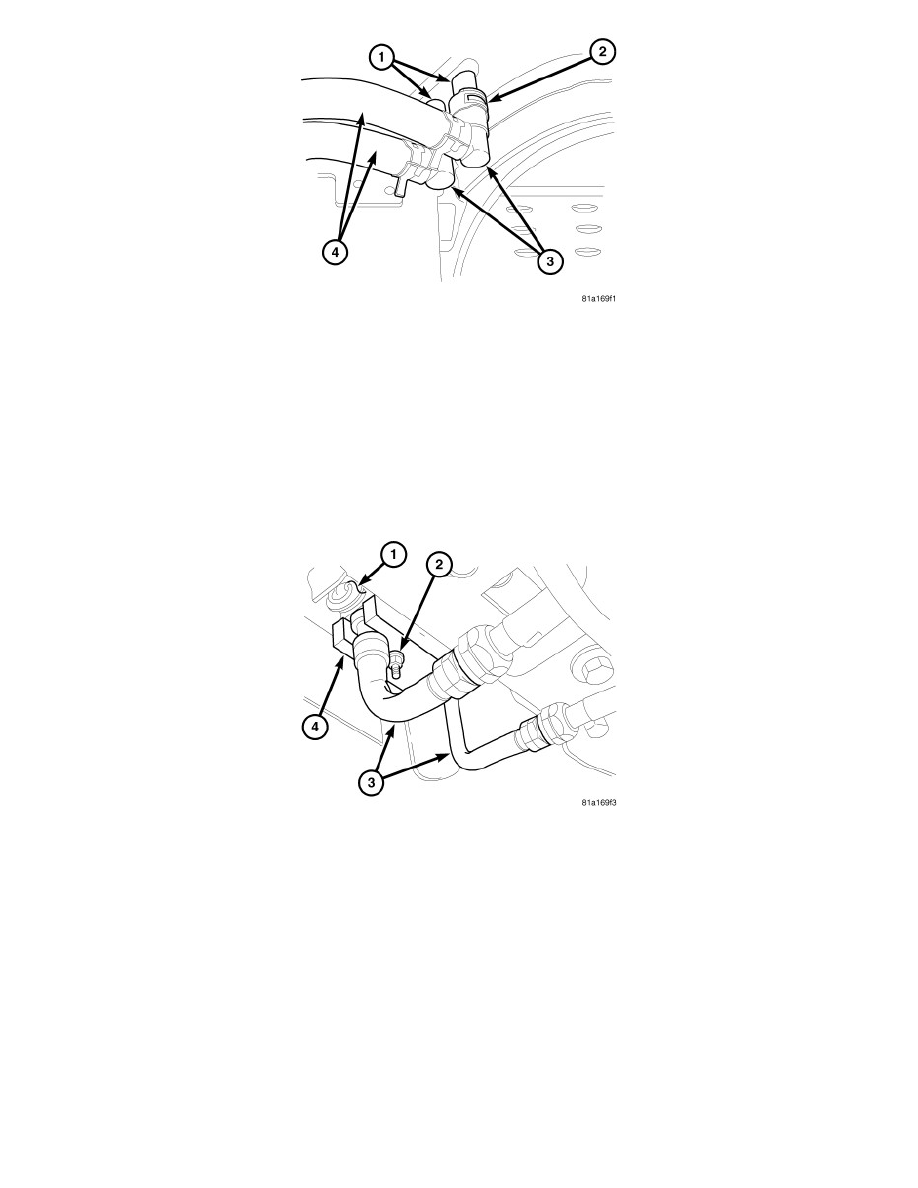
CAUTION: DO NOT apply excessive force on underbody heater lines or rear heater hose quick connect fittings when disconnecting the
connections. Excessive force may damage or deform the fittings and or lines, causing an engine coolant leak.
5. Disconnect the underbody heater lines (4) from the rear heater core tubes (1) which extend through the rear floor panel in front of the right rear
wheel housing by releasing the insert (2) in each rear quick connect fitting (3) and carefully pulling downward on the fittings while using a slight
twisting motion.
6. Lower the underbody heater lines and drain any residual coolant from the lines into a suitable container.
NOTE: Illustration shown with rear body cradle removed for clarity.
7. Loosen the fitting nuts that secure the underbody refrigerant lines to the underbody refrigerant extension lines (3) located behind the right rear
wheel housing.
8. Disconnect the underbody refrigerant lines from underbody refrigerant extension lines and remove and discard the O-ring seals.
9. Remove the nut (2) that secures the underbody refrigerant extension lines and sealing plate (4) to the rear A/C expansion valve (1).
10. Disconnect the extension lines from the rear A/C expansion valve and remove and discard the O-ring seals.