
Town & Country V6-3.8L (2009)
of the seat back and the side of the seat cushion.
9. Engage the push-in plastic fastener (3) that secures the seat belt lower anchor to the outboard side of the seat cushion frame.
10. Reinstall the seat back and seat back hinges (1) to the seat cushion as a unit. Be certain that the forward outboard hinge bracket screw engages the
lower seat belt anchor. Tighten the seat belt lower anchor screw (5) to 39 Nm (29 ft. lbs.). See: Body and Frame/Seats/Seat Back/Service and
Repair/Seat Back - Installation.
11. Reinstall the second row swivel seat unit into the vehicle.
Third Row Center
THIRD ROW CENTER
WARNING: To avoid serious or fatal injury during and following any seat belt or child restraint anchor service, carefully inspect all seat belts,
buckles, mounting hardware, retractors, tether straps, and anchors for proper installation, operation, or damage. Replace any belt
that is cut, frayed, or torn. Straighten any belt that is twisted. Tighten any loose fasteners. Replace any belt that has a damaged or
ineffective buckle or retractor. Replace any belt that has a bent or damaged latch plate or anchor plate. Replace any child
restraint anchor or the unit to which the anchor is integral that has been bent or damaged. Never attempt to repair a seat belt or
child restraint component. Always replace damaged or ineffective seat belt and child restraint components with the correct, new
and unused replacement parts listed in the Chrysler Mopar(R) Parts Catalog.
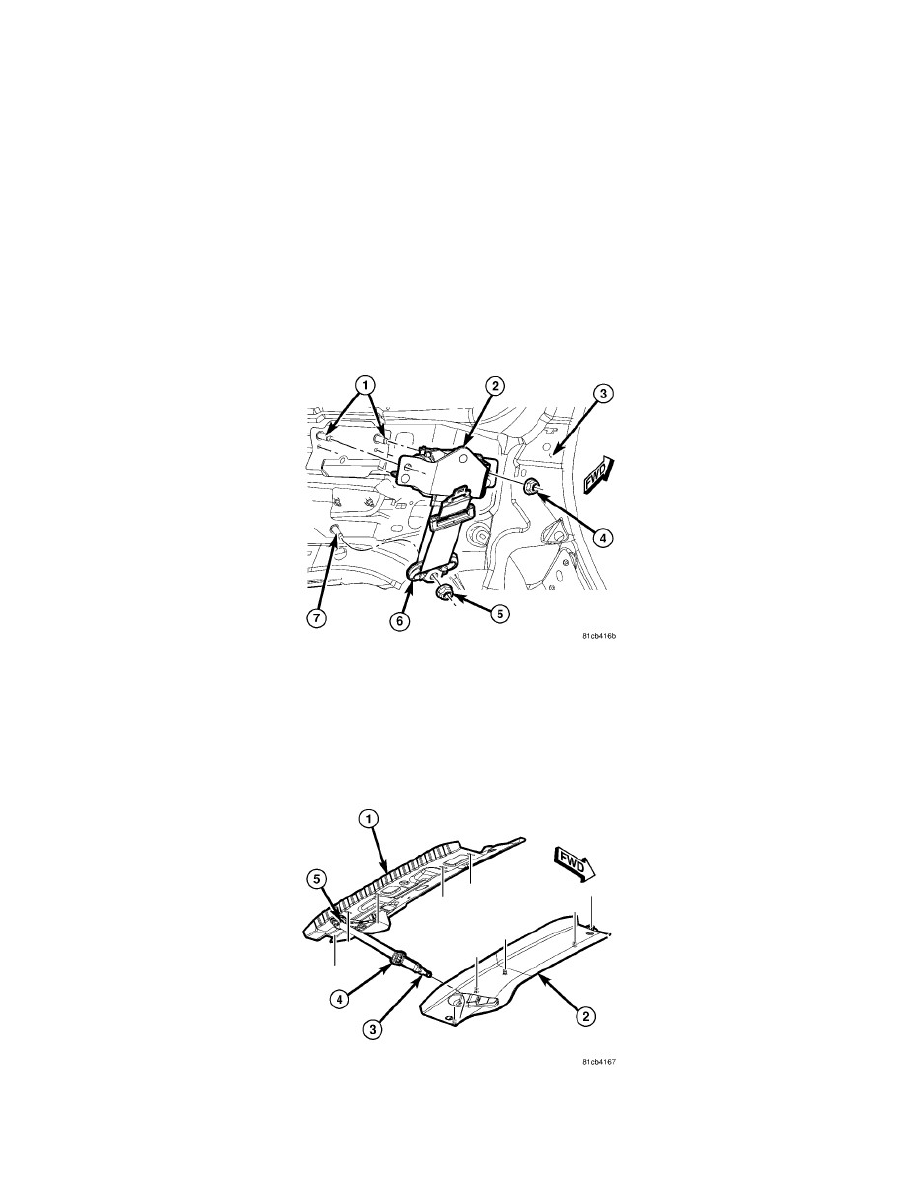
1. Position the third row center seat belt and retractor (2) to the two studs (1) on the inside of the rear header (3) near the liftgate opening as a unit.
2. Engage the two plastic push-in retainers that secure the retractor bracket to the inside of the rear header.
3. Install and tighten the two nuts (4) that secure the retractor bracket to the inside of the rear header. Tighten the nuts to 39 Nm (29 ft. lbs.).
4. Position the third row center seat belt turning loop (6) onto the stud (7) on the inside of the rear header near the liftgate opening. Be certain that the
belt webbing between the retractor and the turning loop is not twisted.
5. Install and tighten the nut (5) that secures the turning loop to the inside of the rear header. Tighten the nut to 39 Nm (29 ft. lbs.).
6. Route the seat belt (5) and both latch plates (3 and 4) through the clearance hole in the liftgate opening trim molding (2).
7. Reinstall the trim molding onto the upper liftgate opening header (1). See: Body and Frame/Interior Moulding / Trim/Trim Panel/Service and
Repair/Rear Header Panel - Installation.