
Town & Country V6-3.8L VIN L (2006)
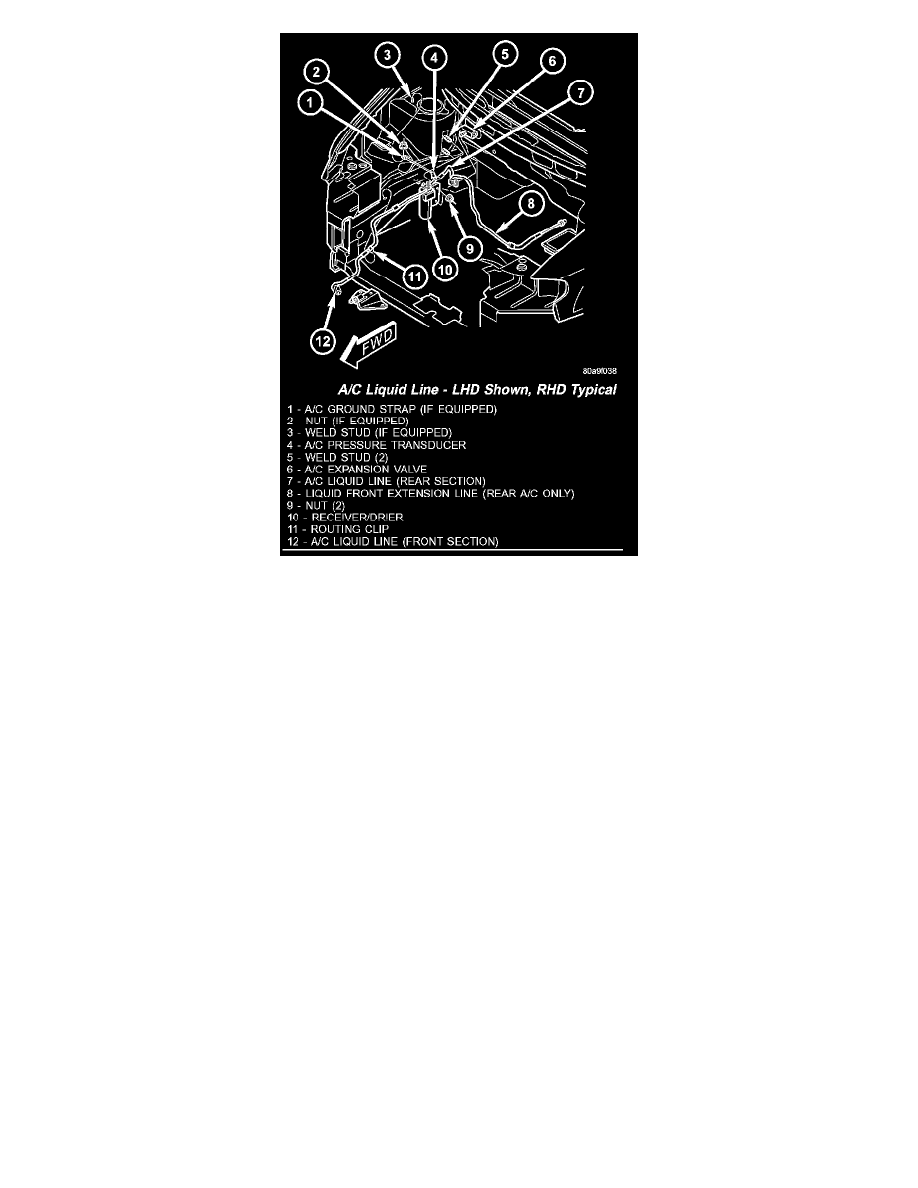
A/C Liquid Line LHD Shown, RHD Typical
8. Disengage the retainer that secures the liquid line routing clip to the top of the right frame rail ahead of the front strut tower in the engine
compartment.
9. Remove the bolt that secures the front section of the A/C liquid line to the receiver/drier.
10. Disconnect the A/C liquid line from the receiver/drier and remove and discard the O-ring seal.
11. Install plugs in, or tape over the opened liquid line fitting and the receiver/drier inlet port.
12. Remove the front section of the A/C liquid line from the engine compartment.
INSTALLATION
1. Position the front section of the A/C liquid line into the engine compartment.
2. Remove the tape or plugs from the liquid line fitting and the receiver/drier inlet port.
3. Lubricate a new rubber O-ring seal with clean refrigerant oil and install it onto the liquid line fitting.
4. Connect the A/C liquid line to the receiver/ drier.
5. Install the bolt that secures the A/C liquid line to the receiver/drier. Tighten the bolt to 11 N.m (97 in. lbs.).
6. Engage the retainer that secures the liquid line routing clip to the top of the right frame rail ahead of the front strut tower in the engine
compartment.
7. Install the air cleaner housing and air inlet tube.
8. Remove the tape or plugs from the condenser outlet port and the liquid line fitting.
9. Lubricate a new rubber O-ring seal with clean refrigerant oil and install it and a new gasket onto the liquid line fitting.
10. Connect the A/C liquid line to the A/C condenser.
11. Install the nut that secures the A/C liquid line to the A/C condenser. Tighten the nut to 23 N.m (17 ft. lbs.).
12. Install the right headlamp unit.
13. Reconnect the negative battery cable.
14. Evacuate the refrigerant system.
15. Charge the refrigerant system.
REMOVAL
REAR SECTION
1. Recover the refrigerant from the refrigerant system.
2. Disconnect and isolate the negative battery cable.
3. Remove the air cleaner housing and the air inlet tube.