
Town & Country V6-4.0L (2008)
Lower Sliding Door Rail: Service and Repair
Removal
REMOVAL
WARNING: To avoid serious or fatal injury on vehicles equipped with airbags, disable the supplemental restraint system before attempting
any steering wheel, steering column, airbag, occupant classification system, seat belt tensioner, impact sensor, or instrument panel component
diagnosis or service. Disconnect and isolate the battery negative (ground) cable, then wait two minutes for the system capacitor to discharge
before performing further diagnosis or service. This is the only sure way to disable the supplemental restraint system. Failure to take the
proper precautions could result in accidental airbag deployment.
NOTE: For the power sliding door drive assembly removal procedure See: Power Sliding Door Drive Assembly/Service and Repair/Power
Sliding Door Drive Assembly - Removal.
1. Disconnect and isolate the battery negative cable.
2. Remove the sliding door sill plate.See: Interior Moulding / Trim/Scuff Plate/Service and Repair/Sliding Door Sill Scuff Plate - Removal.
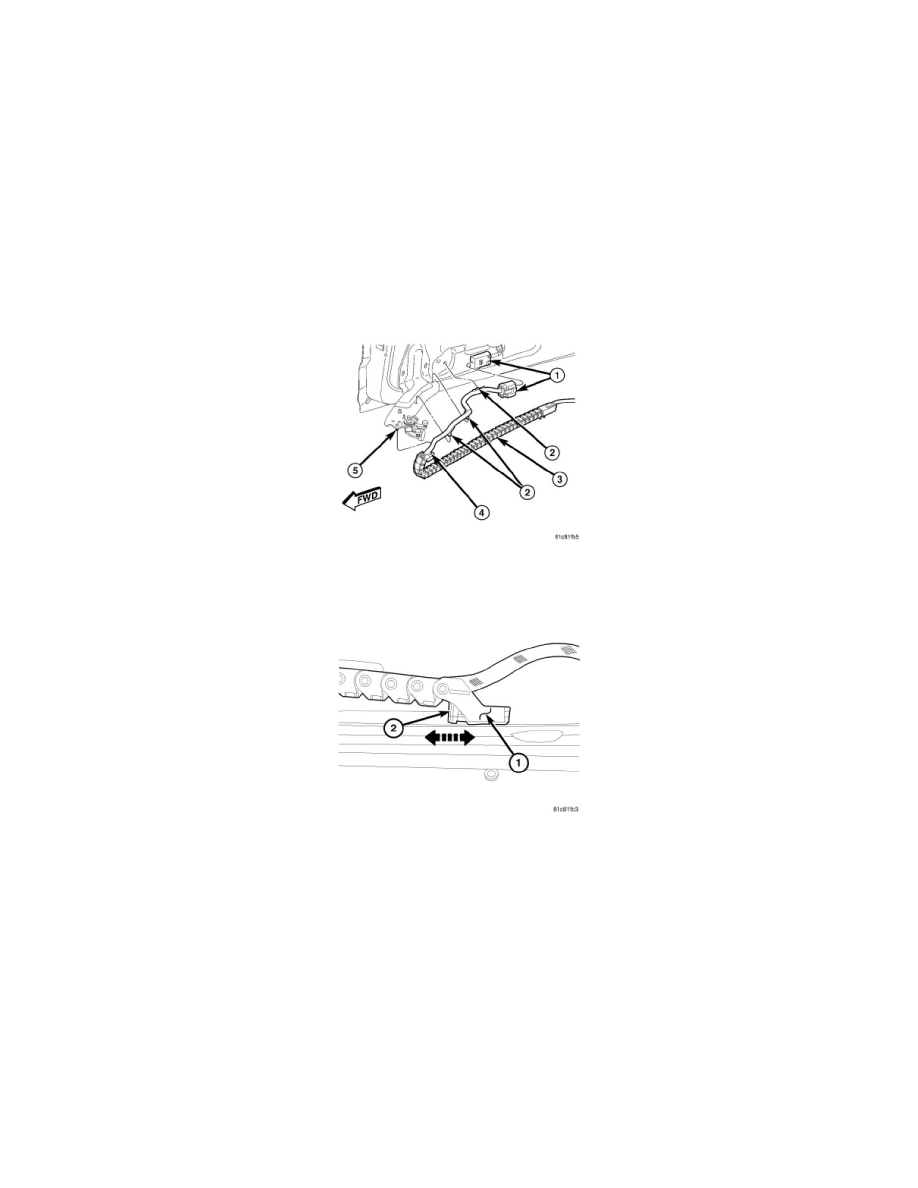
3. Disconnect the sliding door wire harness connector from the bottom of the sliding door (1).
4. Remove the wire harness routing clips (2) from the sliding door and the top of the sliding door lower hinge.
5. Pull locking tab (2) forward to release the rear wire harness chain link clip. Pull the chain link (1) down off of the mounting pin on the sliding door
lower hinge.
6. Disconnect the side impact sensor electrical connector.
7. Remove the wire harness routing clips.
8. Pull the harness out of the body channel and set aside.
9. Remove the side impact sensor retaining bolt and remove the sensor from the body channel.