
Town & Country V6-4.0L (2008)
Trunk / Liftgate Latch: Service and Repair
Liftgate Latch - Installation
INSTALLATION
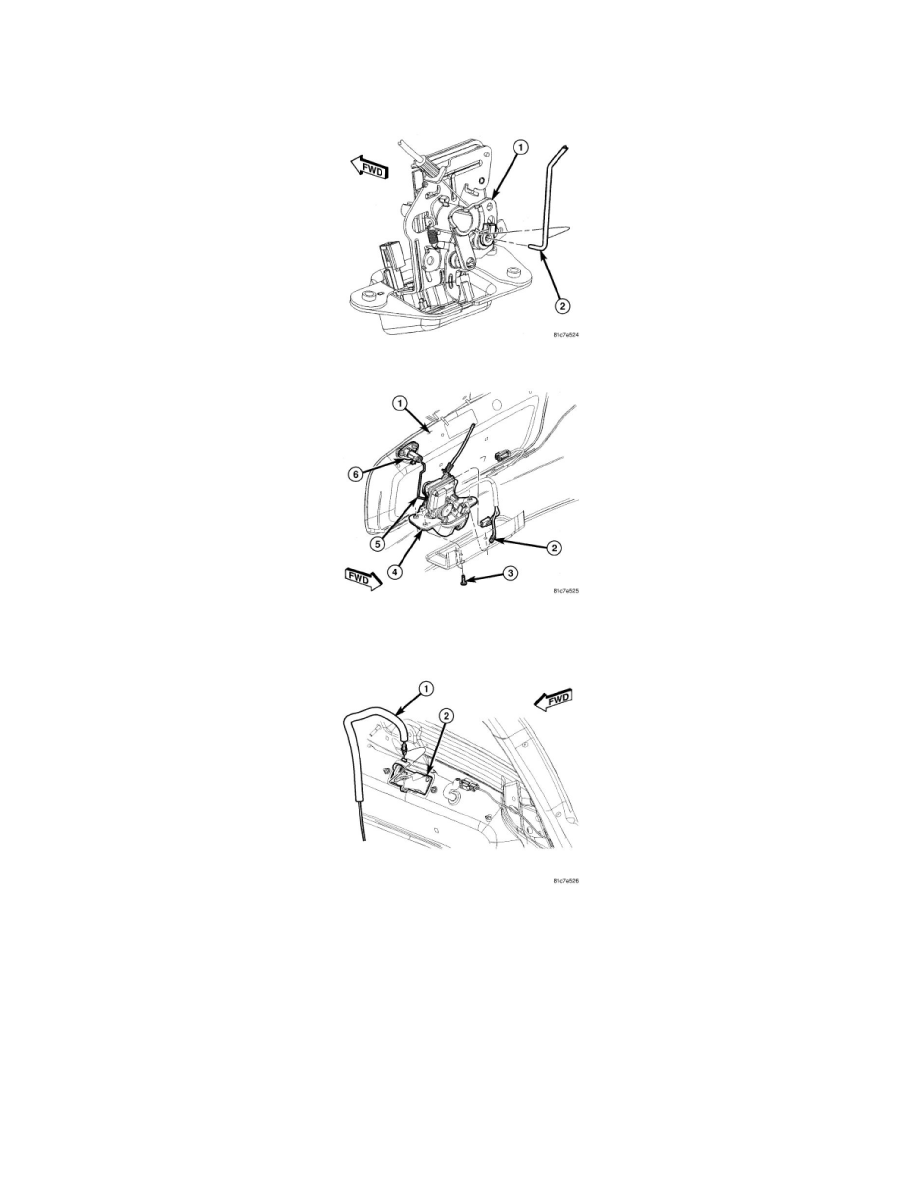
1. Connect the lock cylinder rod (2) to the liftgate latch (1) and engage the retaining clip that secures the rod to the latch.
2. Position the liftgate latch (4) to the inside of the liftgate (1) and install the three retaining screws (3). Tighten the screws to 11 Nm (95 in. lbs.)
3. Install the lock cylinder rod (5) onto the lock cylinder (6) and engage the retaining clip that secures the rod to the cylinder.
4. Connect the wire harness connectors (2) to the liftgate latch.
5. Install the power locking latch cable (1) to the exterior liftgate handle (2) and connect the cable to the handle.
6. Install the liftgate trim panelSee: Trunk / Liftgate Interior Trim Panel/Service and Repair/Liftgate Trim Panel - Installation.
7. Reconnect the negative battery cable.
8. Verify liftgate alignmentSee: Service and Repair/Removal and Replacement/Installation.