
Town & Country V6-4.0L (2008)
WARNING: Be certain a firm brake pedal is achieved prior to attempting to operate the vehicle. If a firm brake pedal cannot be
achieved, bleed the brake hydraulic system and check for leaks. See: Brake Bleeding
10. Road test the vehicle to ensure proper operation of the brakes.
Master Cylinder - Right-Hand-Drive
MASTER CYLINDER - RIGHT-HAND-DRIVE
NOTE: The master cylinder must be bled before installing it on the vehicle.
1. Bench bleed the master cylinder.See: Procedures
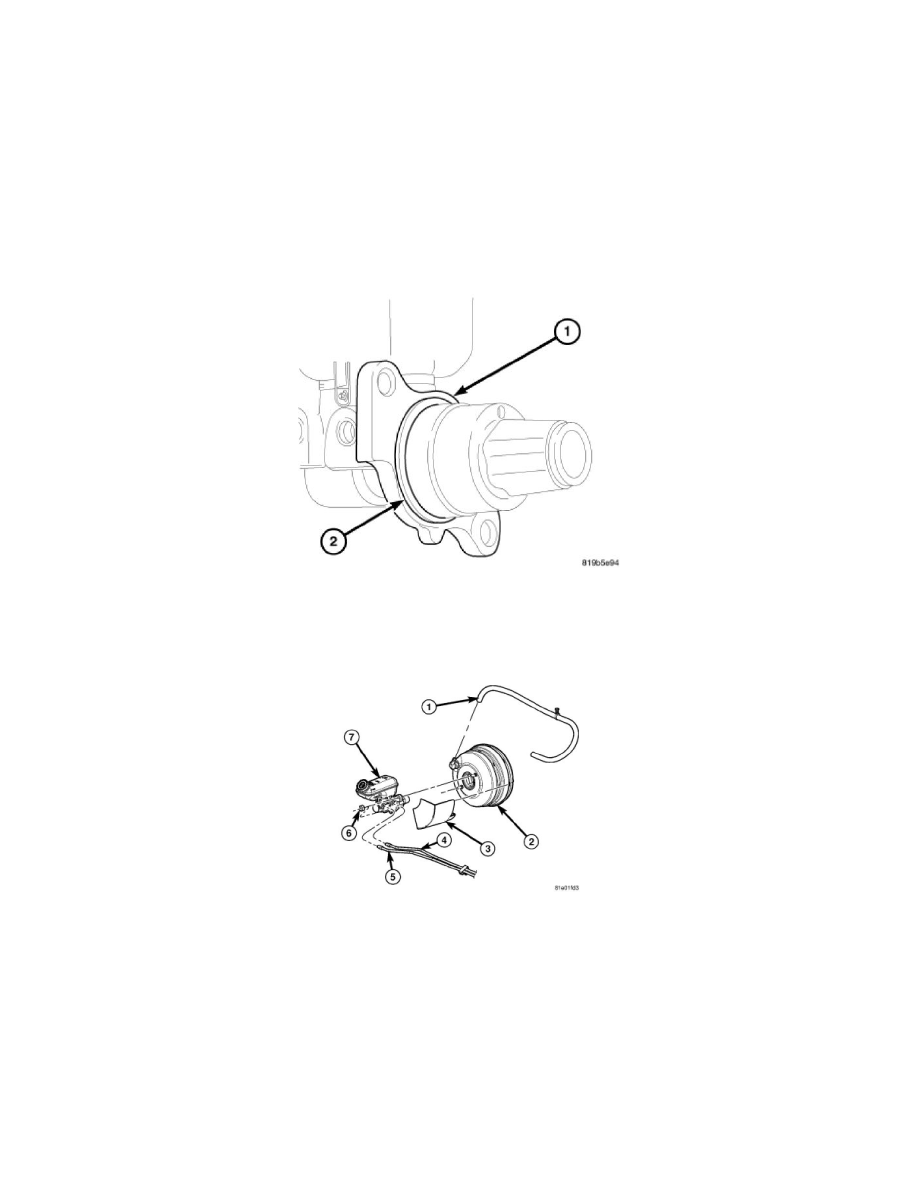
2. Wipe the face of the power brake booster clean where the vacuum seal on the rear of the master cylinder comes in contact when it's installed. Do
not get any cleaner or debris inside the booster.
CAUTION: When installing a master cylinder on the vehicle, a NEW vacuum seal (2) MUST be installed on the master cylinder mounting
flange (1).
3. If the master cylinder does not have a new vacuum seal (2) on the mounting flange (1), remove it. Install a NEW vacuum seal on the master
cylinder mounting flange making sure the seal fits squarely in its groove.
4. Position master cylinder (7) on studs of power brake booster (2), aligning booster push rod with master cylinder piston.
5. Install two master cylinder mounting nuts (6). Tighten both mounting nuts to 25 Nm (19 ft. lbs.).
CAUTION: When tightening primary and secondary brake tube nuts at master cylinder, be sure brake tubes do not contact any other
components within vehicle and that there is slack in flexible sections of tubes. This is required due to movement between ABS ICU and
master cylinder while vehicle is in motion.
6. Thread primary (4) and secondary (5) brake tubes into master cylinder primary and secondary ports. Brake tubes must be held securely when
tightened to control orientation of flex section. Tighten tube nuts to 14 Nm (120 in. lbs.).