
Town & Country V6-4.0L (2008)
1. Install valves if removed.
2. Install valve stem seal/spring seat assembly (5) over valve guides on all valve stems. Ensure that the garter spring is intact around the top of the
rubber seal.
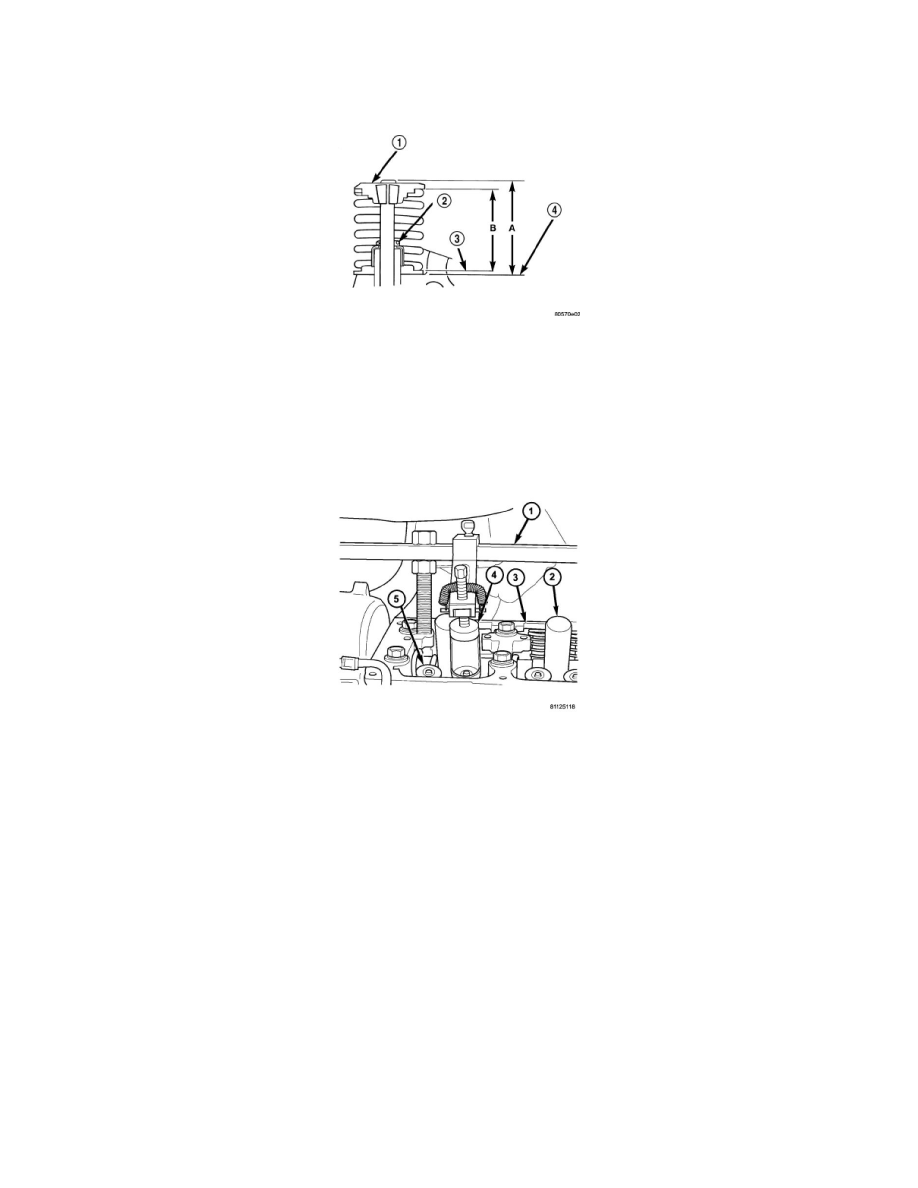
3. Place valve spring (color-coded end facing up)(4) and valve retainer into position.
4. Compress valve spring with valve spring compressor. Install locks and release tool. If valve and/or seat are reground, measure the installed
height of springs (B), make sure measurements are taken from top of spring seat to the bottom surface of spring retainer . If height is
greater than 38.75 mm (1.5256 in.), install a 0.762 mm (0.030 in.) spacer in head counterbore under the valve spring seat to bring spring height
back within specification.
Cylinder Head On
INSTALLATION - CYLINDER HEAD ON
1. Install new valve seal(s) if requiredSee: Seals and Gaskets/Valve Guide Seal/Service and Repair/Valve Guide Seals - Installation.
2. Place valve spring (color-coded end facing up) and valve retainer into position.
NOTE: It may be necessary to use accessory studs 6886, adaptor arm 6887 and 6885 valve adaptor along with MD 998772A, to compress
the valve spring on the right cylinder head exhaust valves.
3. Compress valve spring using Special Tool MD 998772A (1) with Adaptor 6527 (4), only enough to install locks (5).
4. After installing locks, release tension on valve spring and verify proper installation.
5. Remove Special Tool MD 998772A (1) and spark plug adapter tool.
6. Install rocker arm and shaft assembly.
7. Install cylinder head cover(s)See: Valve Cover/Service and Repair/Cylinder Head Cover - Installation.
8. Install spark plugs.
9. Install upper intake manifoldSee: Intake Manifold/Service and Repair/Intake Manifold - Installation.
10. Connect negative battery cable.