
Town & Country V6-4.0L (2008)
Intake Manifold: Service and Repair
Intake Manifold - Installation
Lower Intake Manifold
INSTALLATION - LOWER INTAKE MANIFOLD
1. Clean all sealing surfaces.
NOTE: Make sure the extruded holes in the gasket are installed in the recessed holes in the cylinder head.
2. Position new gaskets and intake manifold on cylinder head surfaces.
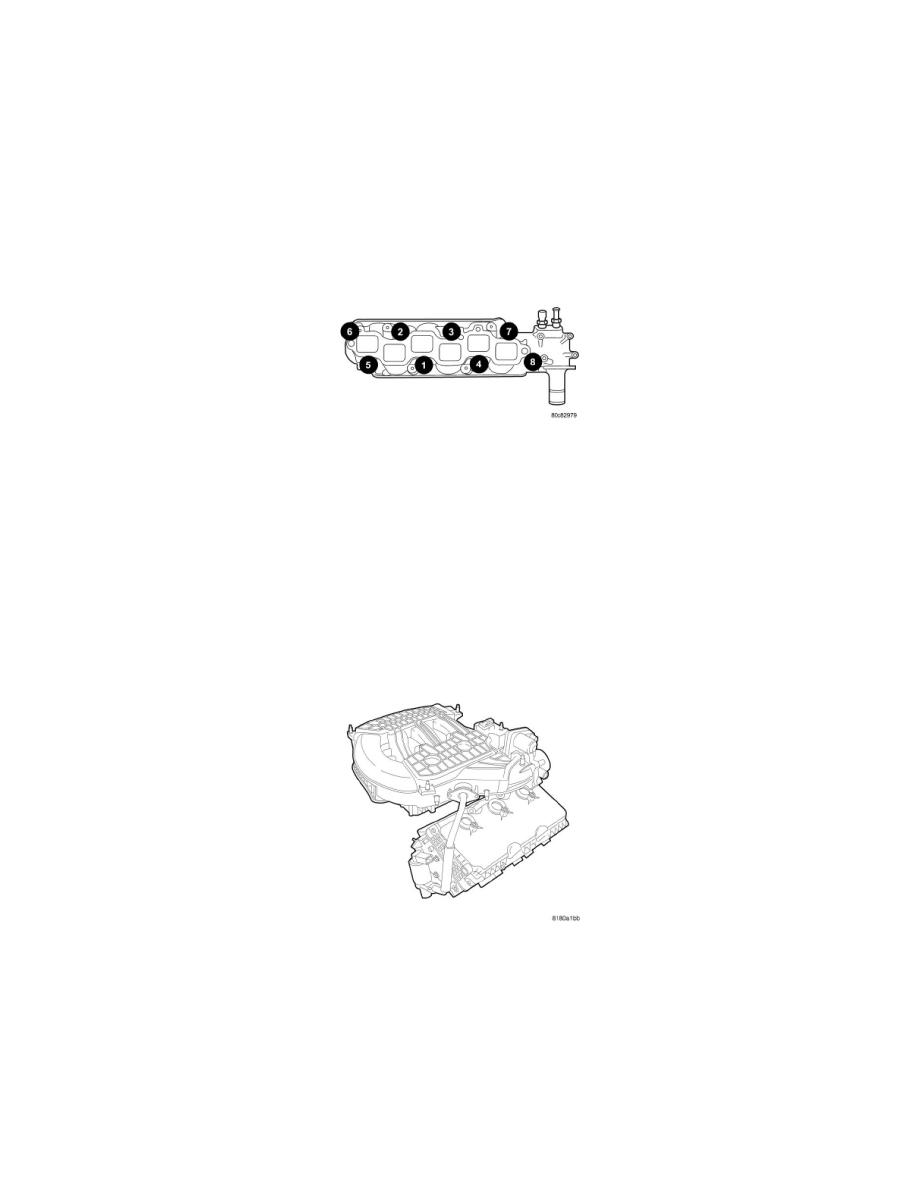
3. Install intake manifold bolts and gradually tighten in sequence shown until a torque of 28 Nm (250 in. lbs.) is obtained.
4. Install fuel rail and injectors as an assembly.
5. Connect fuel supply hose to fuel rail.
6. Connect heater hose to intake manifold.
7. Connect coolant container to thermostat housing.
8. Connect electrical connectors to fuel injectors and coolant temperature sensor.
9. Install power steering fluid reservoir and bracket.
10. Install upper intake manifoldSee: .
11. Connect the upper radiator hose to the thermostat housing.
12. Fill the cooling system.
Upper Intake Manifold
INSTALLATION - UPPER INTAKE MANIFOLD
1. Clean and inspect gasket sealing surfaces.
2. Position new gasket.
3. Install the throttle body on the upper intake (if required)See: Powertrain Management/Fuel Delivery and Air Induction/Throttle Body/Service and
Repair/Throttle Body - Installation.
4. Install upper intake manifold and hand start all attaching bolts.
5. Tighten bolts gradually starting in the center working outward until a torque of 12 Nm (105 in. lbs.) is obtained.
6. Install the front and rear intake manifold support brackets.
7. Install the oil level indicator and oil fill tube to intake manifold bolts.
8. Install the EGR tubeSee: Powertrain Management/Emission Control Systems/Exhaust Gas Recirculation/EGR Valve/Service and Repair/EGR
Valve - Installation.