
Town & Country V6-4.0L (2008)
NOTE: If the foam seal on the instrument panel duct is deformed or damaged, it must be replaced.
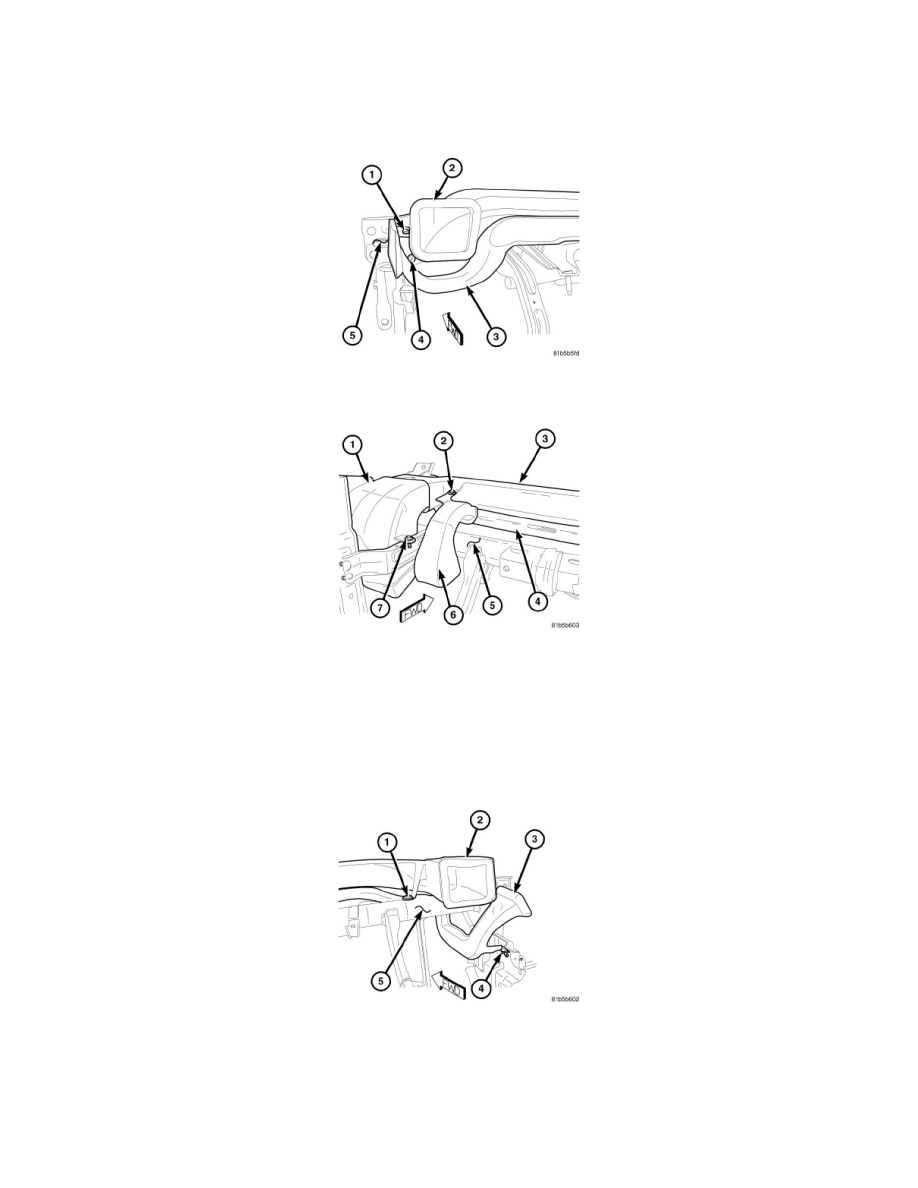
6. Position the driver side instrument panel duct (1) and driver side demister duct (4) as an assembly to the instrument panel support.
7. Connect the instrument panel duct to the center distribution duct. Make sure the ducts are fully engaged to each other.
8. Install the screw (5) that secures the demister duct to the instrument panel support. Tighten the screw to 2 Nm (17 in. lbs.).
9. Install the screws (1 and 4) that secure the driver side instrument panel duct (2) and the demister duct (3) to the instrument panel support (5).
Tighten the screws to 2 Nm (17 in. lbs.).
10. If servicing the center distribution duct (1), install the screw (7) that secures the distribution duct to the instrument panel support (5). Tighten the
screw to 2 Nm (17 in. lbs.).
NOTE: If the foam seal on the instrument panel duct is deformed or damaged, it must be replaced.
11. Position the passenger side instrument panel duct (3) and passenger side demister duct (4) as an assembly to the instrument panel support.
12. Connect the instrument panel duct to the center distribution duct. Make sure the ducts are fully engaged to each other.
13. Connect the inner demister duct (6) to the passenger side demister duct and install the retaining screw (2). Tighten the screw to 2 Nm (17 in. lbs.).
14. Install the screws (1 and 4) that secure the passenger side instrument panel duct (2) and the passenger side demister duct (3) to the instrument
panel support (5). Tighten the screws to 2 Nm (17 in. lbs.).
15. Install the instrument panel cover.
16. Install the instrument panel.
17. Reconnect the negative battery cable.
Rear Ceiling Distribution Ducts - Removal