
Town & Country V6-4.0L (2008)
4. Holding the tensioner pulley (11) against the belt, install the tensioner into the housing and tighten to 28 Nm (250 in. lbs.). Each camshaft sprocket
mark should remain aligned the cover marks.
5. When tensioner is in place pull retaining pin to allow the tensioner to extend to the pulley bracket.
6. Rotate crankshaft sprocket 2 revolutions and check the timing marks on the camshafts and crankshaft. The marks should line up within their
respective locations. If marks do not line up, repeat procedure.
NOTE: If camshaft gears have been removed and timing is correct, counterhold and tighten the camshaft gears to final torque
specificationSee: Timing Belt & Sprockets - Installation.
7. Install the front timing belt coverSee: Engine, Cooling and Exhaust/Engine/Timing Components/Timing Cover/Service and Repair/Timing Cover -
Installation.
8. Tighten the rocker arm assemblies and install the cylinder head covers .
9. Connect negative battery cable.
Camshaft Sprockets
INSTALLATION - CAMSHAFT SPROCKETS
CAUTION: The camshaft sprockets are keyed and not interchangeable from side to side because of the camshaft position sensor pick-up.
1. Install camshaft sprockets onto the camshafts. Install NEW sprocket attaching bolts into place. The 255 mm (10 in.) bolt is to be installed in the
left camshaft and the 213 mm (8 3/8 in.) bolt is to be installed into the right camshaft. Do not tighten the bolts; tightened at later step.
Camshaft sprocket mark should be aligned with the marks on the cover at both sprockets.
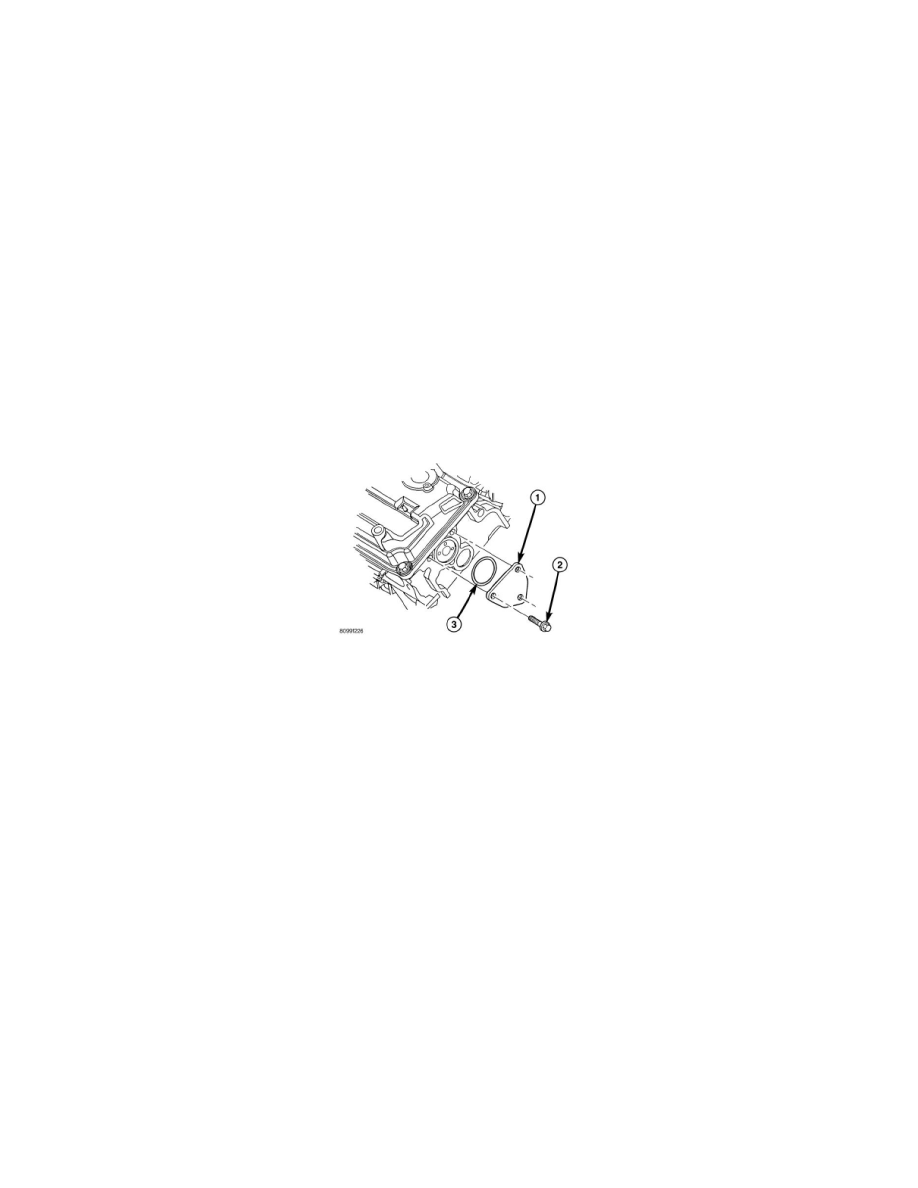
2. Install the right camshaft thrust plate (1) and seal (3). Tighten bolts to 28 Nm (250 in. lbs.).
3. Install the timing belt starting first at the crankshaft sprocket, then to remaining components in a counterclockwise direction.
4. Install the belt around the last sprocket. Maintain tension on the belt as it is positioned around the tensioner pulley. Each camshaft sprockets mark
should still be aligned with the rear cover marks.
NOTE: For timing belt tensioner reset procedure, See: Timing Belt & Sprockets - Removal.
5. Hold the tensioner pulley against the belt and install the reset (pinned) timing belt tensioner into the housing. Tighten attaching bolts to 28 Nm
(250 in. lbs.).
6. Remove tensioner retaining pin to allow the tensioner to extend to the pulley bracket.
7. Using a dial indicator, position the number 1 piston at TDC.
8. Hold the camshaft sprocket hex with a 36 mm (1 7/16 in.) wrench and tighten the camshaft bolts to the following:
-
Right side = 102 Nm (75 ft. lbs.) +90° turn
-
Left side = 102 Nm (75 ft. lbs.) +90° turn
9. Remove dial indicator and install spark plug.
10. Remove Special Tools 6642.
11. Install cam retainer/thrust plates and O-rings.
12. Install front timing belt coverSee: Engine, Cooling and Exhaust/Engine/Timing Components/Timing Cover/Service and Repair/Timing Cover -
Installation.
Crankshaft Sprocket
INSTALLATION - CRANKSHAFT SPROCKET
CAUTION: To ensure proper installation depth of crankshaft sprocket, Special Tool 6641 must be used.
1. Install crankshaft sprocket using Special Tools 6641 and C-4685-C1.