
Town & Country V6-4.0L (2008)
Power Trunk / Liftgate Control Module: Service and Repair
Removal
REMOVAL
1. Open the liftgate.
2. Disconnect and isolate the battery negative cable.
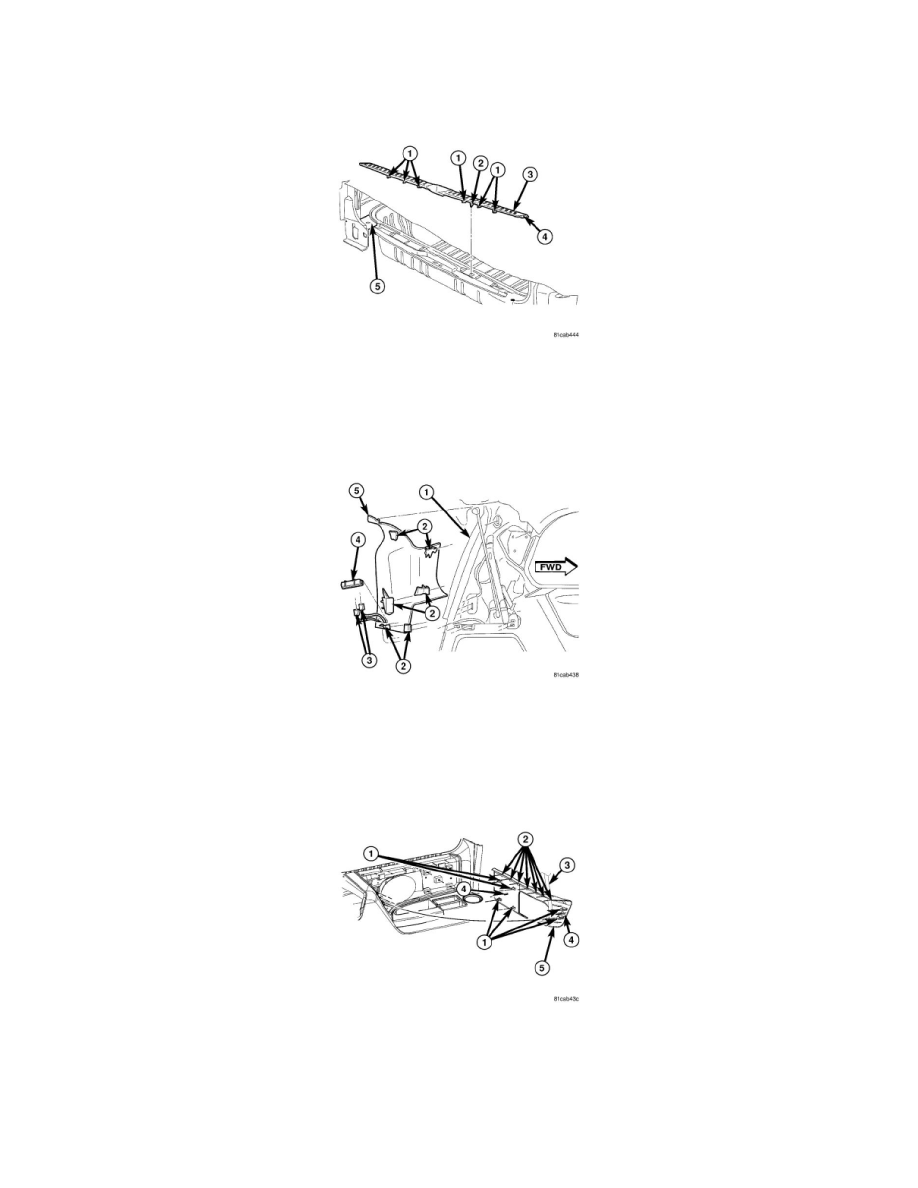
3. Remove the liftgate scuff plate.
a. Using a trim stick C-4755 or equivalent, disengage the liftgate scuff plate retaining clips (1).
b. Carefully disengage the scuff plate end tabs (4) from the left and right quarter trim panels (5).
c. Remove the liftgate scuff plate (3) from the liftgate opening.
4. Remove the upper D-pillar trim.
a. Using a trim stick C-4755 or equivalent, disengage the upper D-pillar trim retaining clips (2).
b. Carefully disengage the upper D-pillar trim end tab (5) from the rear header trim plate.
c. Disconnect the power liftgate D-Pillar switch and third row power folding seat switch electrical connectors (3) (if equipped).
d. Remove the upper D-pillar trim from the liftgate opening.
5. Remove the quarter trim bolster (5).
a. Using a trim stick C-4755 or equivalent, disengage the front and rear quarter trim bolster retaining clips (1).
b. Carefully disengage the quarter trim bolster upper retaining tabs (2) by lifting the bottom edge of the bolster.
c. Continue pulling the quarter trim bolster away from the quarter trim panel to disengage the quarter trim bolster locating tabs (4).
d. Slide the rear seat belt (3) out of the slot in the quarter trim bolster.
e. Remove the quarter trim bolster (5).