
Town & Country V6-4.0L (2008)
1. Disconnect and isolate the battery negative cable. Wait two minutes for the system capacitor to discharge before further service.
2. Release the steering column tilt lever and lower the column to its most downward position for easiest driver airbag removal access.
NOTE: It may be helpful to use a small mirror to aid visibility during the initial attempt to remove the driver airbag from the steering
wheel.
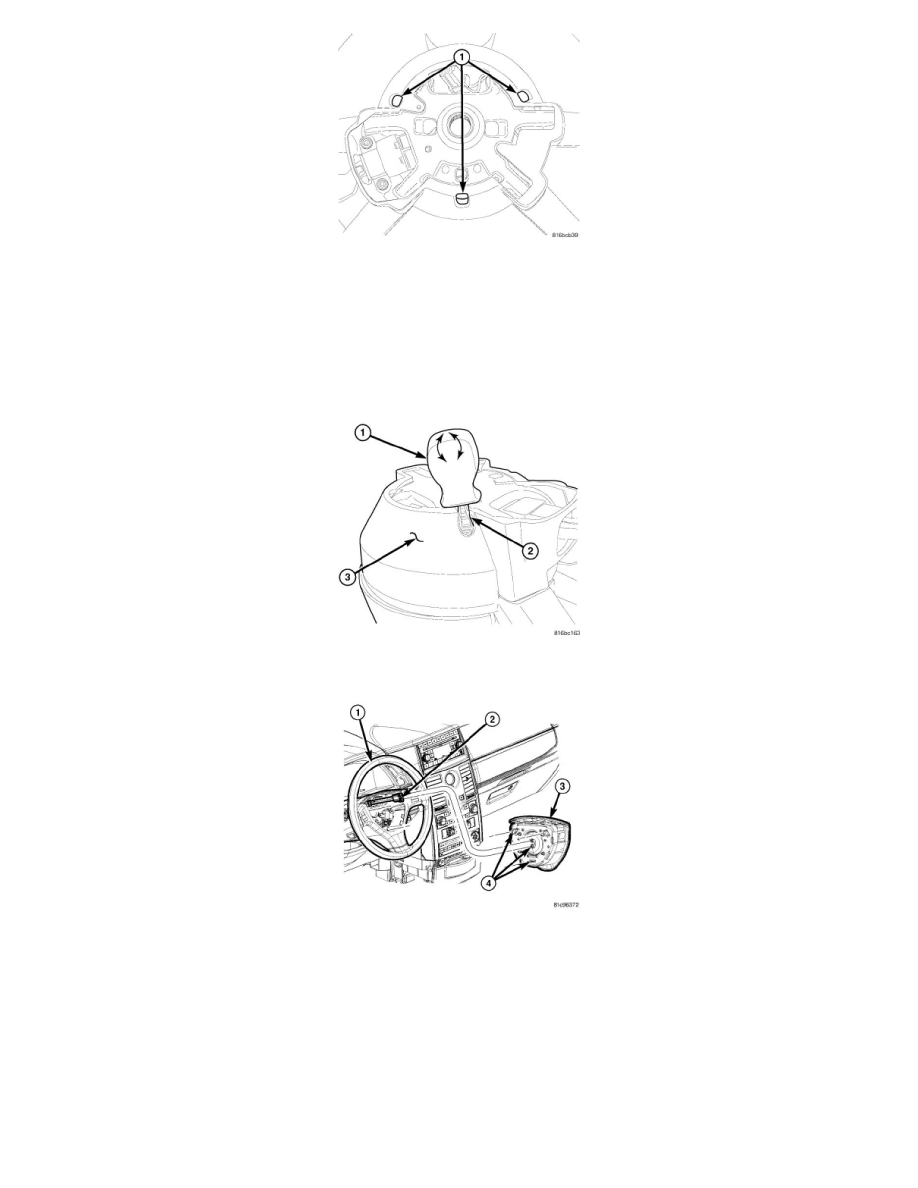
3. There are three airbag retainer access holes (1) on the instrument panel side of the steering wheel hub trim cover located at the two o'clock, six
o'clock and ten o'clock positions of the steering wheel. The steering wheel must be rotated to bring each of these access holes up to the twelve
o'clock position of the steering column one at a time for removal.
4. Insert the tip of a short handled, flat-bladed screwdriver (1) into either of the upper (two o'clock or ten o'clock) access holes of the steering wheel
hub trim cover (3) being certain to place the screwdriver blade (2) on the inboard side of the airbag snap retainer wire loop.
5. Twist the screwdriver handle in either direction far enough to disengage the snap retainer wire loop (4) from the hook of the steering wheel
armature. At the same time, gently pull the driver airbag (3) away from the steering wheel (1) to prevent the retainer from snapping back into place
over the hook once it is disengaged.
6. Repeat STEP 4 and STEP 5 at the other upper (two o'clock or ten o'clock) access hole to disengage the other upper snap retainer wire loop.
7. Repeat STEP 4 and STEP 5 at the lower (six o'clock) access hole to disengage the lower snap retainer wire loop. The lower snap retainer wire
loop has a distinctive V-shape and must always be installed onto the six o'clock hook of the steering wheel armature.
8. Pull the driver airbag away from the steering wheel far enough to access the electrical connections (2) at the back of the airbag housing.
9. Each clockspring driver airbag pigtail wire has a plastic retainer that is pushed onto one of the inflator mounting studs on the back of the airbag
housing. Pull each of these two retainers off of the studs.
CAUTION: Do not pull on the clockspring pigtail wires or pry on the connector insulator to disengage the connector from the driver
airbag inflator connector receptacle. Improper removal of these pigtail wires and their connector insulators can result in damage to the
airbag circuits or the connector insulators.