
Town & Country AWD V6-3.8L VIN L (2003)
Trunk / Liftgate Latch: Procedures
REMOVAL
1. Open the hood, disconnect and isolate the negative battery cable.
2. Open the liftgate and remove the liftgate trim panel. Refer to Body for the procedure.
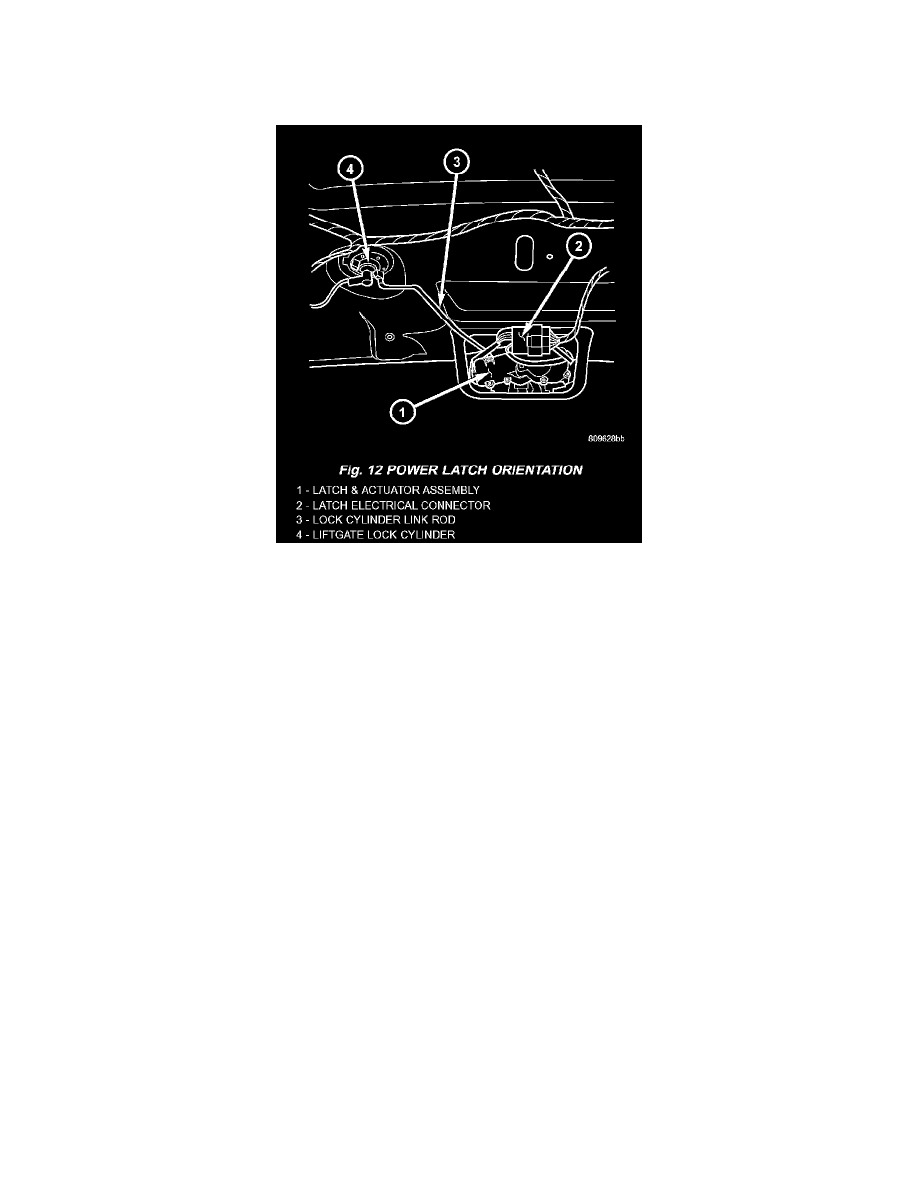
Fig.12 Power Latch Orientation
3. Disconnect the power latch electrical connector.
4. Remove the power latch retaining bolts.
5. Disconnect the liftgate lock cylinder link rod from the key cylinder or latch assembly. To disconnect from latch, rotate the plastic retaining clip 90
° to unsnap clip from linkrod. Then pull link rod straight out of latch arm.
INSTALLATION
1. Connect the liftgate lock cylinder link rod on the cinch latch assembly. Rotate the plastic retaining clip 90 ° to lock retaining clip on linkrod.
2. Connect the link rod on the lock cylinder.
3. Install the power latch retaining bolts. Torque to 10 Nm (90 in. lbs.).
4. Connect the power latch electrical connector and secure push pin retainers.
5. Connect the negative battery cable.
6. Using an appropriate scan tool, check and erase any power liftgate control module diagnostic trouble codes related to the power latch.
7. Verify power liftgate system and power cinch / release latch operation. Cycle the power liftgate through one complete open and close cycle, this
will allow the power liftgate control module to relearn its cycle with the new components.
8. Verify power liftgate manual operation. Using liftgate key rotate the lock cylinder to verify door operation. Pull door open using exterior liftgate
handle I switch.
9. Install the liftgate trim panel. Refer to Body for the procedure.