
Town & Country AWD V6-3.8L VIN L (2003)
4. Connect primary and secondary brake tubes to master cylinder primary and secondary ports. Brake tubes must be held securely when tightened to
control orientation of flex section. Tighten tube nuts to a torque of 17 Nm (145 in. lbs.).
5. Install wiring harness connector to brake fluid level switch mounted in brake fluid reservoir.
6. Install battery, clamp and nut.
7. Install battery shield.
8. Connect positive battery terminal.
9. Connect negative battery terminal.
10. Fill master cylinder with clean, fresh Mopar Brake Fluid or equivalent.
11. Road test vehicle to ensure proper operation of brakes.
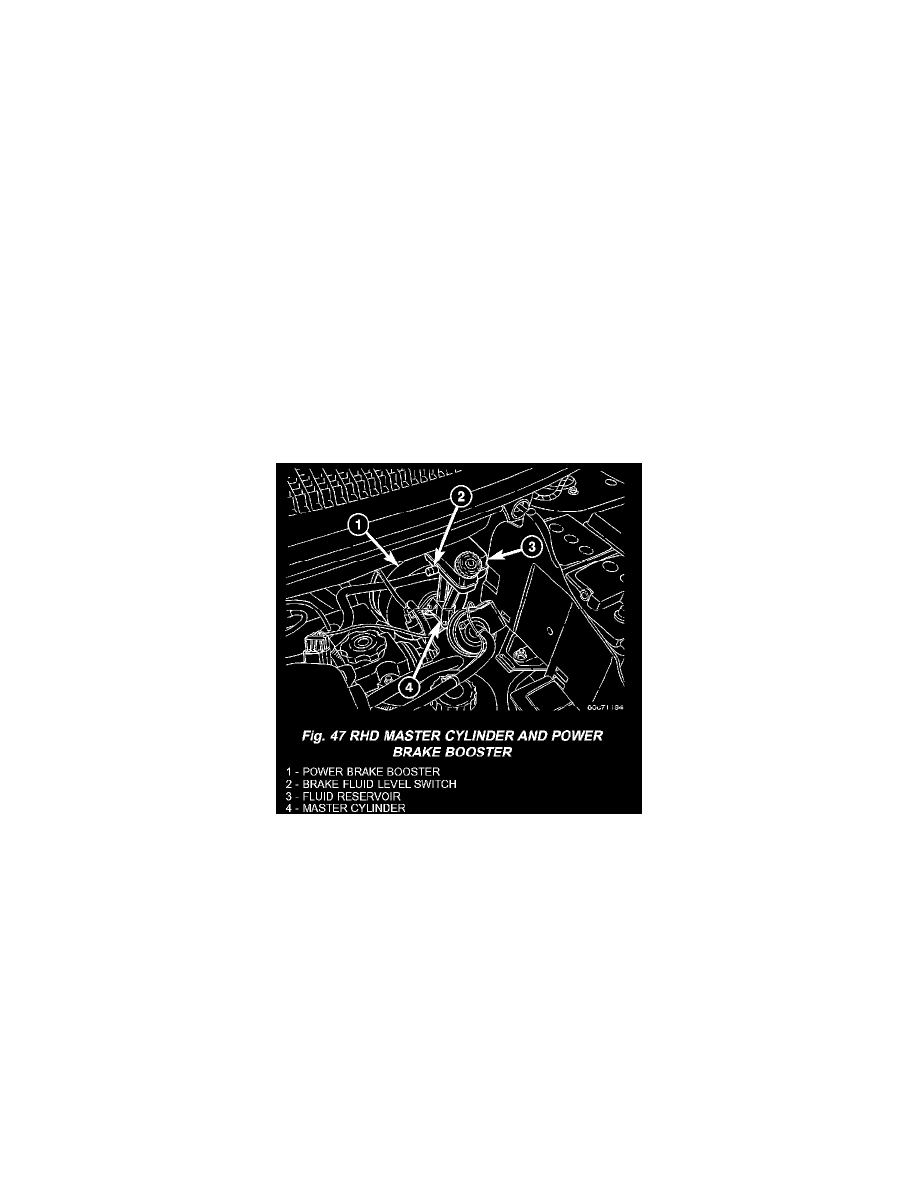
RHD
REMOVAL - RHD
CAUTION: Vacuum in the power brake booster must be pumped down (removed) before removing master cylinder from power brake booster. This
is necessary to prevent the power brake booster from sucking in any contamination as the master cylinder is removed. This can be done simply by
pumping the brake pedal, with the vehicle's engine not running, until a firm feeling brake pedal is achieved.
1. With engine not running, pump brake pedal until a firm pedal is achieved (4 or 5 strokes).
2. Disconnect negative battery terminal.
3. Disconnect positive battery terminal.
4. Remove battery shield.
5. Remove nut and clamp securing battery to tray, remove battery.
6. Thoroughly clean all surfaces of the brake fluid reservoir and master cylinder. Use only solvent such as Mopar Brake Parts Cleaner or equivalent.
7. Remove wiring harness connector from brake fluid level switch in master cylinder brake fluid reservoir.