
Town & Country LWB AWD V6-3.8L VIN L (2000)
Hood Hinge: Service and Repair
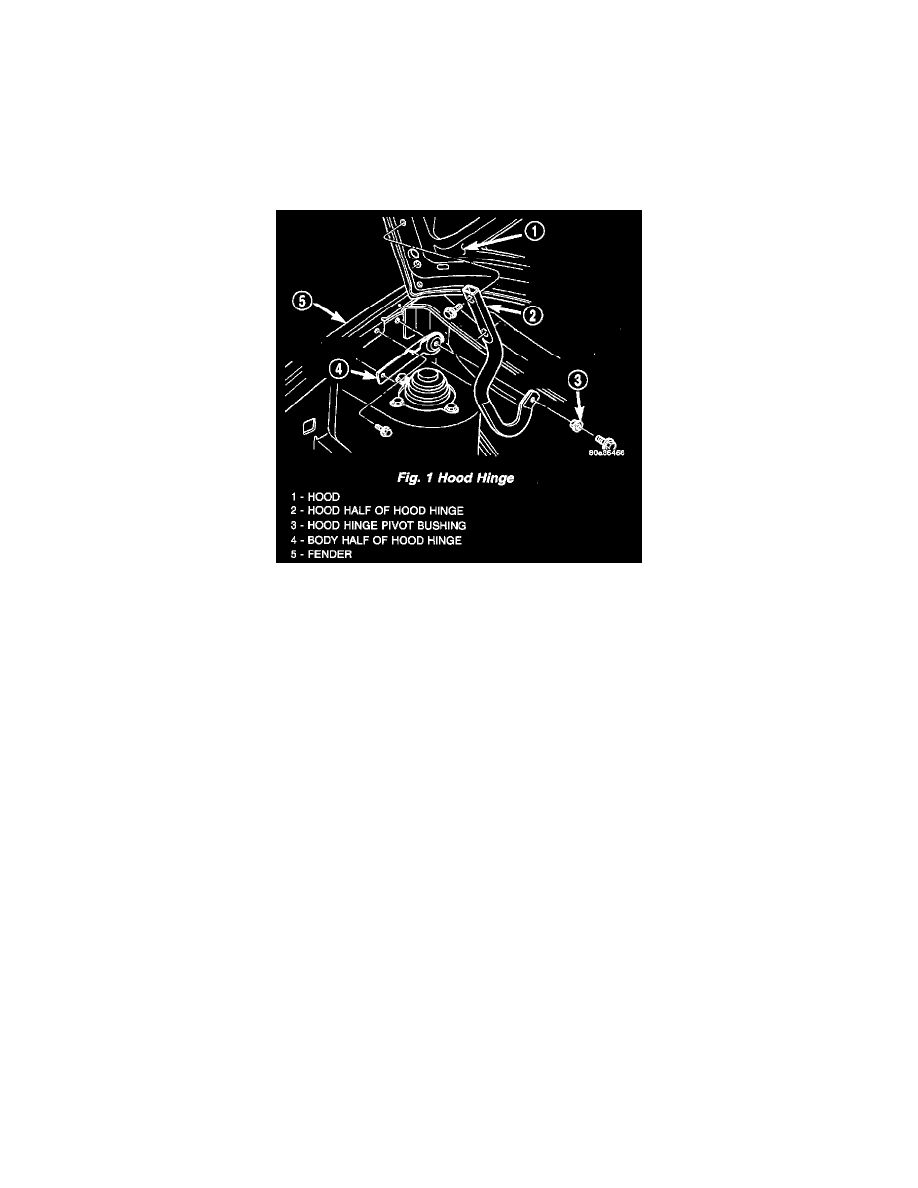
HINGE
REMOVAL
1. Remove hood.
2. Remove wiper unit.
3. Mark all bolt and hinge attachment locations with a grease pencil or other suitable device to provide reference marks for installation.
4. Remove pivot bolt from the body half of hood hinge.
Fig. 1
5. Remove bolts attaching body half of hood hinge to front fender flange and remove hinge from vehicle (Fig. 1).
INSTALLATION
1. If necessary, paint new hinge before installation.
2. Place body half of hood hinge in position on vehicle.
3. Install bolts attaching hood hinge to front fender flange. Tighten bolts to 8 N.m (70 in.lbs.) torque.
4. Install pivot bolt to the body half of hood hinge. Tighten bolts to 28 N.m (21 ft.lbs.) torque.
5. Install wiper unit.
6. Install hood.
7. Align all marks and secure bolts. The hood should be aligned to 4 mm (0.160 in.) gap to the front fenders and flush across the top surfaces along
fenders. Shims can be added or removed under hood hinge to achieve proper hood height. Tighten bolts to 13.5 N.m (10 ft.lbs.) torque.