
Town & Country LWB FWD V6-3.3L VIN G Flex Fuel (1999)
To create a (metric) ISO style tubing flare, Use Snap-On Flaring Tool TFM-428, or equivalent. See and proceed with the steps listed below. Be sure to
place the tubing nut on the tube before flaring the tubing.
1. Carefully prepare the end of the tubing to be flared. Be sure the end of the tubing to be flared is square and all burrs on the inside of the tubing are
removed. This preparation is essential to obtain the correct form of a (metric) ISO tubing flare.
2. Open jaws of the Flaring Tool. Align the mating size jaws of the flaring tool around the size of the tubing to be flared. Close the jaws of the
Flaring Tool around the tubing to keep it from sliding out of the flaring tool, but do not lock the tubing in place.
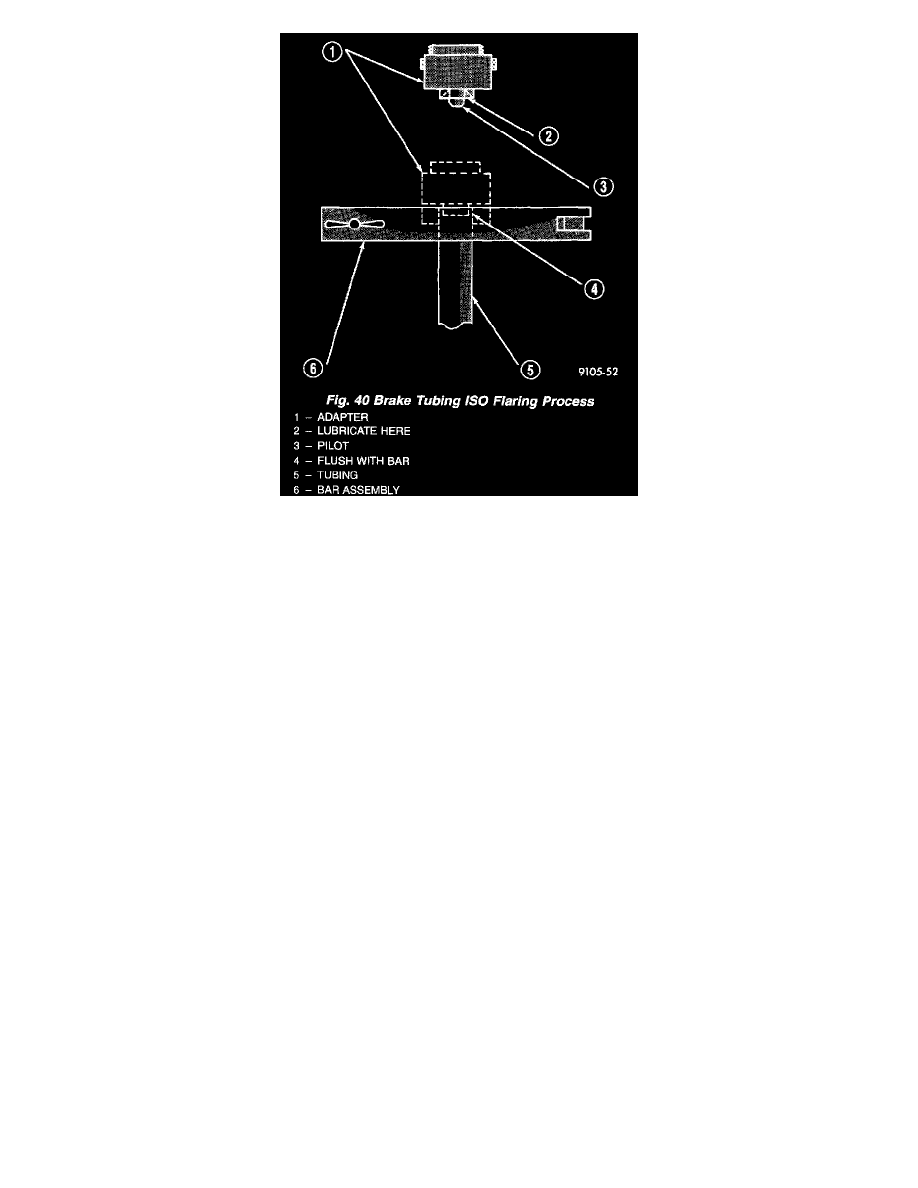
3. Position the tubing in the jaws of the Flaring Tool so that it is flush with the top surface of the flaring tool bar assembly.
4. Install the correct size adapter for the brake tubing being flared, on the feed screw of the yoke assembly. Center the yoke and adapter over the end
of the tubing. Apply lubricant to the adapter area that contacts brake tubing. Making sure the adapter pilot is fully inserted in the end of the brake
tubing. Screw in the feed screw of the yoke assembly until the adapter has seated squarely on the surface of the bar assembly. This process has
created the (metric) ISO tubing flare.