
Town & Country LWB FWD V6-3.3L VIN G Flex Fuel (1999)
Control Arm Bushing: Service and Repair
Rear
REMOVE
1. Remove the lower control arm from the front suspension cradle.
2. Mount the lower control arm in a vise without using excessive clamping force.
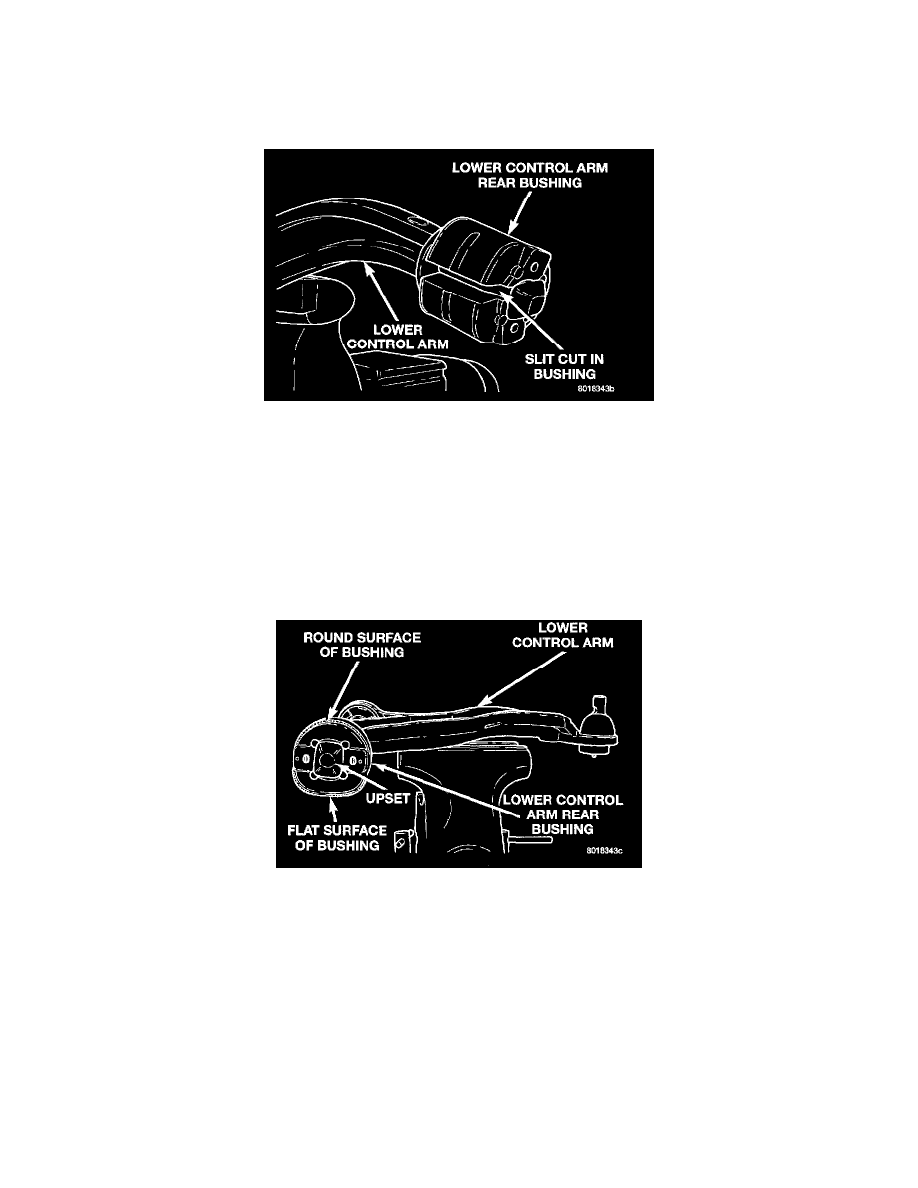
Slit Lower Control Arm Rear Bushing
3. Using a sharp knife, (such as a razor) slit the bushing lengthwise to allow its removal from the lower control arm.
4. Remove the bushing from the lower control arm.
INSTALL
CAUTION: Do not apply grease or any other type of lubricant other than the silicone lubricant specified to the control arm bushing.
1. Apply Mopar Silicone Spray Lube or an equivalent, to the hole in lower control arm rear bushing. This will aid in the installation of the bushing on
the lower control arm.
Correctly Installed Lower Control Arm Bushing
2. With the lower control arm held securely in a vise, install bushing on lower control arm. Install bushing by pushing and rocking the bushing until it
is fully installed on lower control arm. Be sure when bushing is installed it is past the upset on the end of the lower control arm.
3. The rear bushing of the lower control arm, when correctly installed, is to be positioned on the lower control arm.