Town & Country LWB FWD V6-3.8L VIN L (1999)

Timing Chain: Service and Repair
Timing Chain Replacement
REMOVAL
1. Disconnect negative cable from battery.
2. Remove timing cover.
3. Remove camshaft sprocket attaching bolt, and timing chain with camshaft sprocket.
4. Using a suitable puller remove the crankshaft sprocket. Be careful not to damage the crankshaft surface.
INSTALLATION
1. Position a new crankshaft sprocket on the shaft, install sprocket with suitable tool and mallet. Be sure sprocket is seated into position.
2. Rotate crankshaft so the timing arrow is to the 12 o'clock position.
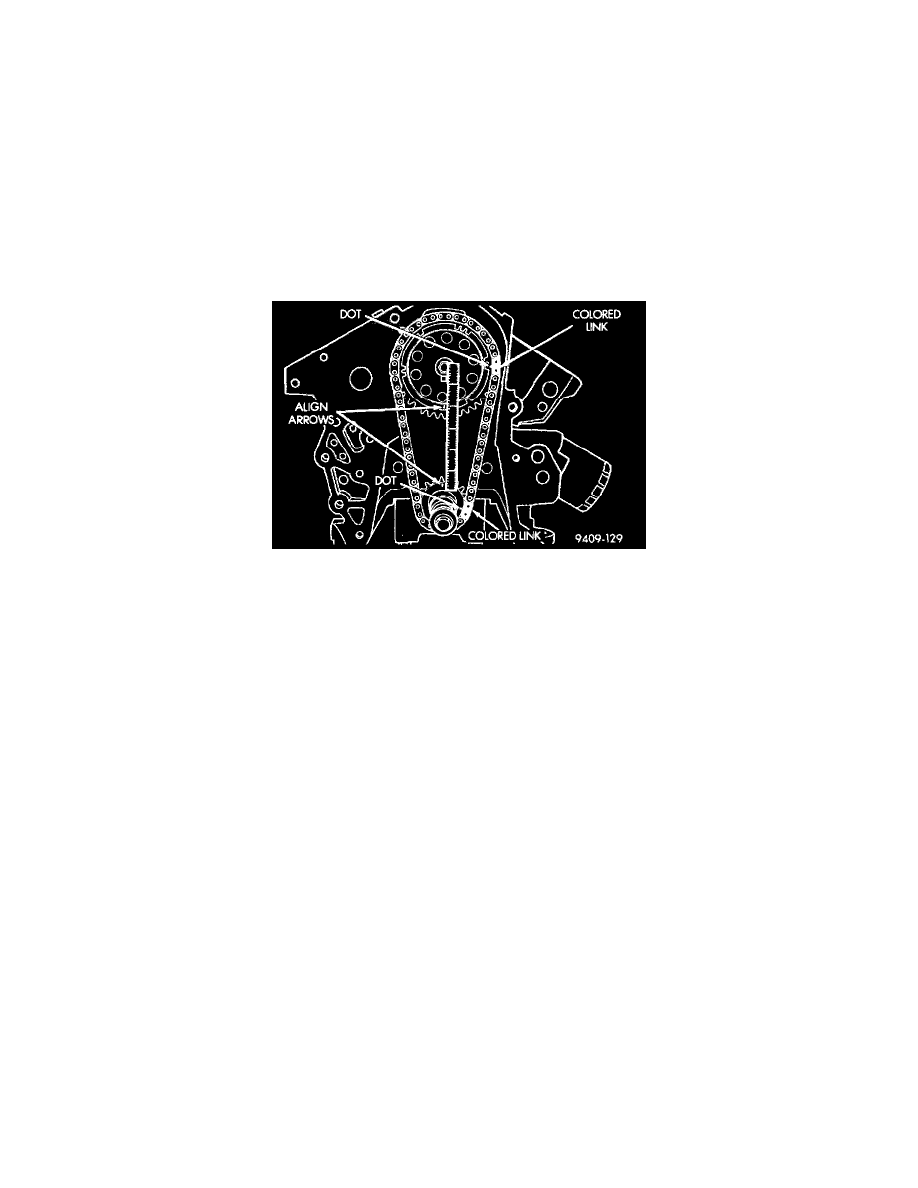
3. Place timing chain around camshaft sprocket and place the timing mark to the 6 o'clock position.
4. Align the dark colored links with the dot on the camshaft sprocket, place timing chain around crankshaft sprocket with the dark colored link lined
up with the dot on the sprocket and install camshaft sprocket into position.
Timing Marks Alignment
5. Use a straight edge to check alignment of timing marks.
6. Install camshaft bolt and washer. Tighten to 54 Nm (40 ft. lbs.).
7. Rotate crankshaft 2 revolutions. Timing marks should line up. If timing marks do not line up, remove cam sprocket and realign.
8. Check camshaft end play. With new thrust plate the specification is 0.0127 to 0.304 min (0.005 to 0.012 inch). Old thrust plate specification is
0.31 mm (0.012 inch) maximum. If not within these limits, install new thrust plate.
9. Install timing chain cover and connect negative cable to battery.
