
Town & Country SWB FWD V6-3.3L VIN G Flex Fuel (2000)
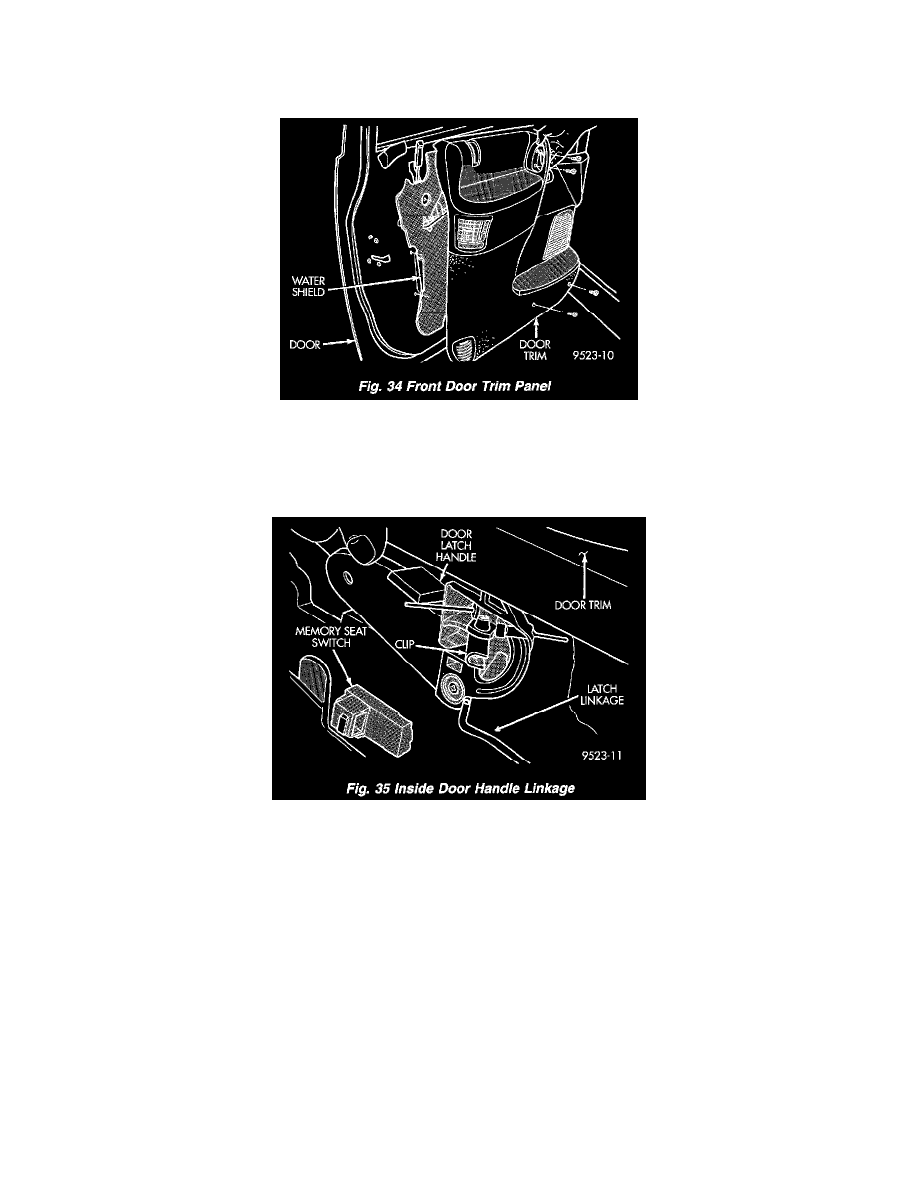
Fig.33 Memory Seat/Mirror Switch
11. If equipped, using a small, flat bladed pry tool, remove memory seat/mirror switch and disconnect wire connector.
12. If equipped, remove screw holding door trim to door panel from behind inside latch release handle.
Fig.34 Front Door Trim Panel
13. Disengage clips attaching door trim to door frame around perimeter of panel.
14. Lift trim panel upward to disengage flange from inner belt molding at top of door.
15. Tilt top of trim panel away from door to gain access to latch linkage.
Fig.35 Inside Door Handle Linkage
16. Disengage clip attaching linkage rod to inside latch release handle.
17. Separate linkage rod from latch handle.
18. Remove front door trim panel from vehicle.
INSTALLATION
1. Hold top of trim panel away from door to gain access to latch linkage.
2. Place linkage rod in position on latch handle.
3. Engage clip to hold linkage rod to inside latch release handle.
4. Place front door trim panel in position on door.
5. Install trim panel into inner belt molding at top of door.
6. Install clips to attach door trim to door frame around perimeter of panel.
7. If equipped, install screw to attach door trim to door panel behind inside latch release handle.
8. If equipped, connect power switch into wire connector.
9. Place power accessary switch in position on door trim.
10. Connect wire connector into memory seat/mirror switch and install switch into trim panel.
11. Install screws to attach accessary switch panel to door trim.
12. Install screw cover into switch panel.