
Town & Country SWB FWD V6-3.3L VIN G Flex Fuel (2000)
CAUTION: Make note of cable routing and foam insulator placement. This will prove helpful when reinstalling replacement cable. Be
certain replacement cable is routed and retained correctly.
7. Trace the inside handle cable along its routing path and disconnect from its retaining clips.
8. Disconnect the inside handle cable from the latch assembly. Gently pry cable sleeve retainer out of the latch mounting bracket and then unhook
swedged cable end from the latch link.
9. Remove the inside handle cable from the side door.
INSTALLATION
1. Match the replacement cable up against the old cable to verify the correct part.
2. Position the inside handle cable on the side door.
3. Connect the inside handle cable on the handle assembly. Hook the swedged cable end on the handle link and gently push the cable sleeve retainer
in the handle bracket.
4. Install the inside handle assembly on the side door.
NOTE: The Inside handle cable is marked with blue tape and must be attached to the latch at the center (just above the lower cable). This
position is marked with a "B" on the latch.
5. Connect the inside handle cable on the latch assembly. Hook the swedged cable end on the latch link and gently push the cable sleeve retainer in
the latch bracket.
6. Trace the inside handle cable along its routing path and install on its retaining clips and position foam insulators. Use previously made schematic
as a guide or remove the opposite side door trim panel and use that door as a guide.
CAUTION: Be certain replacement cable is routed and retained correctly and foam insulators are properly positioned.
7. Install the latch assembly.
8. Place the watershield into position and press securely to adhesive making sure to properly route wiring and linkages.
9. Install the appropriate side door trim panel on the vehicle.
10. Connect the negative battery cable.
Inside Latch Handle
INSIDE LATCH HANDLE
REMOVAL
1. Remove sliding door trim panel.
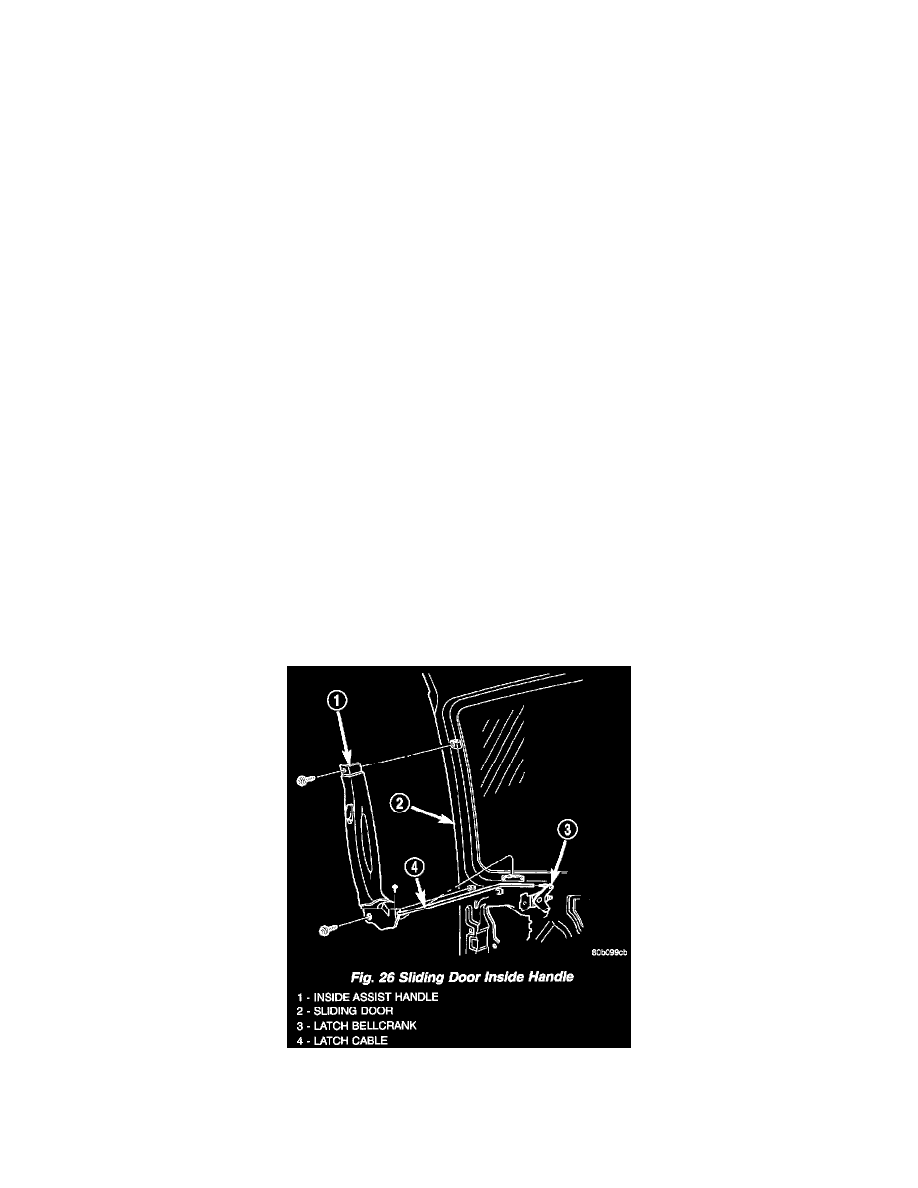
Fig. 26
2. Remove screws holding bottom of inside latch handle to sliding door (Fig. 26).
3. Remove screw holding top of inside latch handle to sliding door.
4. Disengage cable end from clip on bellcrank assembly.