
Town & Country SWB FWD V6-3.3L VIN G Flex Fuel (2000)
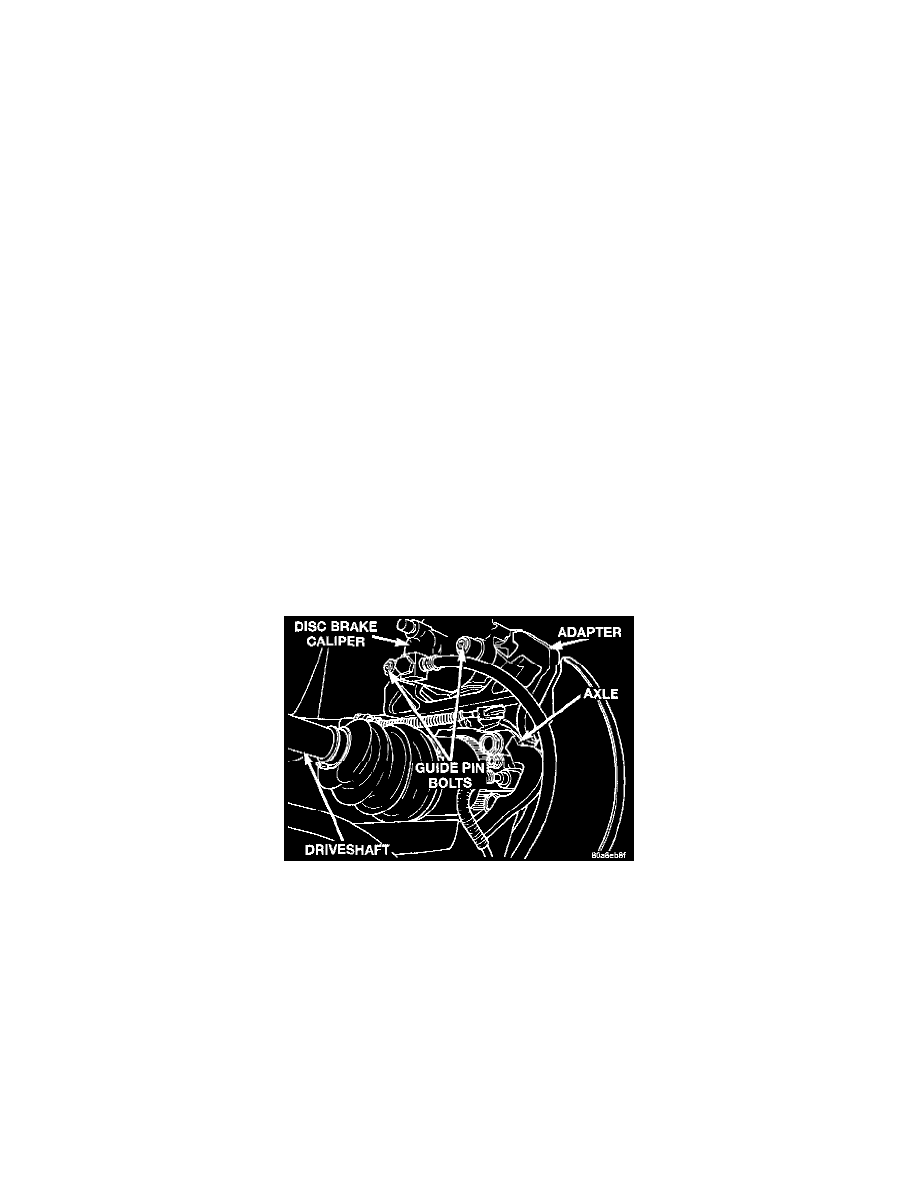
3. Carefully position the brake caliper and shoes over the brake rotor by hooking lower or upper end of the caliper over the machined abutment on
steering knuckle. Next, rotate the caliper into position at the top of the steering knuckle. Make sure that caliper guide pin bolts, bushings and
sleeves are clear of the steering knuckle bosses.
4. Install the caliper guide pin bolts and tighten to a torque of 22 Nm (195 inch lbs.).
Extreme caution should be taken not to cross thread the caliper guide pin bolts.
CAUTION: When connecting the brake hose to the caliper, install new brake hose to caliper special washers.
5. Install the brake hose on the caliper. r1b do this, first place one new special fitting washer on each side of the hose fitting, then slide the banjo bolt
through the fitting. Next, thread the banjo bolt into the threaded port on the rear of the brake caliper. Tighten the banjo bolt to a torque of 47 Nm
(35 ft. lbs.).
6. Install the wheel and tire assembly.
7. Using a torque wrench, tighten the wheel mounting stud nuts in proper sequence until all nuts are torqued to half specification, then repeat the
tightening sequence to the full specified torque of 135 Nm (100 ft. lbs.).
8. Lower the vehicle.
9. Remove the brake pedal depressor (holding) tool.
10. Bleed the hydraulic brake circuit to the brake caliper. Refer to Brake Bleeding, Service and Repair, Base Brake Bleeding.
11. Road test the vehicle and make several stops to wear off any foreign material on the brakes and to seat the brake shoe linings.
Rear
NOTE: Before proceeding with this procedure, review the Service Warnings and Cautions found in Service Precautions.
NOTE: Handling of the rotor and caliper, must be done in such a way as to avoid damage to the rotor and scratching or nicking of lining on the brake
shoes.
REMOVAL
1. Depress the brake pedal past its first inch of travel and hold it in this position using a brake pedal depressor (holding) tool. This is done to isolate
the master cylinder from the brake hydraulic system disallowing the brake fluid to completely drain out of the brake fluid reservoir.
2. Raise the vehicle. Refer to Hoisting in Maintenance.
3. Remove rear wheel and tire assembly from vehicle.
4. Remove the banjo bolt connecting the brake hose to the brake caliper. There are two washers (one on each side of the brake hose fitting) that will
come off with the banjo bolt. Discard these washers.
Removing Caliper Guide Pin Bolts
5. Remove the disc brake caliper to adapter guide pin bolts.