
Town & Country SWB FWD V6-3.3L VIN G Flex Fuel (2000)
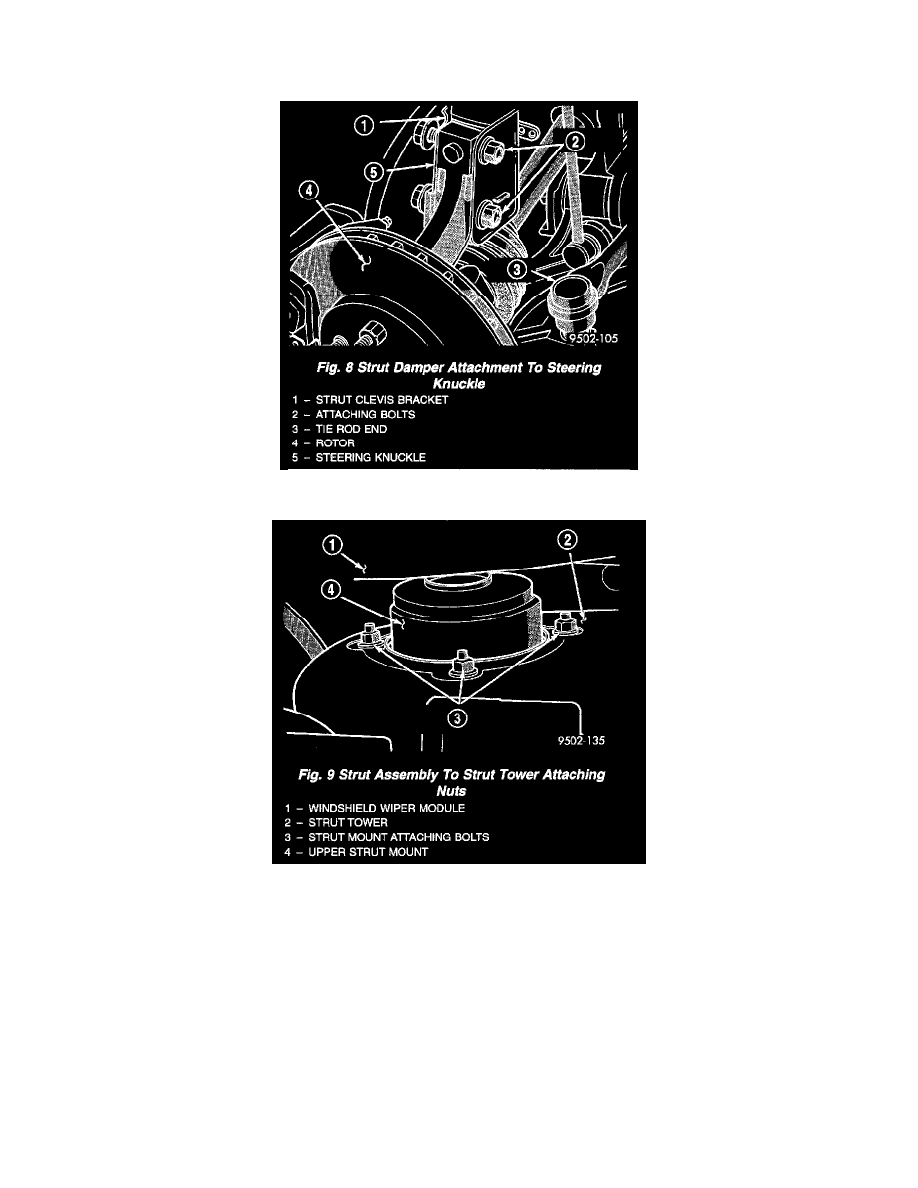
CAUTION: The steering knuckle to strut assembly attaching bolts are serrated and must not be turned during removal. Remove nuts while
holding bolts stationary in the steering knuckles.
6. Remove the 2 strut assembly clevis bracket to steering knuckle attaching bolts.
7. Remove the 3 nuts attaching the strut assembly upper mount to the strut tower and remove the strut assembly from the vehicle.
8. To disassemble and reassemble the strut assembly, refer to Disassembly And Assembly.
INSTALLATION
1. Install strut assembly into strut tower, aligning and installing the 3 studs on the upper strut mount into the holes in shock tower. Install the 3 upper
strut mount attaching nut/washer assemblies. Then using a crow foot. tighten the 3 attaching nuts to a torque of 28 Nm (250 inch lbs.).
CAUTION: The steering knuckle to strut assembly attaching bolts are serrated and must not be turned during installation. Install nuts while
holding bolts stationary in the steering knuckles.
2. Align strut assembly with steering knuckle. Position arm of steering knuckle into strut assembly clevis bracket. Align the strut assembly clevis
bracket mounting holes with the steering knuckle mounting holes. Install the 2 strut assembly to steering knuckle attaching bolts. If strut assembly
is attached to steering knuckle using a cam bolt, the cam bolt must be installed in the lower slotted hole on strut clevis bracket. Also, attaching
bolts should be installed with the nuts facing the front of the vehicle. Tighten the strut assembly to steering knuckle attaching bolts to a torque of
88 Nm (65 ft. lbs.) plus an additional 1/4 turn after specified torque is met.