
Town & Country Van V6-229 3.8L VIN L MFI (1995)
Evaporator Core: Service and Repair
Rear Evaporator and Expansion Valve Replacement
REMOVE
NOTE: Special effort must be used to keep all R-134a system components moisture-free. Moisture in the oil is very difficult to remove and will
cause a reliability problem with the compressor.
WARNING: On vehicles equipped with rear A/C, the refrigerant system must be emptied before performing the following operation.
The engine cooling system must also be relieved of all pressure.
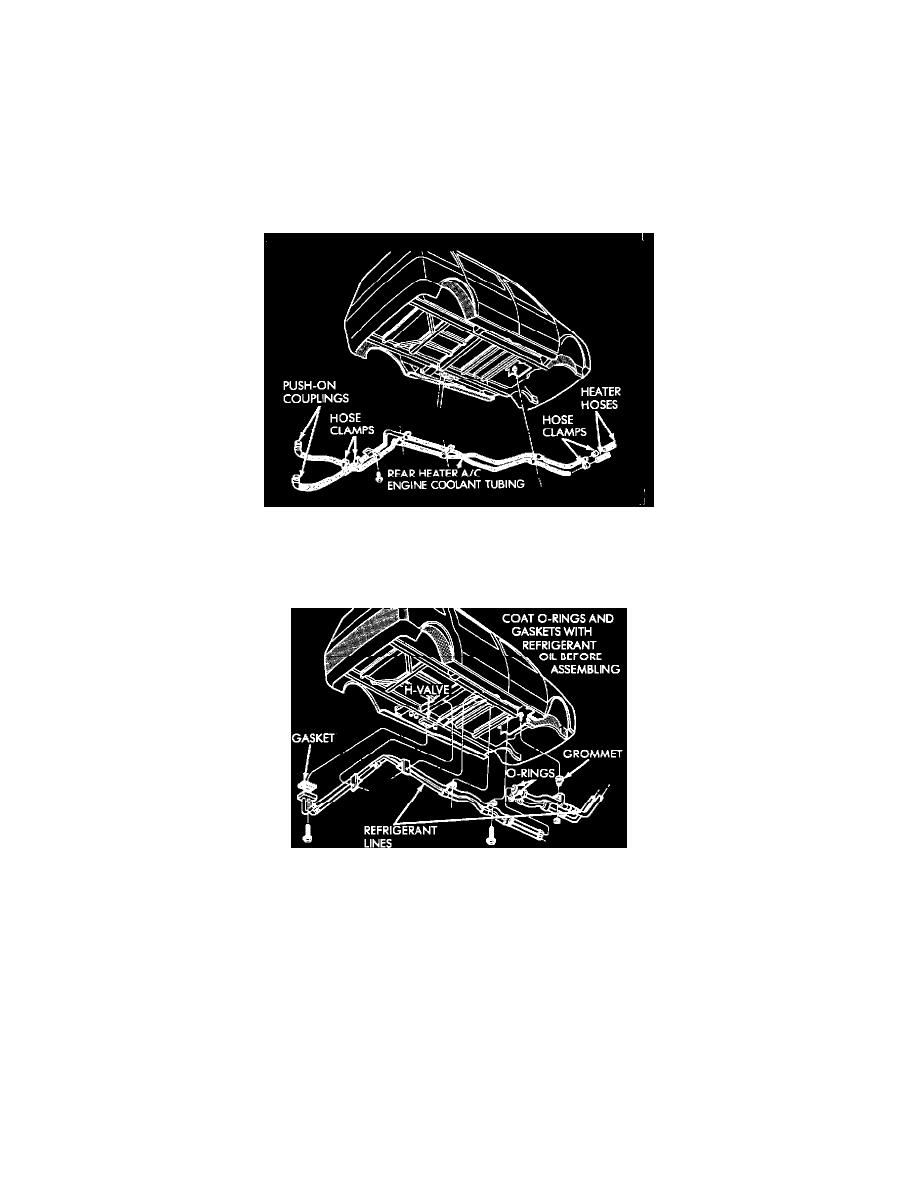
Rear Heater Plumbing
1. Drain engine cooling system. Disconnect heater hoses at rear heater A/C unit. Refer to: "Engine, Cooling and Exhaust : Cooling System :
Service and Repair" See: Engine, Cooling and Exhaust/Cooling System/Service and Repair
Rear A/C Plumbing
2. Using a refrigerant recovery machine, remove refrigerant from the A/C system. Disconnect A/C plumbing from rear heater A/C unit. Refer to:
"Testing and Inspection : Procedures" See: Testing and Inspection
3. Remove left lower quarter trim panel. Refer to: "Body and Frame : Interior Trim : Trim Panel : Service and Repair" See: Body and
Frame/Interior Moulding / Trim/Trim Panel/Service and Repair
4. Remove screws securing air distribution duct to the rear wheel housing.
5. Remove screws securing heater unit to the floor pan.
6. Remove screw securing unit to the quarter panel support.
7. Lift the unit enough to clear floor pan. Remove unit from the vehicle.
EVAPORATOR AND EXPANSION VALVE
1. Remove unit cover.
2. Remove the bolt that mounts the unified refrigerant plumbing block to the expansion valve.
3. Carefully pull the evaporator and expansion valve straight out of unit.