
Town & Country Van AWD V6-230 3.8L VIN L SMFI (1998)
Piston Ring End Gap Position
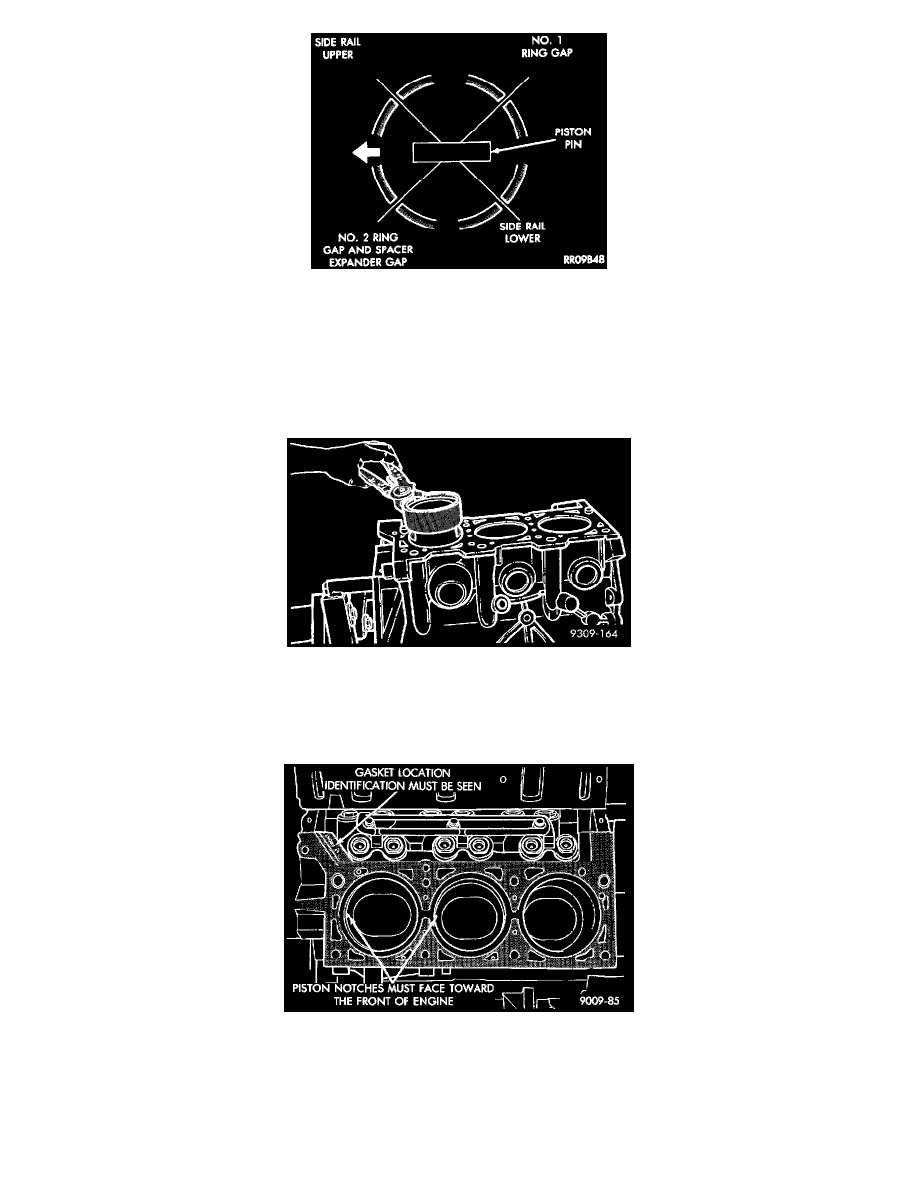
1. Before installing pistons and connecting rod assemblies into the bore, be sure that compression ring gaps are staggered so that neither is in line
with oil ring rail gap.
2. Before installing the ring compressor, make sure the oil ring expander ends are butted and the rail gaps located as shown in image.
3. Lubricate the piston and rings with clean engine oil. Position a ring compressor over the piston and rings, and tighten the compressor. Be sure
position of rings does not change during this operation.
4. Install connecting rod bolt protectors on rod bolts.
Piston-Installation
5. Rotate crankshaft so that the connecting rod journal is on the center of the cylinder bore. Insert rod and piston into cylinder bore and guide rod
over the crankshaft journal.
6. Tap the piston down in cylinder bore, using a hammer handle. At the same time, guide connecting rod into position on connecting rod journal.
Piston I.D. Notches
7. The notch or groove on top of piston must be pointing toward front of engine.
8. Install rod caps. Install nuts on cleaned and oiled rod bolts and tighten nuts to 54 Nm (40 ft. lbs.) Plus 1/4 turn.
9. Repeat procedure for each piston and rod installation.
10. Install cylinder heads and oil pan.
11. Fill engine crankcase with proper oil to correct level.