
Town & Country Van AWD V6-230 3.8L VIN L SMFI (1998)
EGR Valve: Testing and Inspection
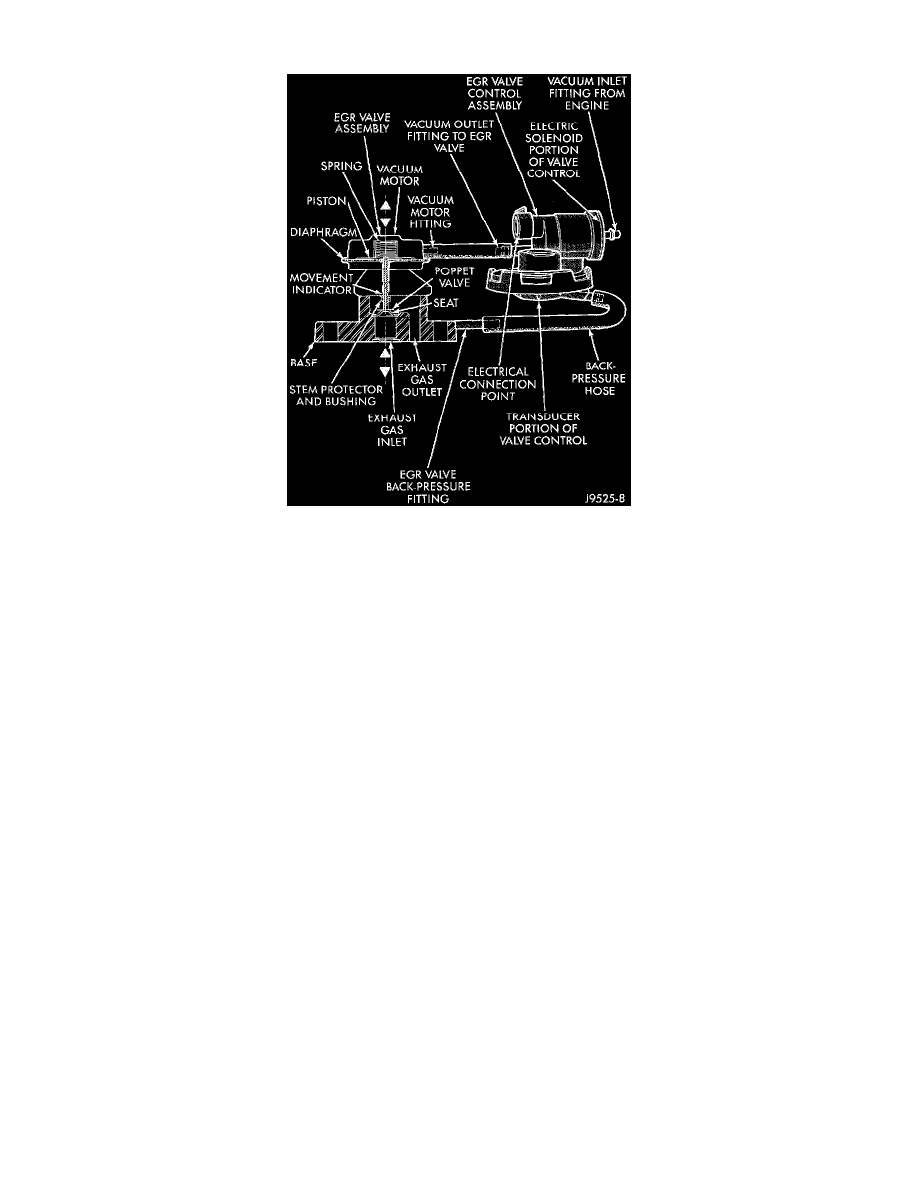
Fig 4 EGR System
EGR VALVE LEAKAGE TEST
This is not to be used as a complete test of the EGR system.
If the engine will not idle, dies out on idle, or idle is rough or slow, the poppet valve (Fig. 4) at the base of the EGR valve may be leaking in the closed
position.
1. The engine should be off for the following test.
2. Disconnect the rubber hose from the fitting (Fig. 4) at the top (vacuum motor) side of the EGR valve.
a. Connect a hand-held vacuum pump to this fitting.
b. Apply 15 inches of vacuum to the pump.
c. Observe the gauge reading on the pump.
d. If vacuum falls off, the diaphragm in the EGR valve has ruptured.
e. Replace the EGR valve. Note: The EGR valve, valve control and attaching hoses are serviced as one assembly.
f.
Proceed to the next step.
3. A small metal fitting (back-pressure fitting) is located at the base of the EGR valve (Fig. 4).
-
A rubber back-pressure hose connects it to the back-pressure fitting on the EGR valve control.
-
Disconnect this rubber hose at the EGR valve fitting.
4. Remove the air cleaner housing from the throttle body
5. Using compressed air, and an air nozzle with a rubber tip, apply approximately 50 psi of regulated shop air to the metal back-pressure fitting on
the EGR valve.
6. By hand, open the throttle to the wide open position.
-
Air SHOULD NOT BE HEARD emitting from the intake manifold while applying air pressure at the back-pressure fitting.
7. If air CAN BE HEARD emitting from the intake manifold, the poppet valve (Fig. 4) is leaking at the bottom of the EGR valve.
-
Replace the EGR valve.
NOTE: The EGR valve, valve control and attaching hoses are serviced as one assembly. Do not attempt clean the old EGR valve.