
Town & Country Van AWD V6-230 3.8L VIN L SMFI (1998)
Alignment: Service and Repair
Setting Camber Adjustment and Cam Bolt Installation
1. If the front camber readings obtained are not within the vehicle's specifications, use the following procedure and the Mopar (R) Clevis Bolt
Service Kit, or equivalent to provide camber adjustment. The kit contains 2 flange bolts, 2 cam bolts, and 2 dog bone washers. These components
of the service kit are necessary to assemble the strut to the steering knuckle, after modification of the strut clevis bracket.
2. Verify that the strut and steering knuckle are not bent or otherwise damaged. If either component is bent or show other signs of damage, replace
required components and check the camber setting again.
3. If no component is bent or damaged, use the following procedure for modifying the strut clevis bracket and adjusting the camber setting.
4. Raise front of vehicle until tires are not supporting the weight of the vehicle. Then remove wheel and tire assembly from the location on the
vehicle requiring the strut to be modified.
CAUTIONS:
-
When removing the steering knuckle from the strut clevis bracket, do not put a strain on the brake flex hose. Also, do not let the weight of the
steering knuckle assembly be supported by the brake flex hose when removed from the strut assembly. If necessary use a wire hanger to
support the steering knuckle assembly or if required remove the brake flex hose from the caliper assembly.
-
The steering knuckle strut assembly attaching bolts are serrated and must not be turned during removal. Remove nuts while holding bolts
stationary in the steering knuckles.
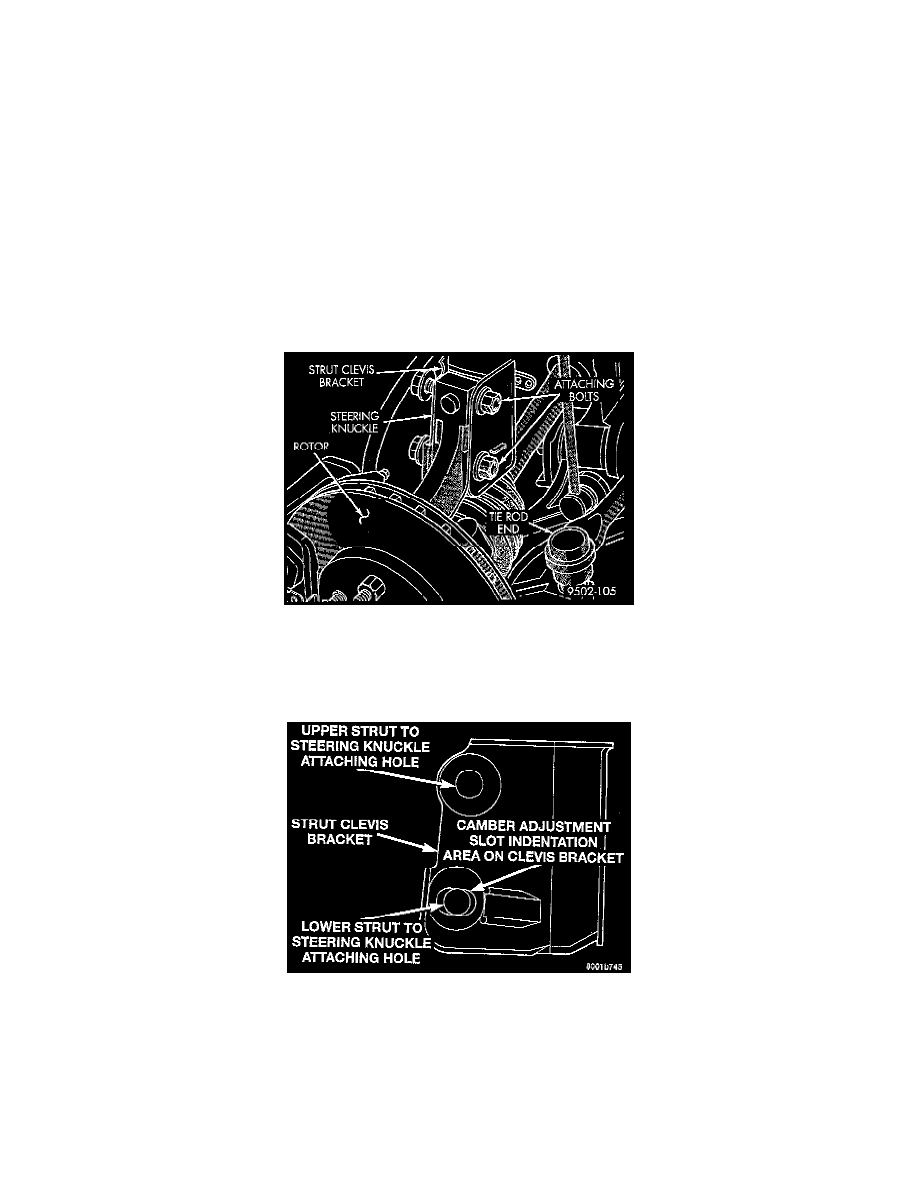
5. Remove the top and bottom, strut clevis bracket to steering knuckle attaching bolts and discard. Separate the steering knuckle from the Strut clevis
bracket and position steering knuckle so it is out of the way of the strut.
CAUTION: When slotting the bottom mounting hole on the strut clevis bracket, do not enlarge the hole beyond the indentations on the sides of
the strut clevis bracket.
6. Using an appropriate grinder and grinding wheel slot the bottom hole in both sides of the strut clevis bracket. When grinding slot do not go beyond
the indentation area on the sides of the clevis bracket.
CAUTION: After slotting the strut clevis bracket hole, do not install the original attaching bolts when assembling the steering knuckle to the strut
assembly. Only the flange bolts, cam bolts, and dog bone washers from the Mopar (R) Clevis Bolt Service Kit, or equivalent can be used to attach
the steering knuckle to the strut after the mounting hole is slotted.