
Voyager L4-2.4L VIN B (2001)
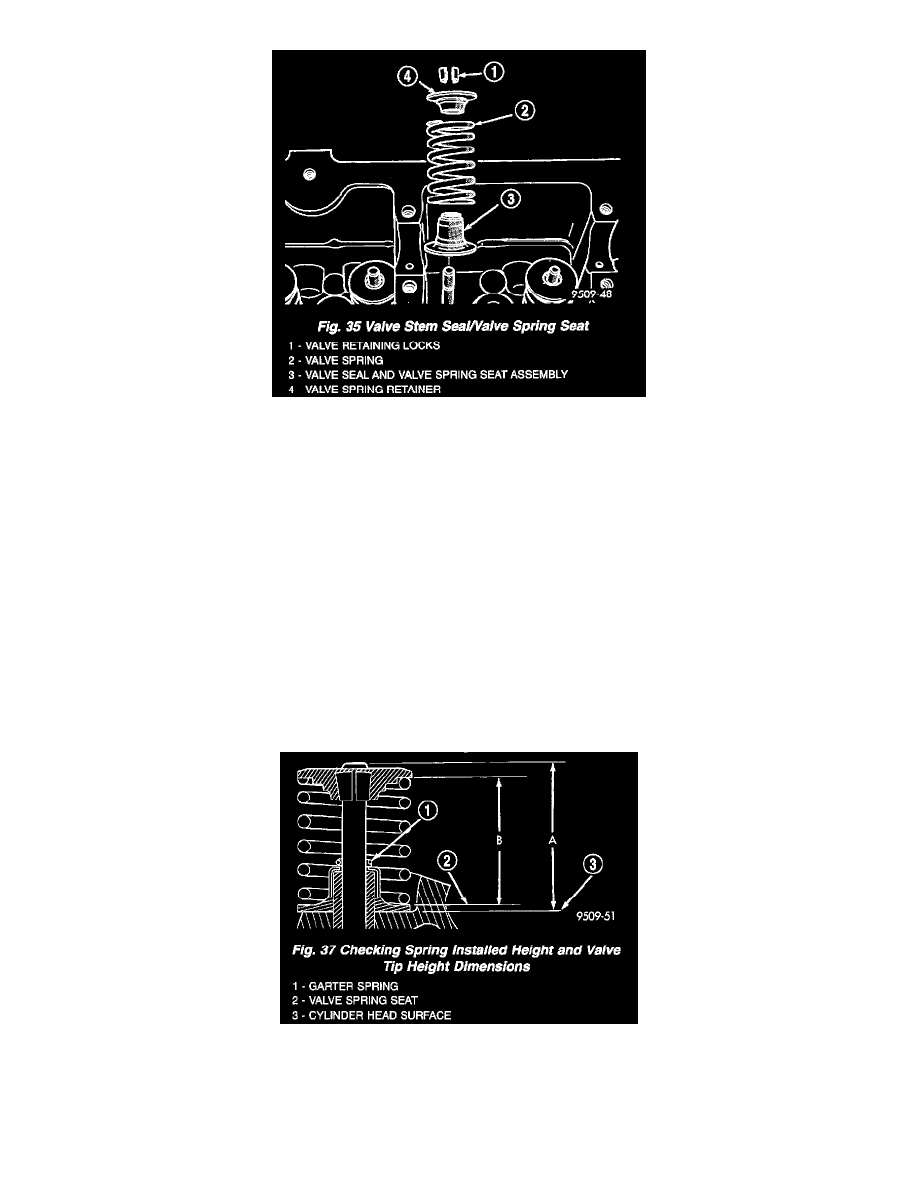
1. Install valve seal/valve spring seat assembly (Fig. 35). Push the assembly down to seat it onto the valve guide.
2. Install valve spring and retainer, use Special Tool MD-998772-A with adapter 6779 to compress valve springs only enough to install locks (Fig.
34). Correct alignment of tool is necessary to avoid nicking valve stems.
3. Remove air hose and install spark plugs.
4. Install camshafts and cylinder head cover
CYLINDER HEAD OFF
1. Coat valve stems with clean engine oil and insert in cylinder head.
2. Install new valve stem seals on all valves using a valve stem seal tool (Fig. 36). The valve stem seals should be pushed firmly and squarely over
valve guide.
CAUTION: When oversize valves are used, the corresponding oversize valve seal must also be used. Excessive guide wear may result if oversize
seals are not used with oversize valves.
3. Install valve springs and retainers. Compress valve springs only enough to install locks, taking care not to misalign the direction of compression.
Nicked valve stems may result from misalignment of the valve spring compressor.
CAUTION: When depressing the valve spring retainers with valve spring compressor the locks can become dislocated. Ensure both locks are in
the correct location after removing tool.
4. Check the valve spring installed height B after refacing the valve and seat (Fig. 37). Make sure measurements are taken from top of spring seat to
the bottom surface of spring retainer. If height is greater than 38.75 mm (1.525 inch), install a 0.762 mm (0.030 inch) spacer under the valve
spring seat to bring spring height back within specification.