
Voyager L4-2.4L VIN B (2001)
Evaporator Core: Service and Repair
Rear Evaporator
REMOVAL
Rear Evaporator
WARNING: REFER TO THE APPLICABLE WARNINGS AND CAUTIONS FOR THIS SYSTEM BEFORE PERFORMING THE
FOLLOWING OPERATION.
1. Remove the rear heater-A/C unit housing from the vehicle. Refer to: "Housing Assembly HVAC : Service and Repair" See: Housing Assembly
HVAC/Service and Repair
2. Remove the rear evaporator line extension from the expansion valve.
3. Remove the rear expansion valve from the rear evaporator. Refer to: "Expansion Valve : Service and Repair" See: Expansion Valve/Service
and Repair
4. Remove the rubber grommet that seals the evaporator inlet and outlet tubes to the rear heater-A/C housing near the expansion valve.
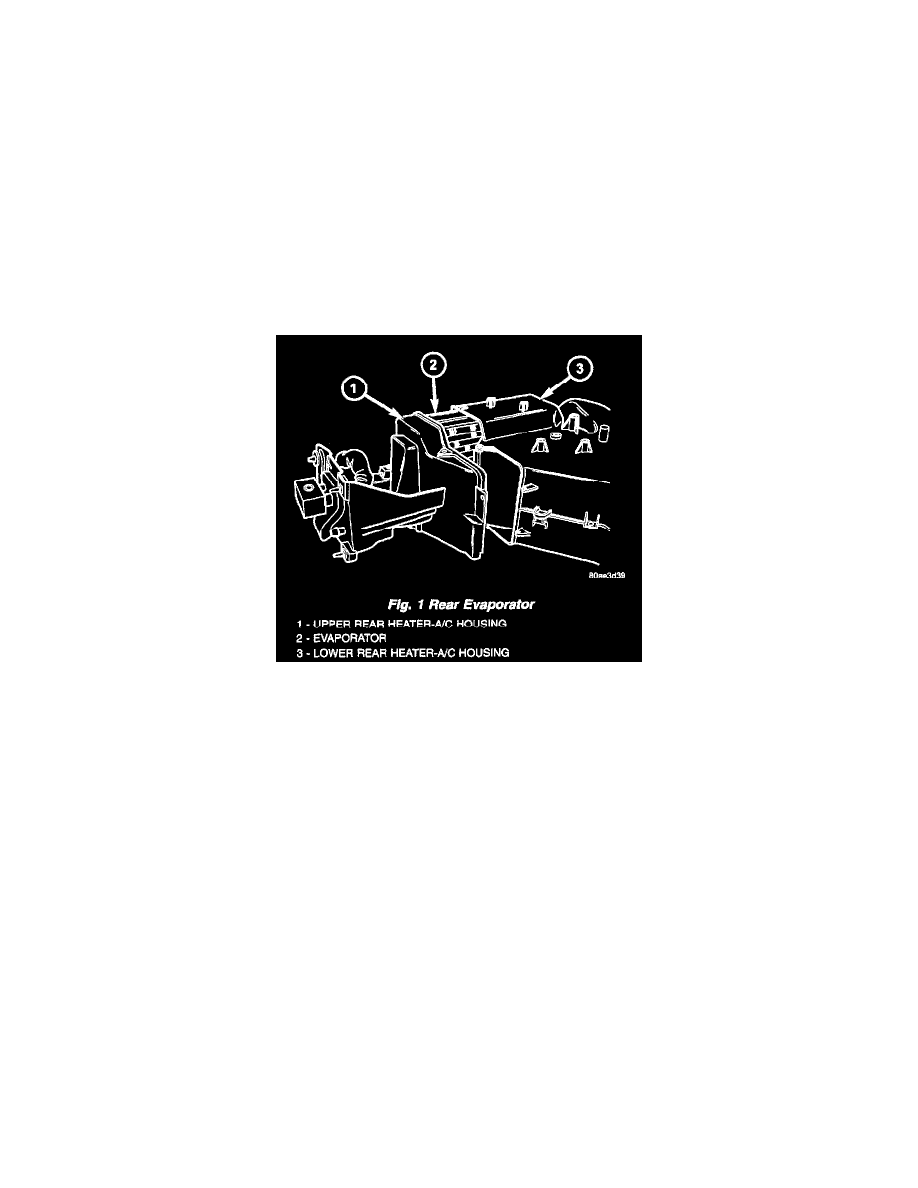
Fig.1 Rear Evaporator
5. Remove the three screws that secure the upper half of the rear heater-A/C housing to the lower half.
6. Remove the three small metal spring clips that secure the upper half of the rear heater-A/C housing to the lower half.
7. Carefully separate and remove the upper half of the rear heater-A/C housing from the lower half.
8. Remove the evaporator from the lower half of the rear heater-A/C housing.
Rear Evaporator Line Extension
WARNING: REFER TO THE APPLICABLE WARNINGS AND CAUTIONS FOR THIS SYSTEM BEFORE PERFORMING THE
FOLLOWING OPERATION.
1. Remove the rear heater-A/C unit housing from the vehicle. Refer to: "Housing Assembly HVAC : Service and Repair" See: Housing Assembly
HVAC/Service and Repair