
Voyager L4-2.4L VIN B (2001)
Control Arm Bushing: Service and Repair
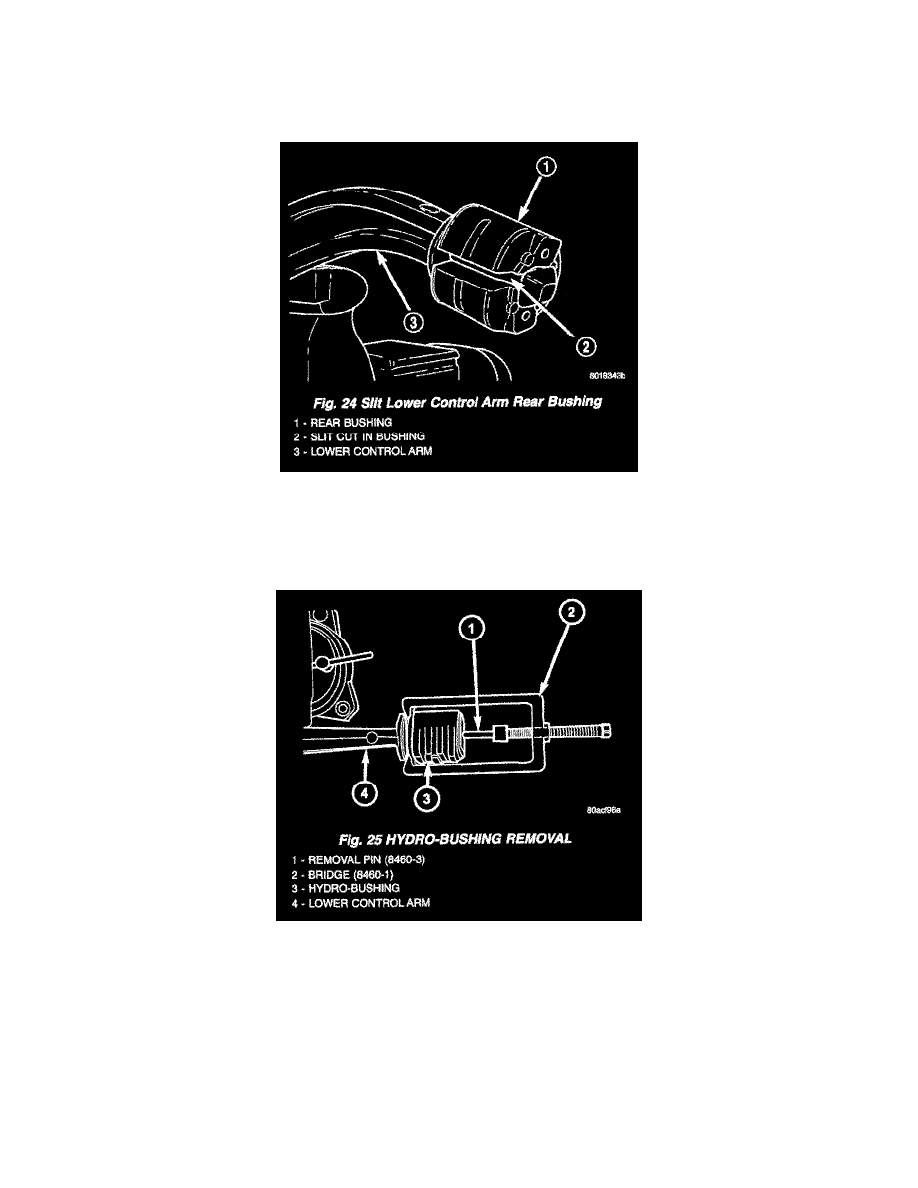
DISASSEMBLY-LOWER CONTROL ARM (REAR BUSHING-STANDARD)
1. Remove the lower control arm from the front suspension cradle.
2. Mount the lower control arm in a vise without using excessive clamping force. type rear bushings are serviceable. If the front bushing fails, the
lower control arm must be replaced.
3. Using a sharp knife (such as a razor), split the bushing lengthwise to allow its removal from the lower control arm,
4. Remove the bushing from the lower control arm.
DISASSEMBLY-LOWER CONTROL ARM (REAR BUSHING-HYDRO)
1. Remove the lower control arm from the front suspension cradle.
2. Mount the lower control arm in a vise without using excessive clamping force.
3. Install remover, Special Tool 8460, on hydro-bushing as shown. Removal Pin, Special Tool 8460-3, must extend through hole in center of
bushing rear.
4. Tighten forcing screw of Bridge (Special Tool 8460-1) removing bushing from the lower control arm.
ASSEMBLY-LOWER CONTROL ARM (REAR BUSHING-STANDARD)
CAUTION: Do not apply grease or any other type of lubricant other than the silicone lubricant specified below to the control arm bushing.
1. Apply Mopar Silicone Spray Lube or an equivalent, to the hole in lower control arm rear bushing. This will aid in the installation of the bushing on
the lower control arm.