Voyager V6-3.0L VIN 3 (2000)

Front Door Latch: Service and Repair
LATCH
REMOVAL
1. Roll door glass up.
2. Remove front door trim panel.
3. Remove watershield as necessary to gain access to the outside door handle.
4. Through access hole at rear of inner door panel, disconnect wire connector from power door lock motor, if equipped.
5. Disengage clips holding linkage to door latch.
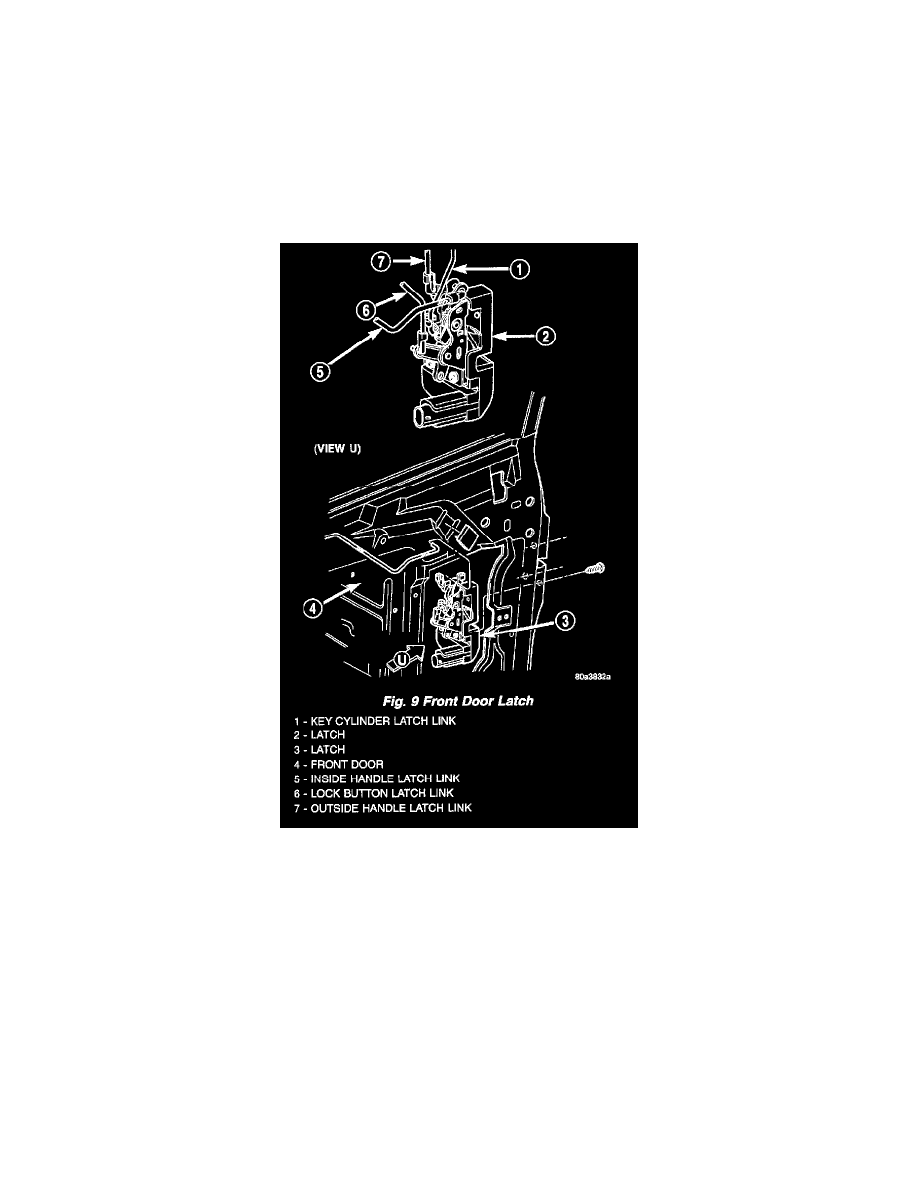
6. Remove linkages from door latch.
Fig. 9
7. Remove screws attaching door latch to door end frame (Fig. 9).
8. Remove door latch from door.
INSTALLATI0N
NOTE: The screws attaching the door latch to the door end frame have nylon patches on the threads. All screws must be replaced when the latch has
been removed.
1. Place door latch in position on door end frame.
2. Install screws attaching door latch to door end frame. Tighten screws to 10 N.m (90 in.lbs.) torque.
3. Insert linkage into door latch.
4. Engage clips attaching linkage to door latch.
5. Connect wire connector into power door lock motor, if equipped.
6. Insert a hex wrench through the elongated hole located in the door shut face above the latch.
7. Loosen allen head screw.
8. Pull outward on the outside door handle and release.
