
Voyager V6-3.0L VIN 3 (2000)
Lower Sliding Door Roller: Service and Repair
Lower Roller Arm
LOWER ROLLER ARM
REMOVAL
1. Open sliding door.
2. Mark outline of roller arm on sliding door bracket to aid installation.
3. Remove sliding door sill plate. Refer to Trim Panel.
4. Remove screws attaching open latch to lower roller arm.
5. Remove open latch from lower arm.
6. Support sliding door on a suitable lifting device with a padded upper surface. The door must be moveable with lifting device in place.
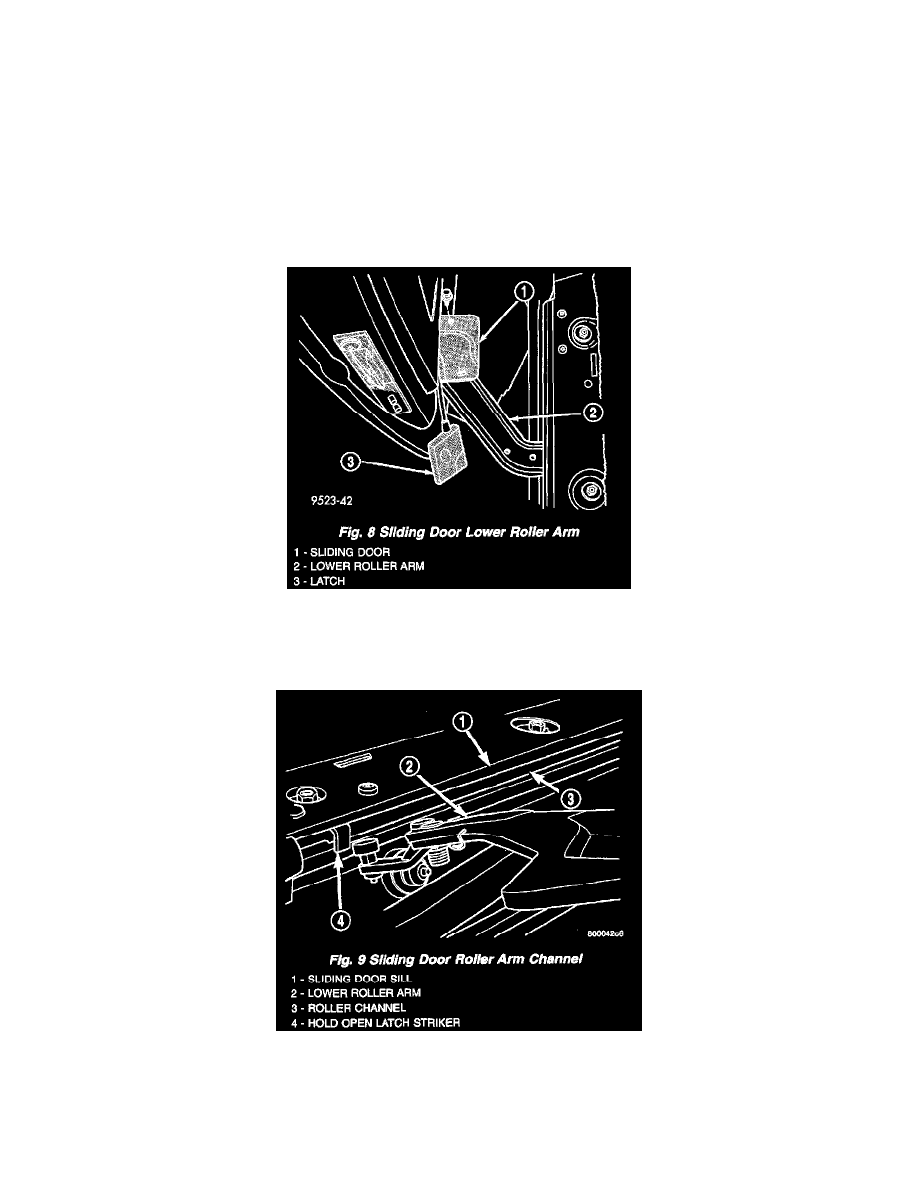
Fig. 8
7. Remove bolts attaching lower roller arm to sliding door (Fig. 8).
8. Remove roller arm from sliding door.
Fig. 9
9. Disengage roller arm from lower channel (Fig. 9).
10. Remove roller arm from vehicle.
INSTALLATION