
Voyager V6-3.0L VIN 3 (2000)
Brake Shoe: Service and Repair
Removal and Installation
NOTE: Before proceeding with this procedure, review the Service Warnings and Cautions found in Brakes, Service Precautions.
REMOVAL
1. Raise vehicle. Refer to Hoisting in Maintenance.
2. Remove the rear wheel and tire assemblies from the vehicle.
3. Remove rear brake drum to hub retaining clips (if equipped), then remove rear brake drums.
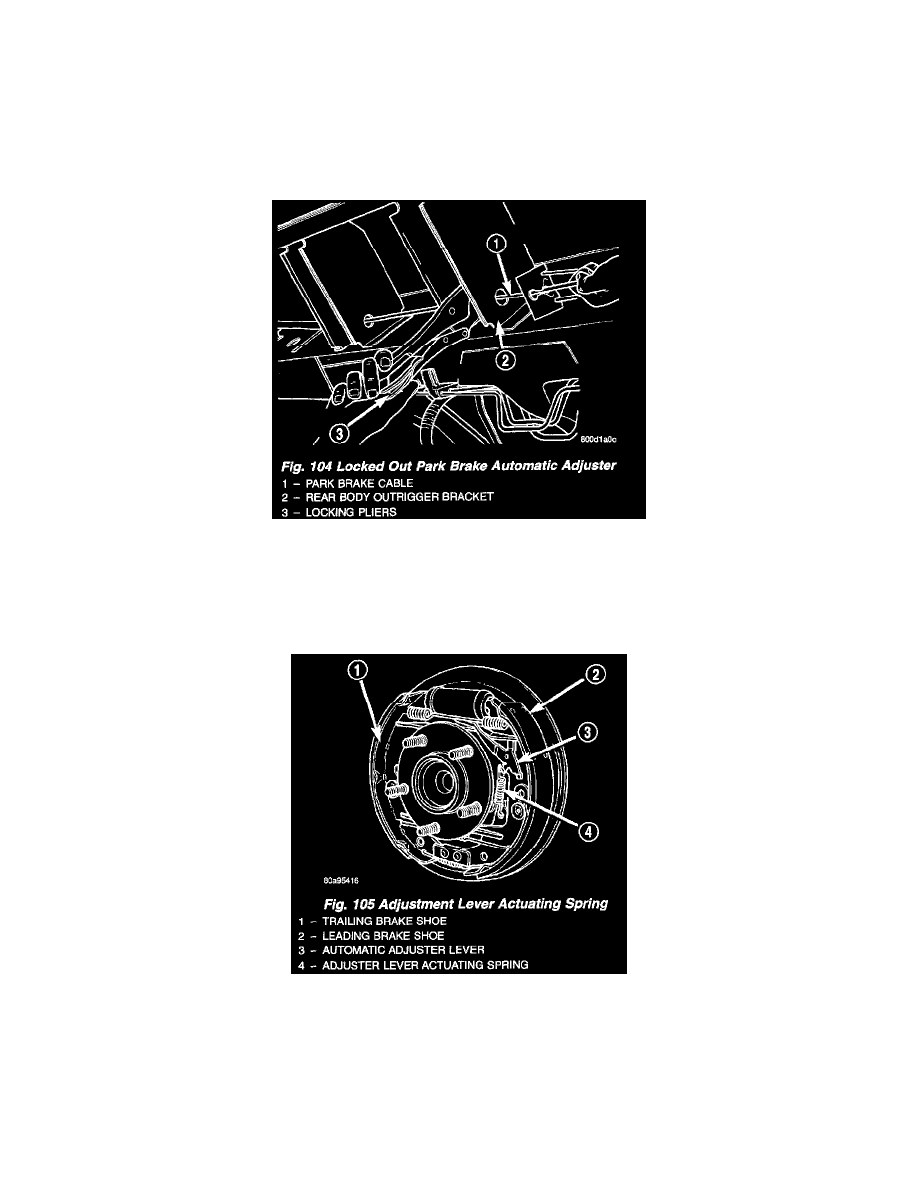
NOTE: When creating slack in the park brake cables by locking out the automatic adjuster, be sure that the park brake pedal is in the released
(most upward) position.
4. Create slack in the rear park brake cables. Slack is created by grabbing exposed section of front park brake cable and pulling it down and
rearward. Slack is maintained in the park brake cable by installing a pair of locking pliers on the park brake cable just rearward of only the rear
body outrigger bracket.
5. Remove adjustment lever spring from adjustment lever and front brake shoe.