Voyager V6-3.0L VIN 3 (2000)

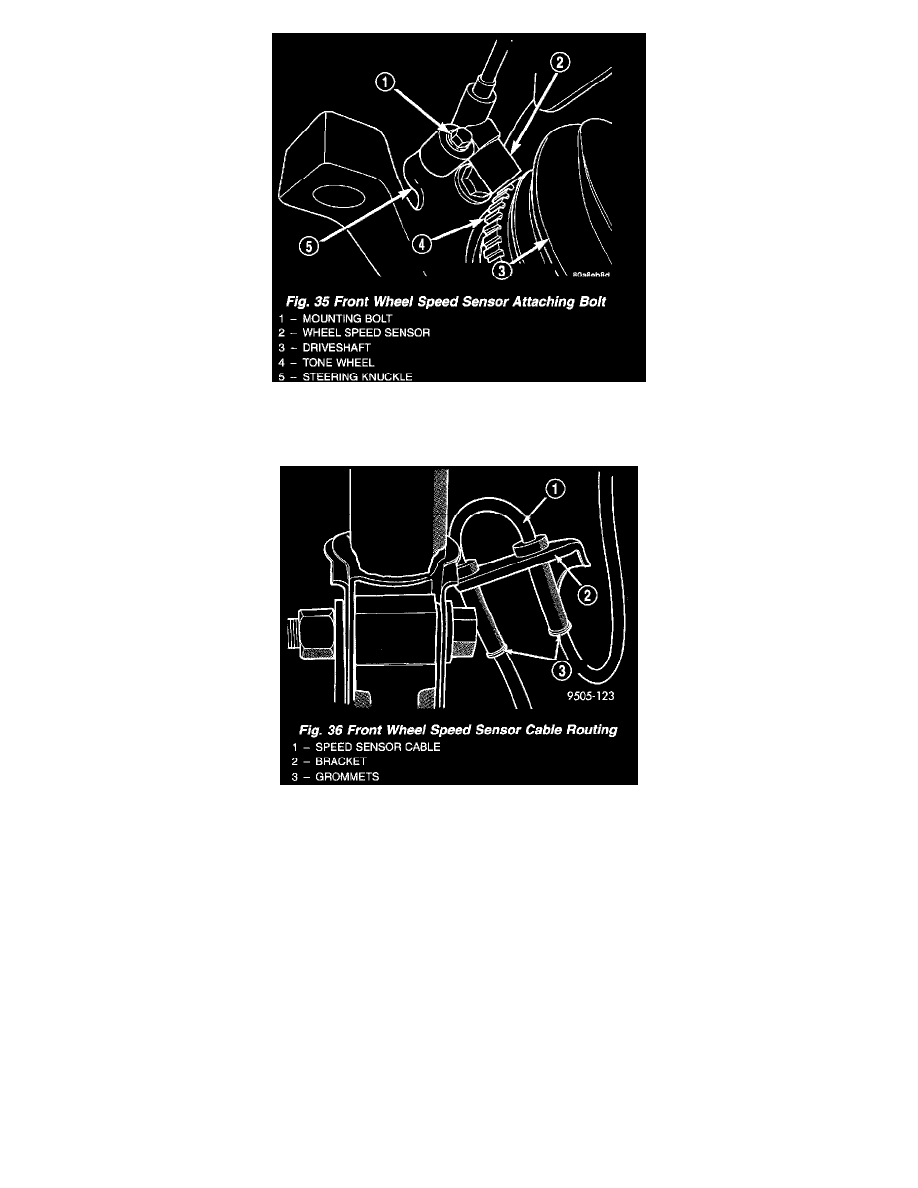
5. Remove the wheel speed sensor head to steering knuckle attaching bolt.
6. Remove sensor head from steering knuckle. If the sensor has seized, due to corrosion, DO NOT USE PLIERS ON SENSOR HEAD. Use a
hammer and a punch and tap edge of sensor ear, rocking the sensor side to side until free.
7. Remove the wheel speed sensor cable grommets from the retaining bracket.
8. Remove front wheel speed sensor assembly from the vehicle.
INSTALL
CAUTION: Proper installation of wheel speed sensor cables is critical to continued system operation. Be sure that cables are installed in retainers.
Failure to install cables in retainers as shown may result in contact with moving parts and/or over extension of cables, resulting in an open circuit.
1. Connect the front wheel speed sensor cable to the vehicle wiring harness connector. Be sure speed sensor cable connector is fully seated and
locked into vehicle wiring harness connector, then insert cable and grommet into hole in strut tower.
CAUTION: When installing channel bracket, do not pinch the speed sensor cable under the channel bracket.
2. Install the channel bracket and grommet retainer on the frame rail.
3. Install the 2 bolts attaching the channel bracket to frame. Tighten the 2 attaching bolts to a torque of 11 Nm (95 inch lbs.).
4. Insert speed sensor cable grommets into intermediate bracket on strut. Route cable from strut to steering knuckle on the rearward side of the
stabilizer bar link.
5. Install the wheel speed sensor to steering knuckle attaching bolt. Tighten the speed sensor attaching bolt to a torque of 12 Nm (105 inch lbs.)
6. Check the air gap between the face of the wheel speed sensor and the top surface of the tone wheel. Air gap must be less then the maximum
allowable tolerance of 1.2 mm (0.047 inch).
